To re-enroll a device that has been removed from Nureva Console cloud, follow the steps below. In order to have conferencing cameras enrolled, a Nureva audio conferencing system must be enrolled first.
For information about removing a device from Nureva Console cloud, see this article.
Nureva audio conferencing systems
NOTE: The images shown in this article below depict an HDL300 system. These steps apply to all Nureva audio conferencing systems.
Generate an enrollment code
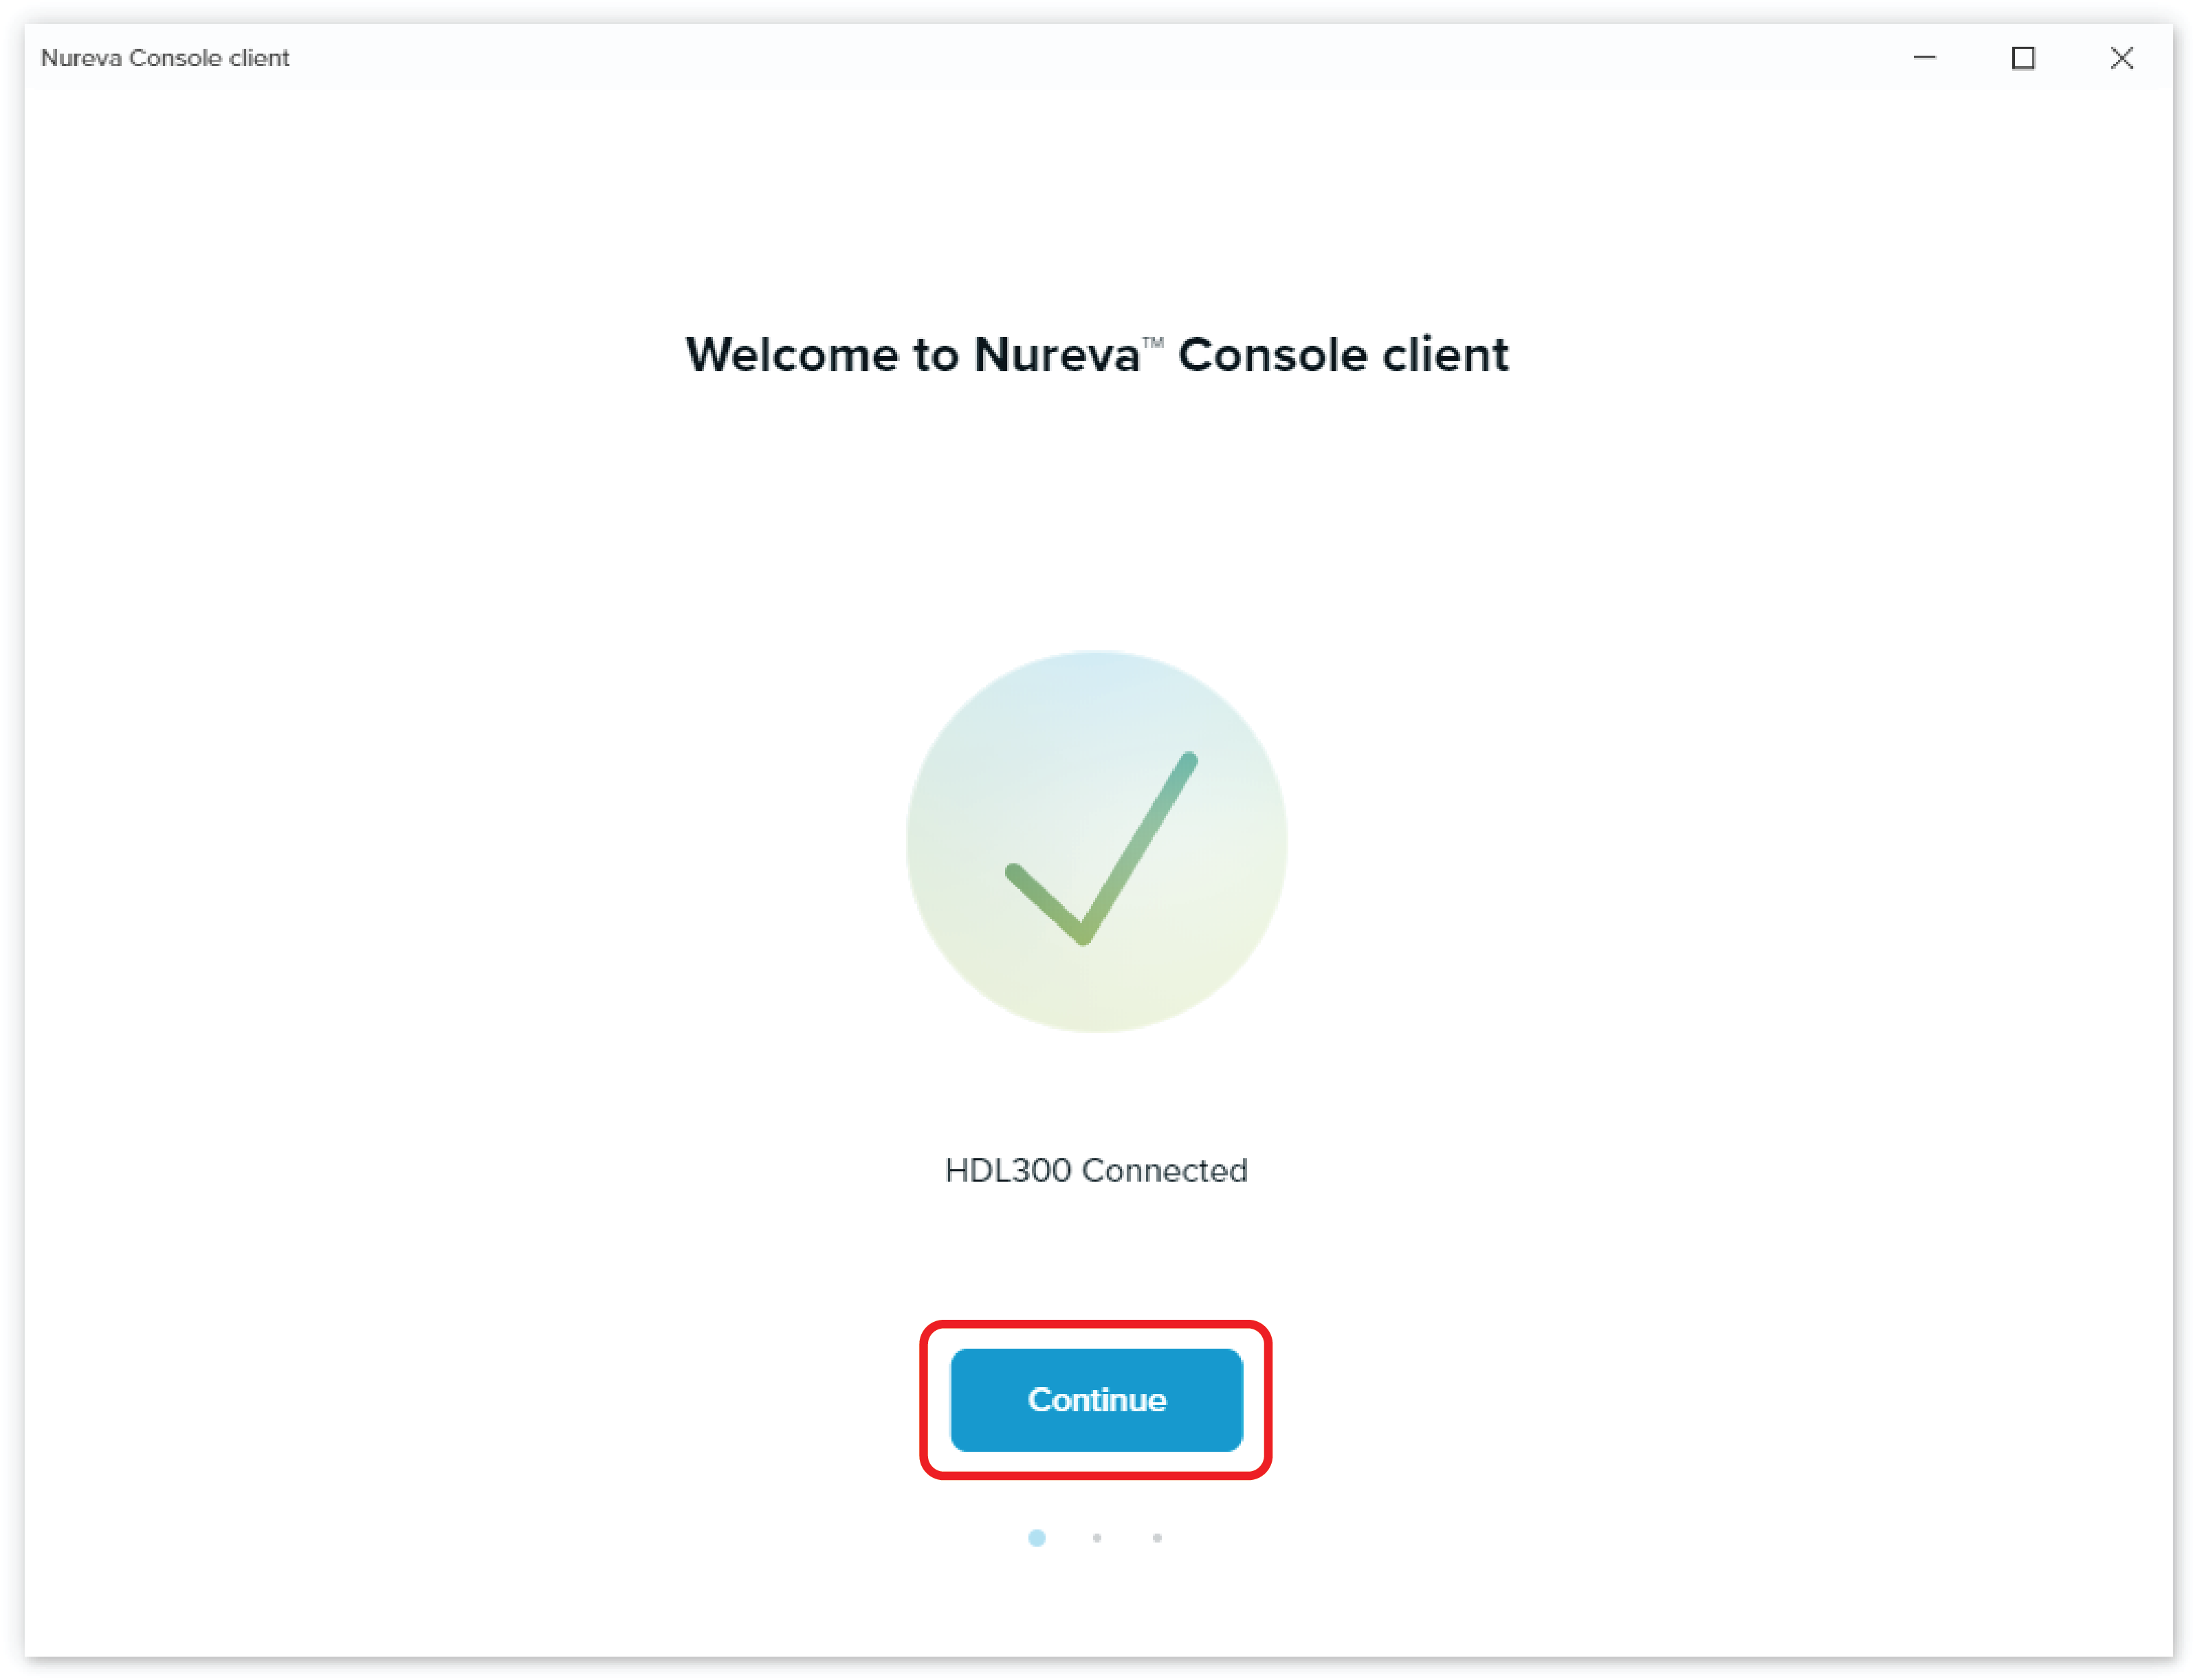
- Launch Nureva Console client
- Ensure that the Nureva audio device is connected properly and select Continue to start the setup
- Complete the instructions in Nureva Console client for setting up the device in the Windows sound settings
- Once the sound settings have been set for the audio device, click Next to advance
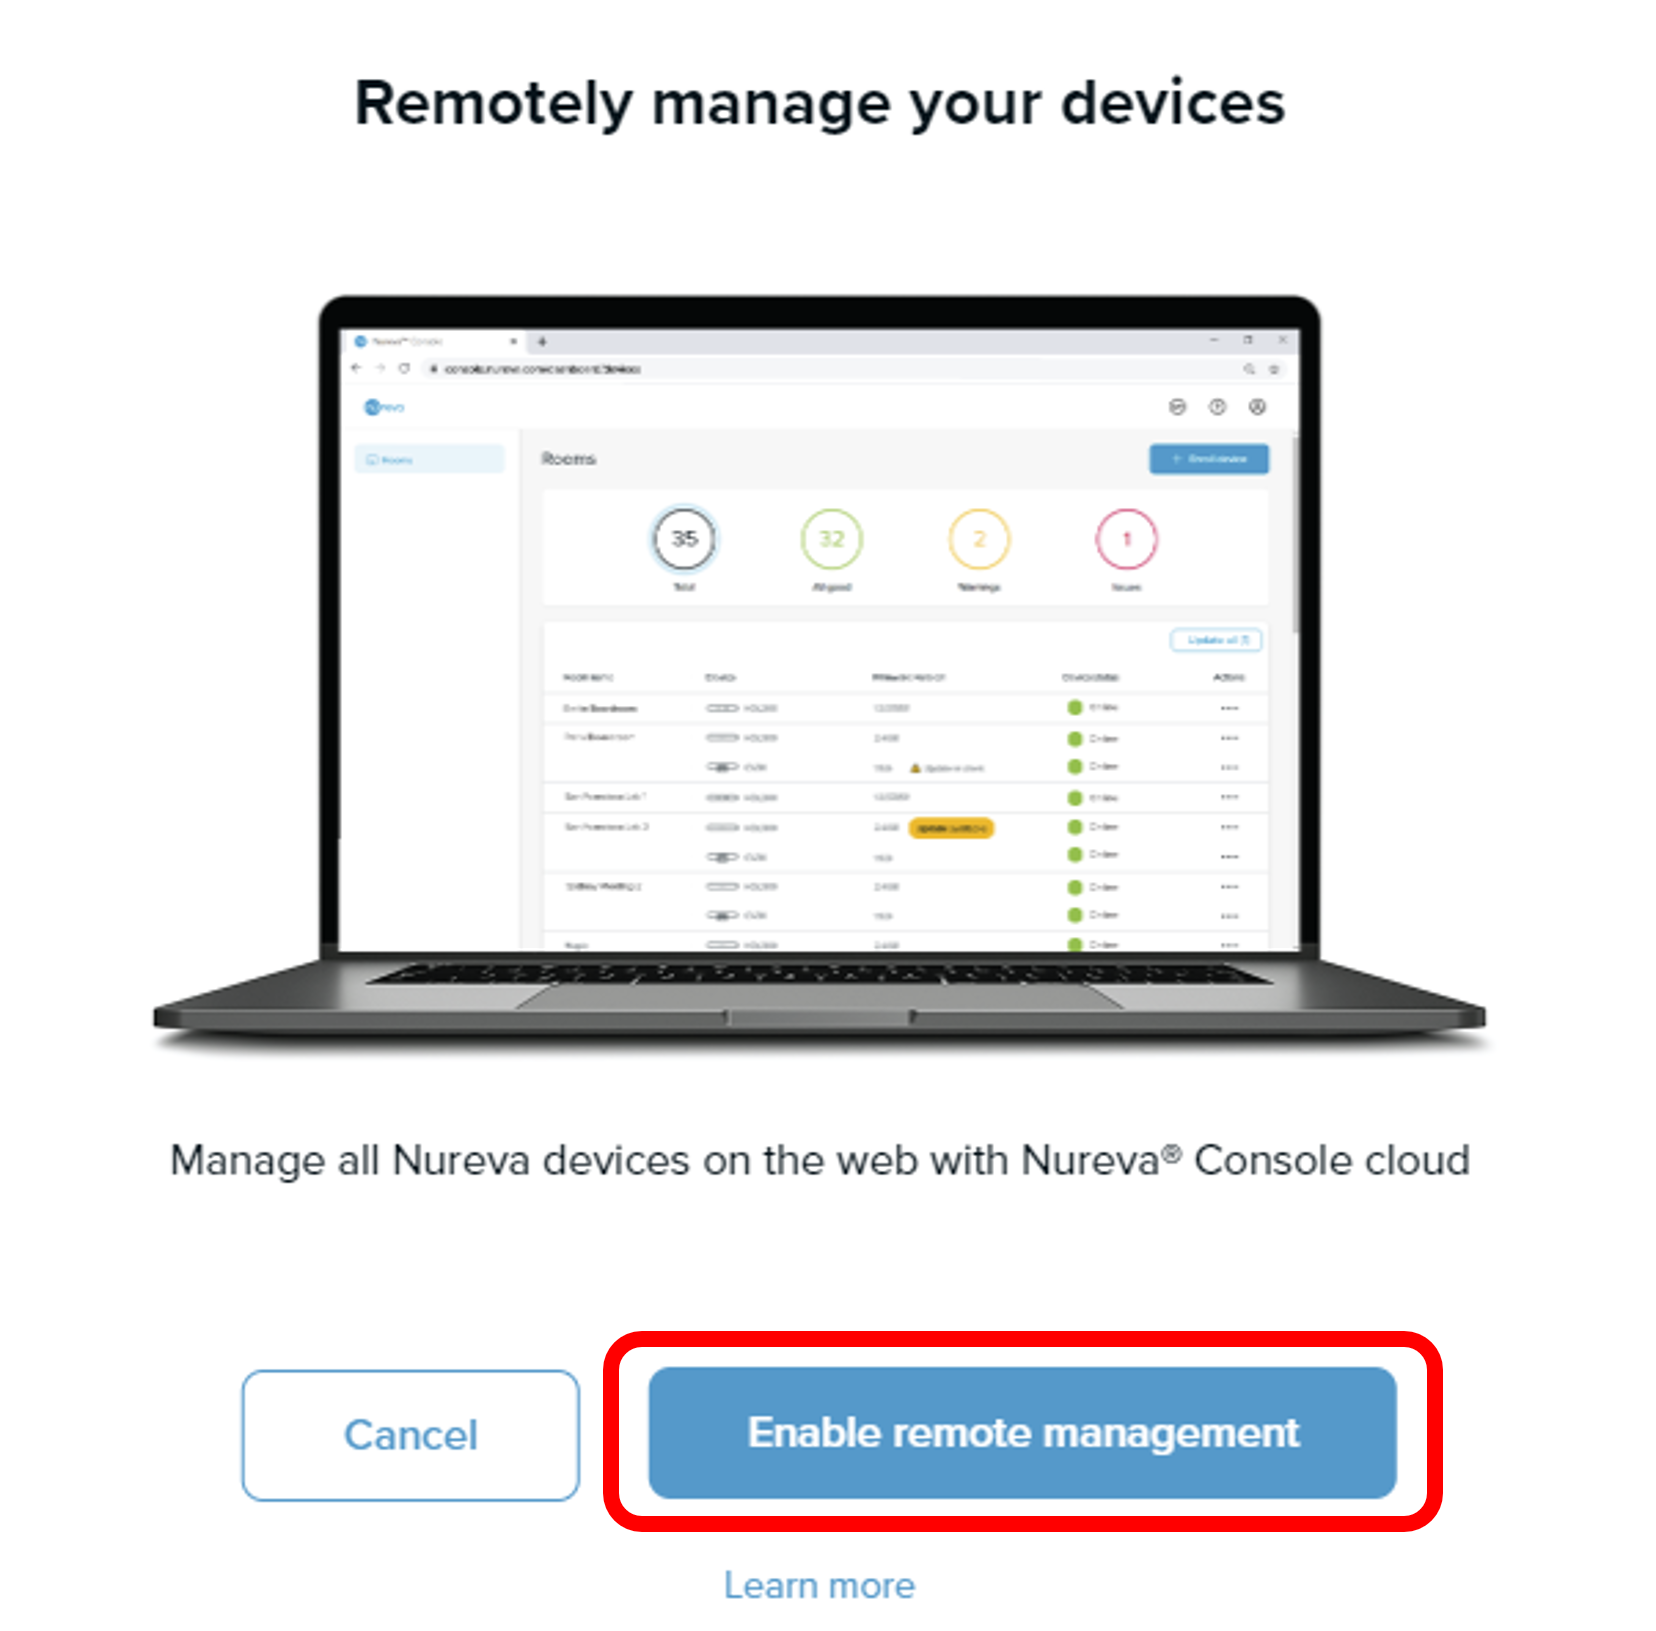
- To begin enrolling the device into Nureva Console cloud, select Enable remote management
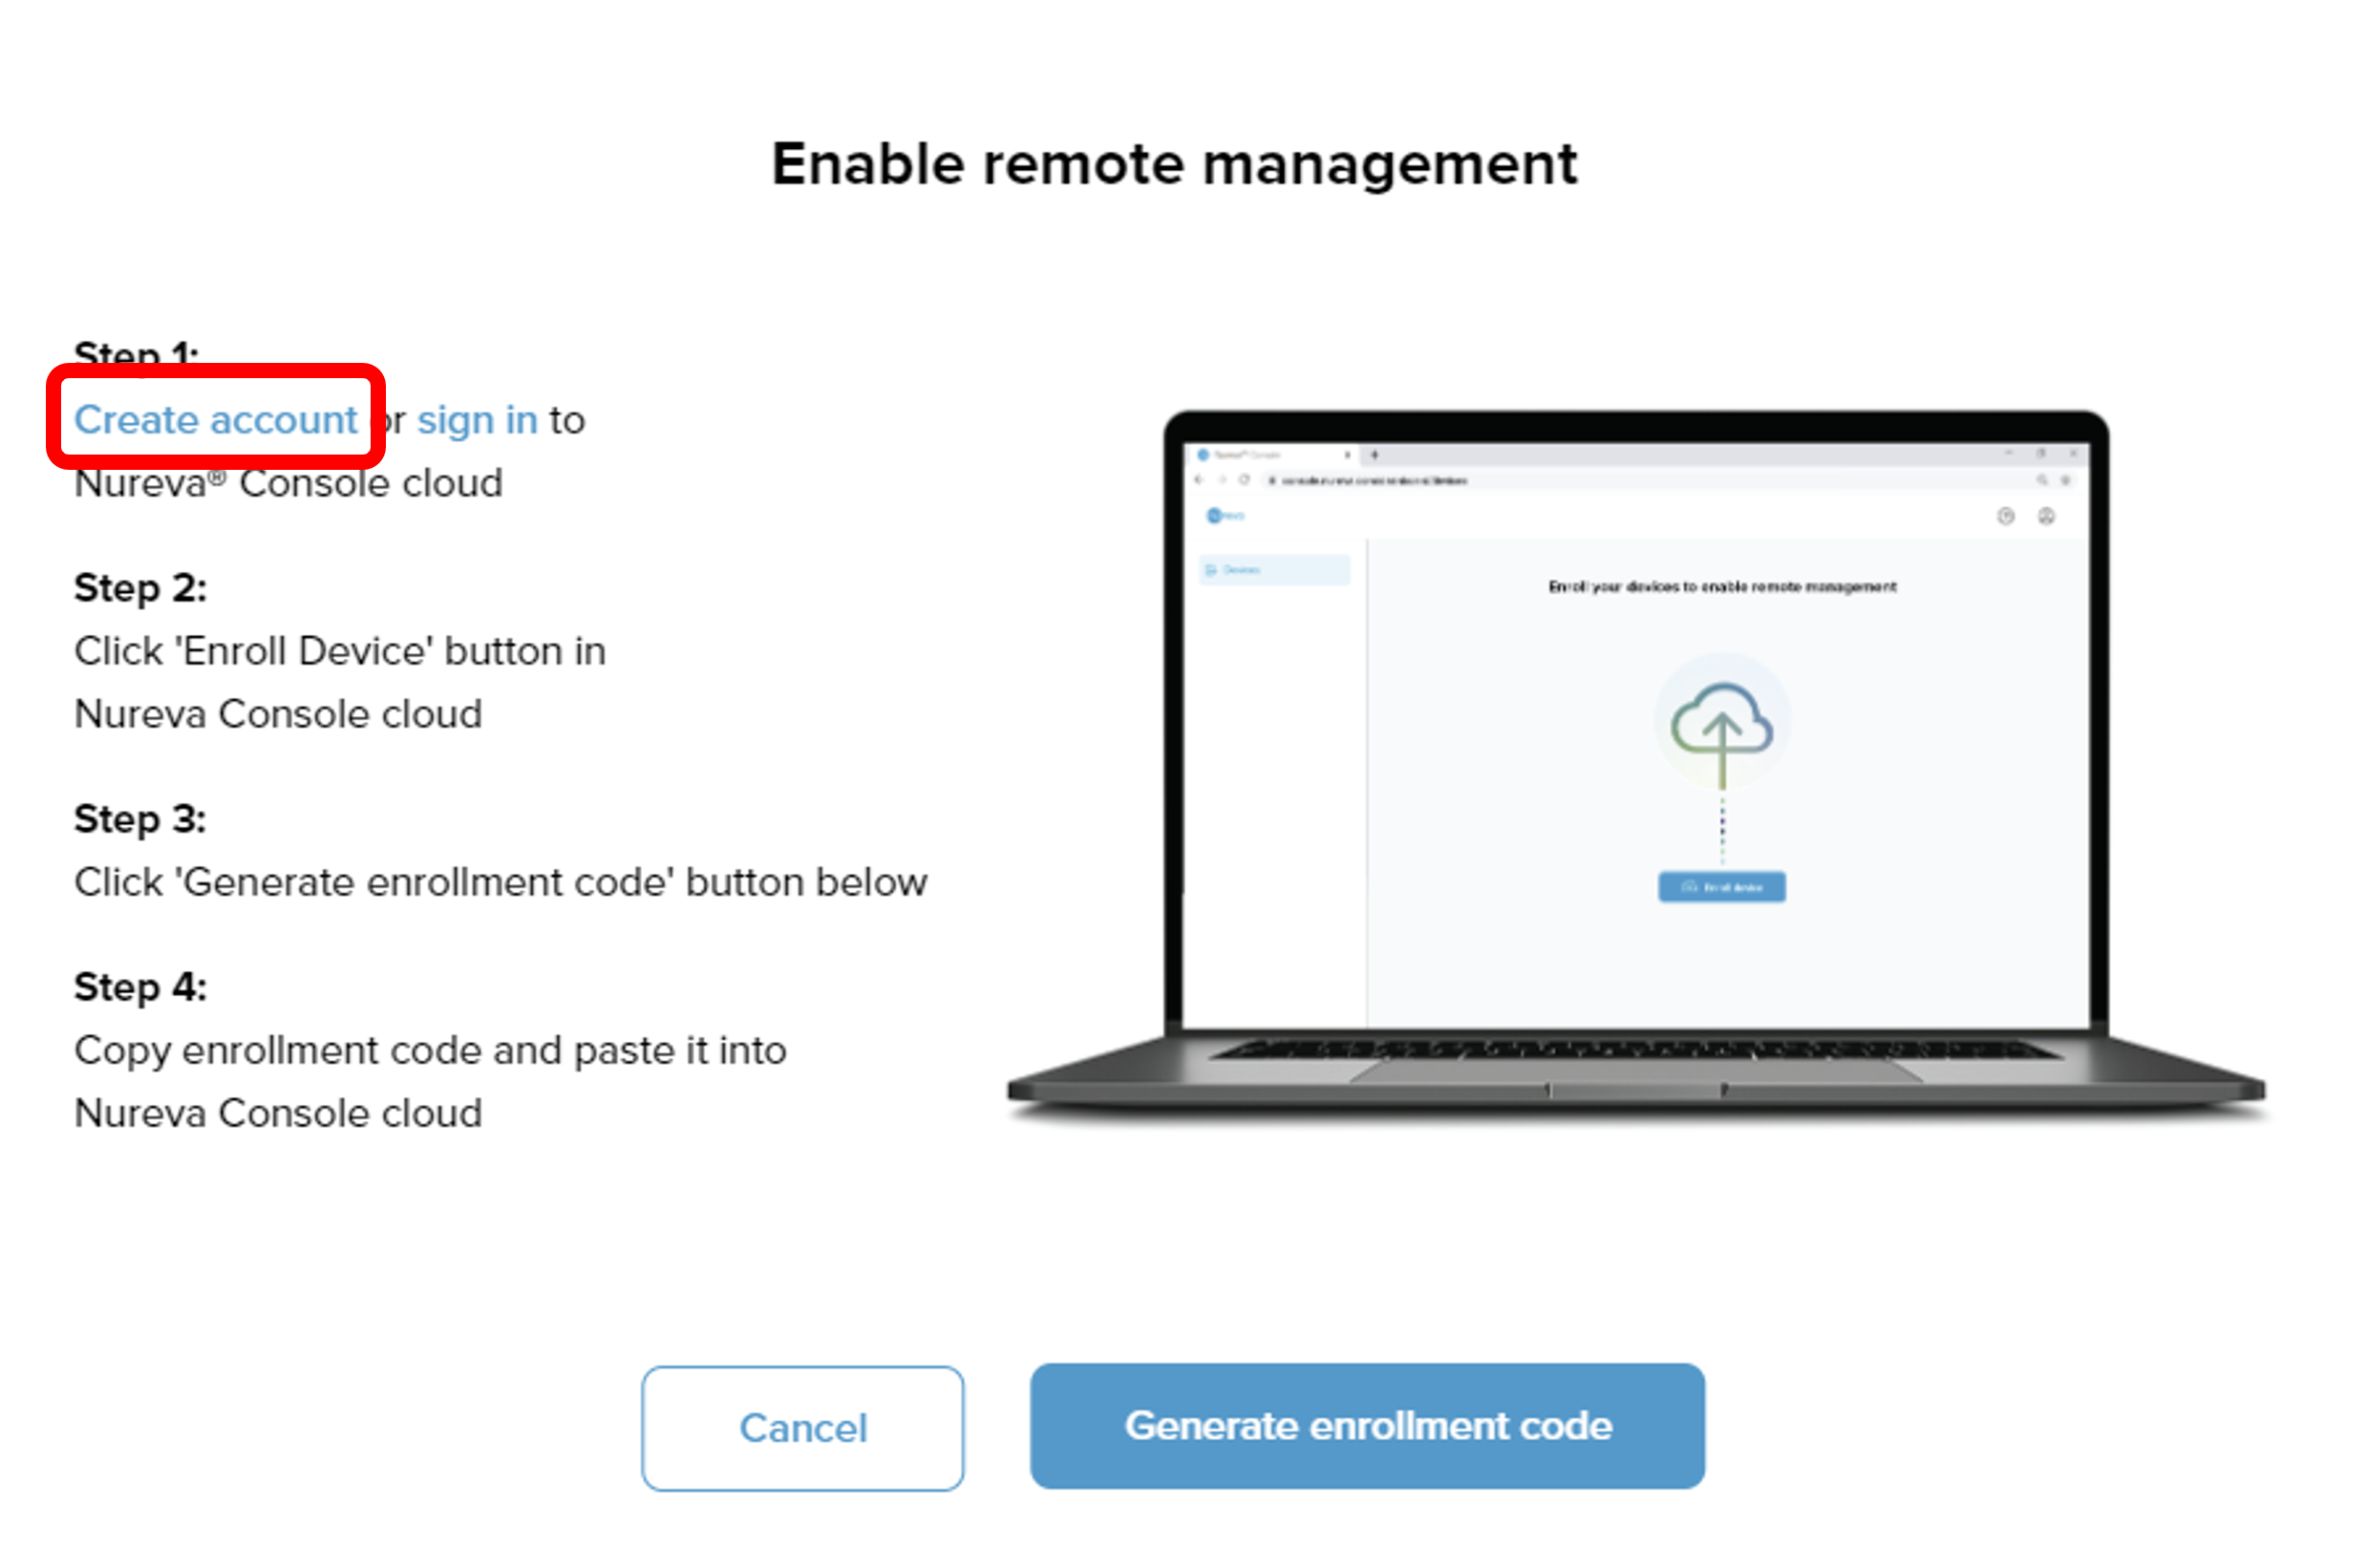
Step 1: Select Create account and complete the steps for account creation in Nureva Console cloud using your internet browser
- Complete all of the fields and set-up steps
- Click on Create account
- Check your email
- A verification email will be sent to the email address
- If the email is not in your inbox, please look in the junk or spam filter
- Click on Verify in the email body
- You will be directed to the sign-in page, where you can now sign in
- The first time you sign in to your account you will be prompted to create an Organization
NOTE: Please DO NOT close Nureva Console client as it is needed to complete the enrollment. If you have enhanced internet security, please approve the URLs from this list.
Step 2: Choose Enroll device in Nureva Console cloud from your browser
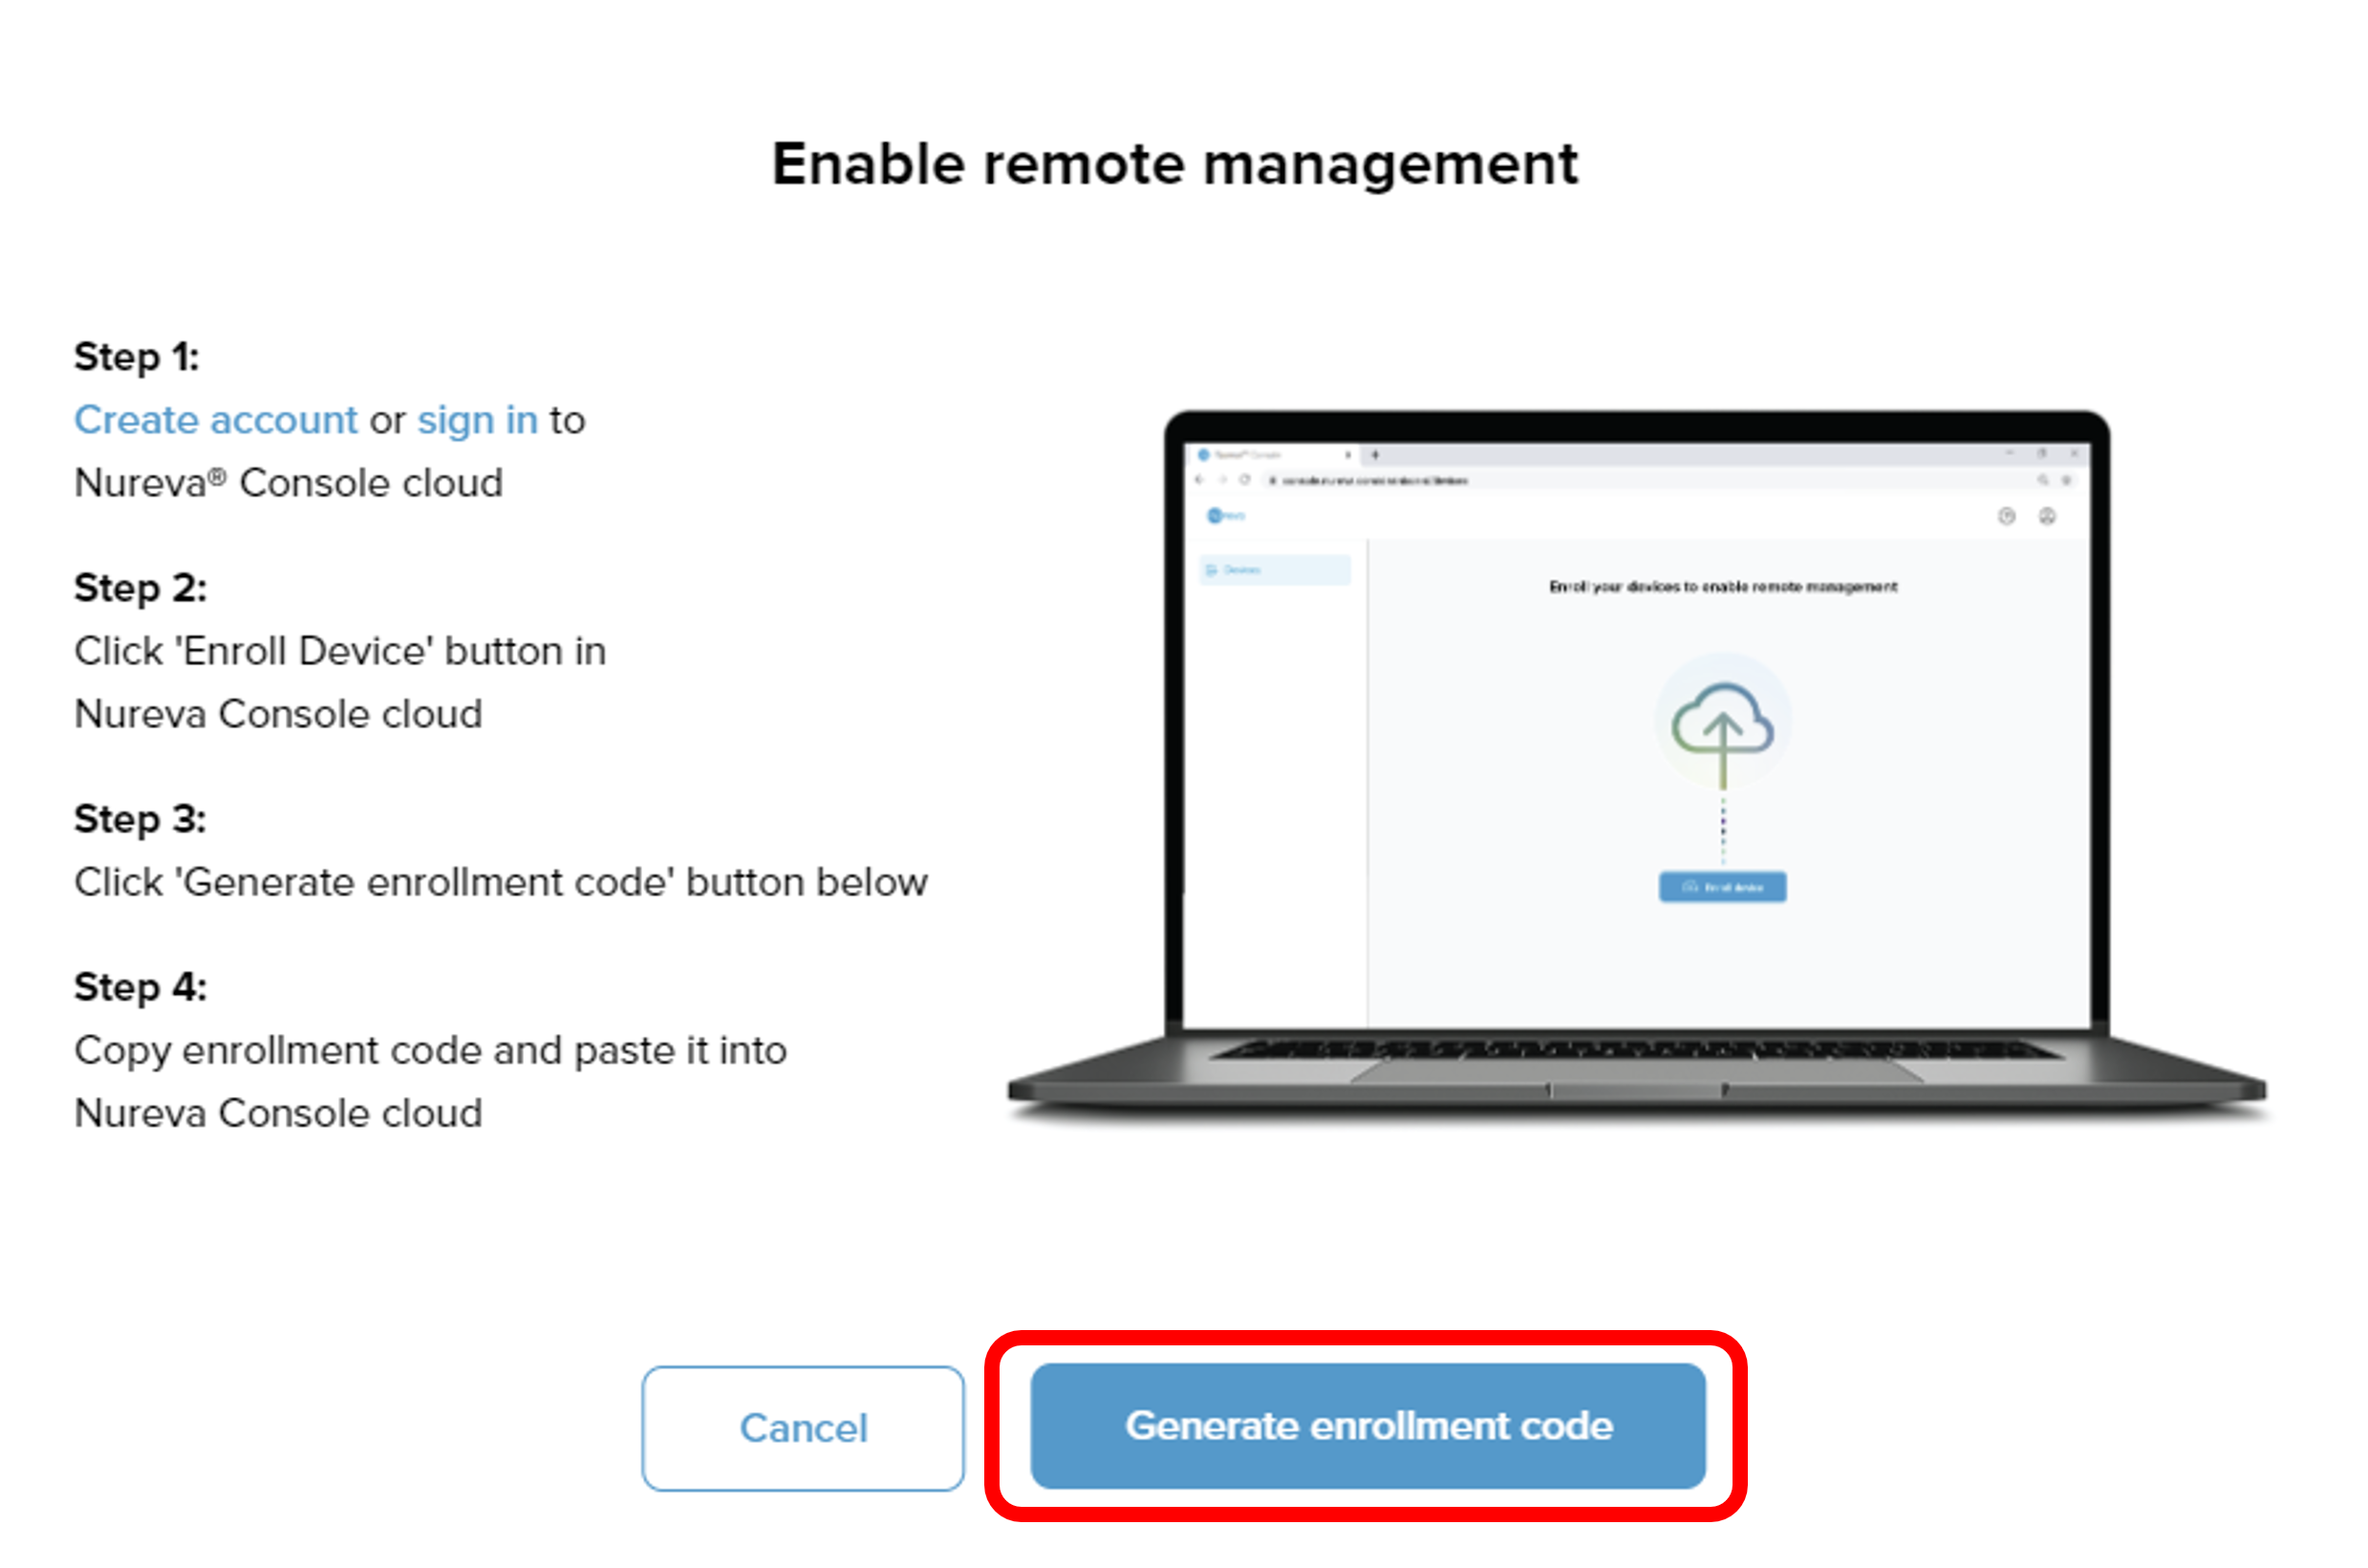
Step 3: Choose Generate enrollment code in Nureva Console client
NOTE: If the client window has been closed, relaunch it following the setup, then click Generate enrollment code.
- Step 4: Select Copy then paste the enrollment code into the Enter code box in Nureva Console cloud and click Next
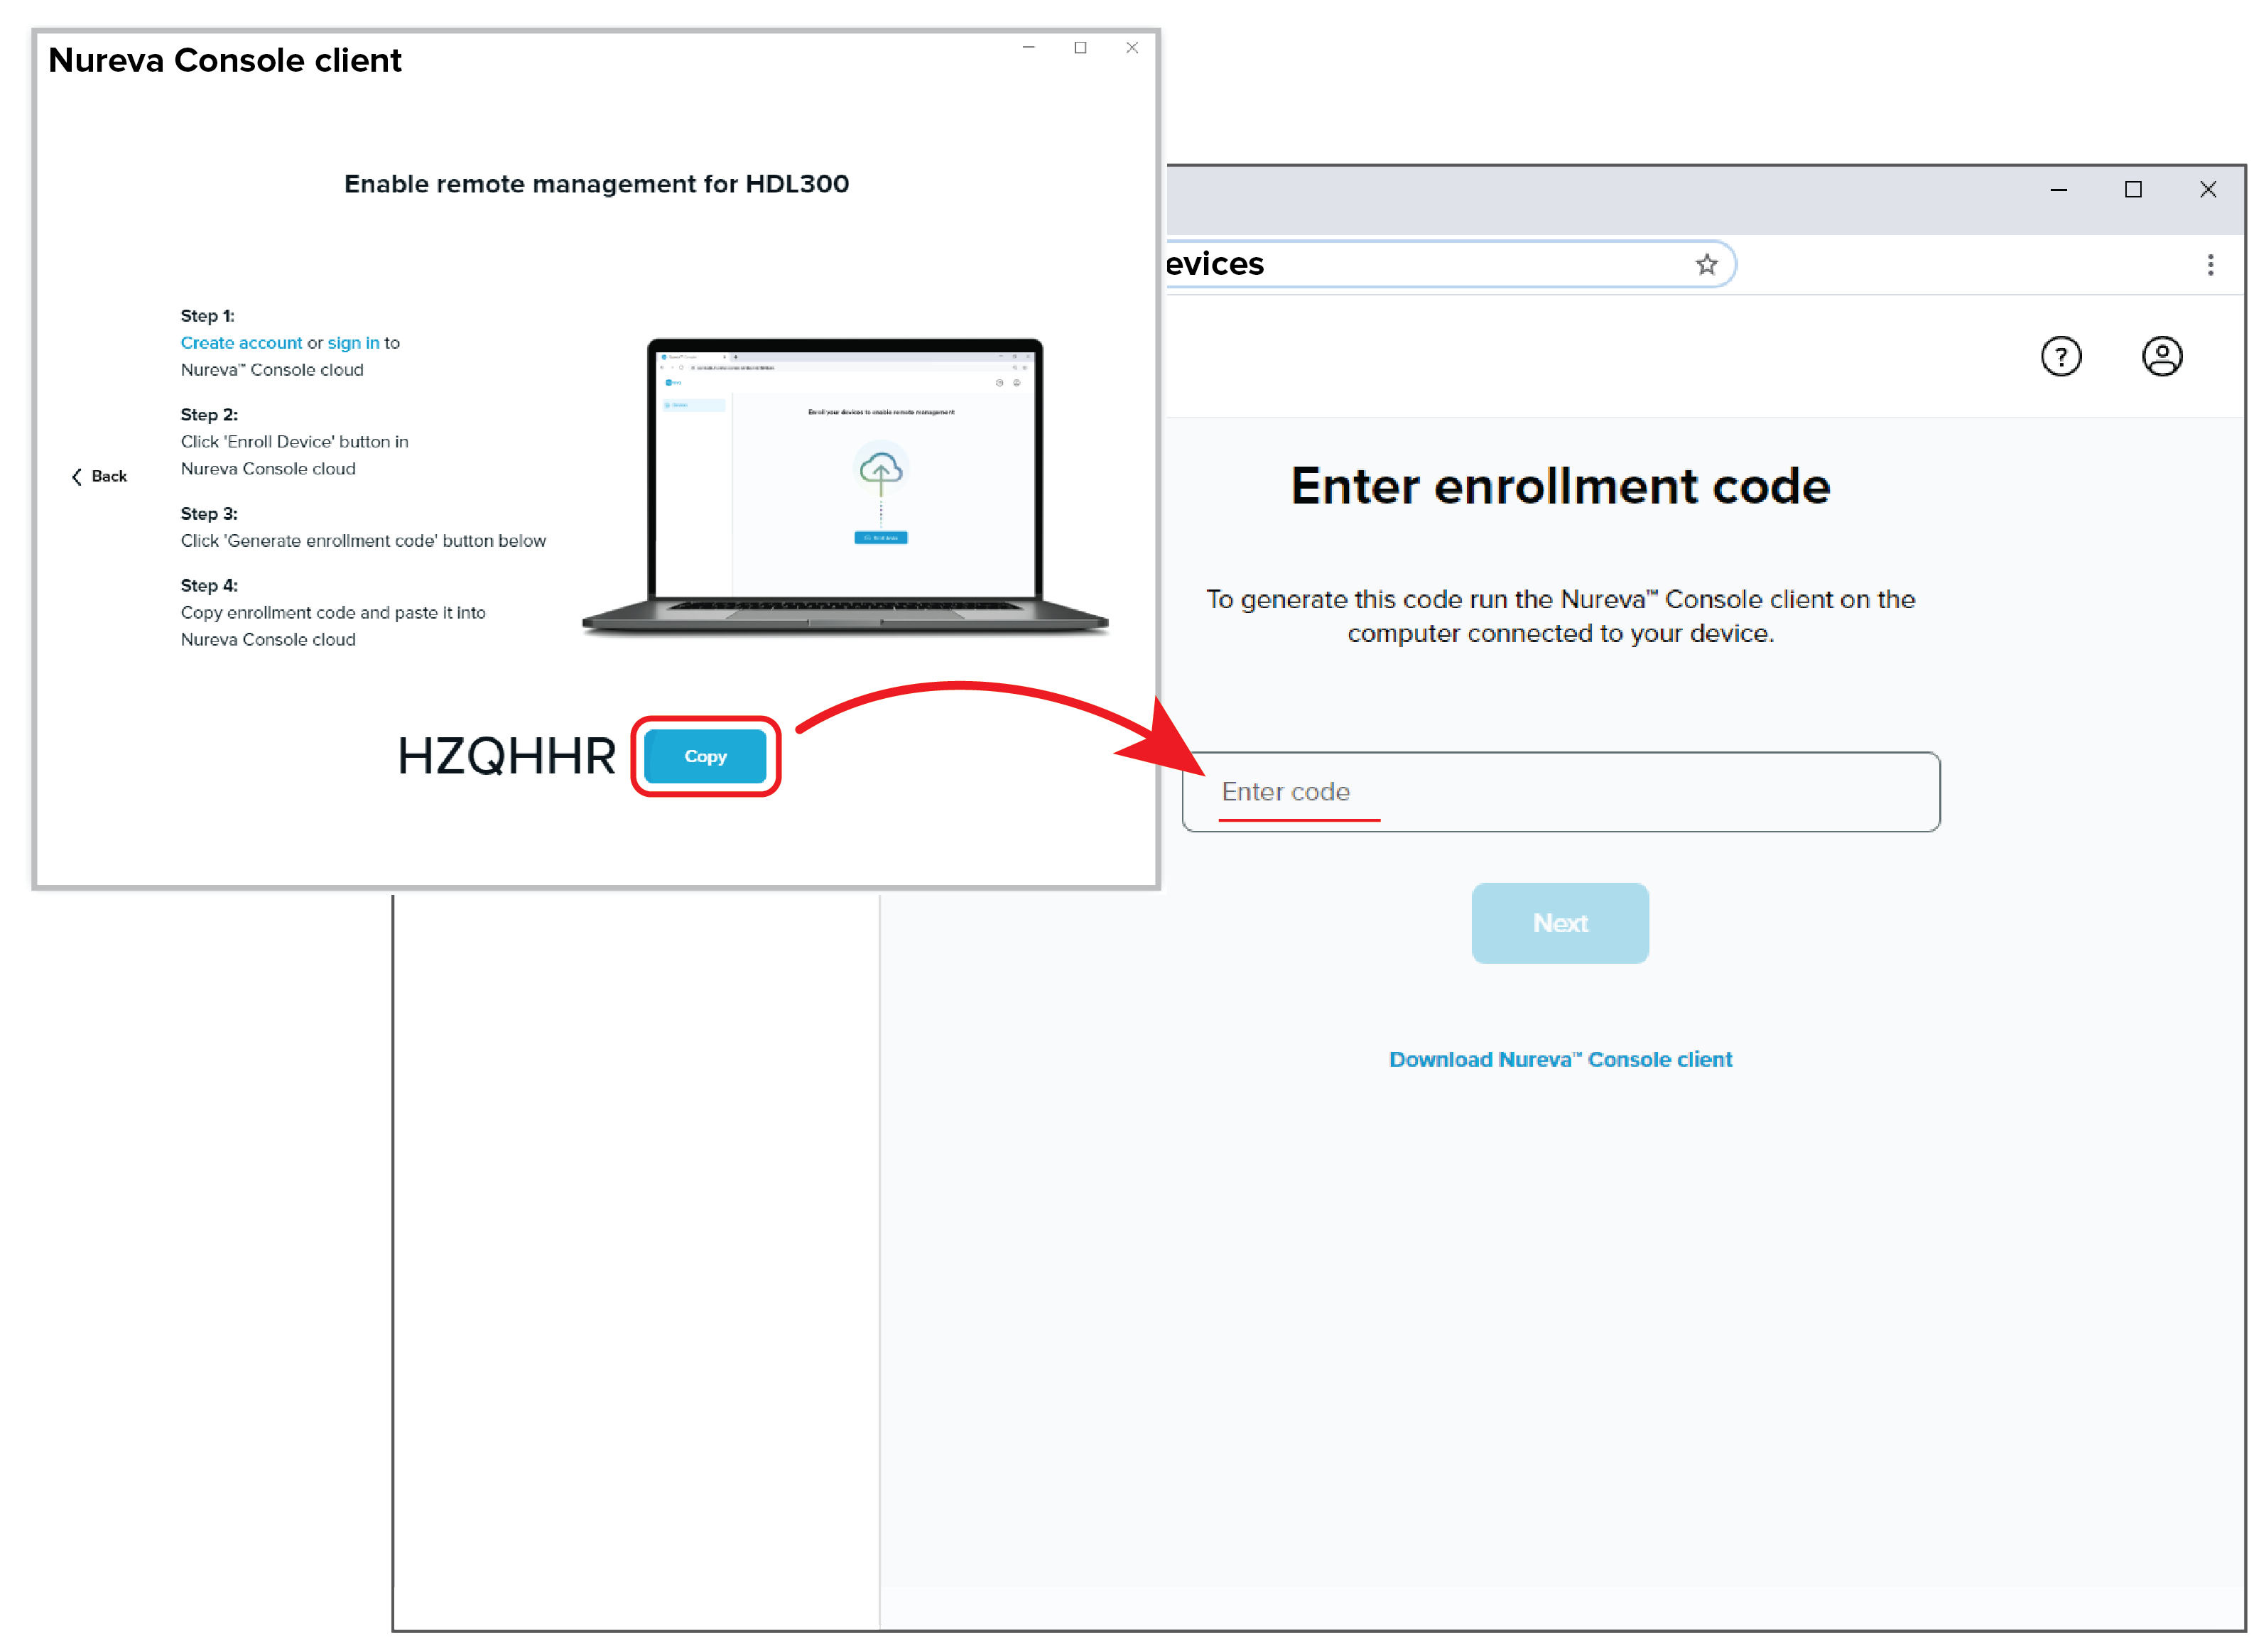
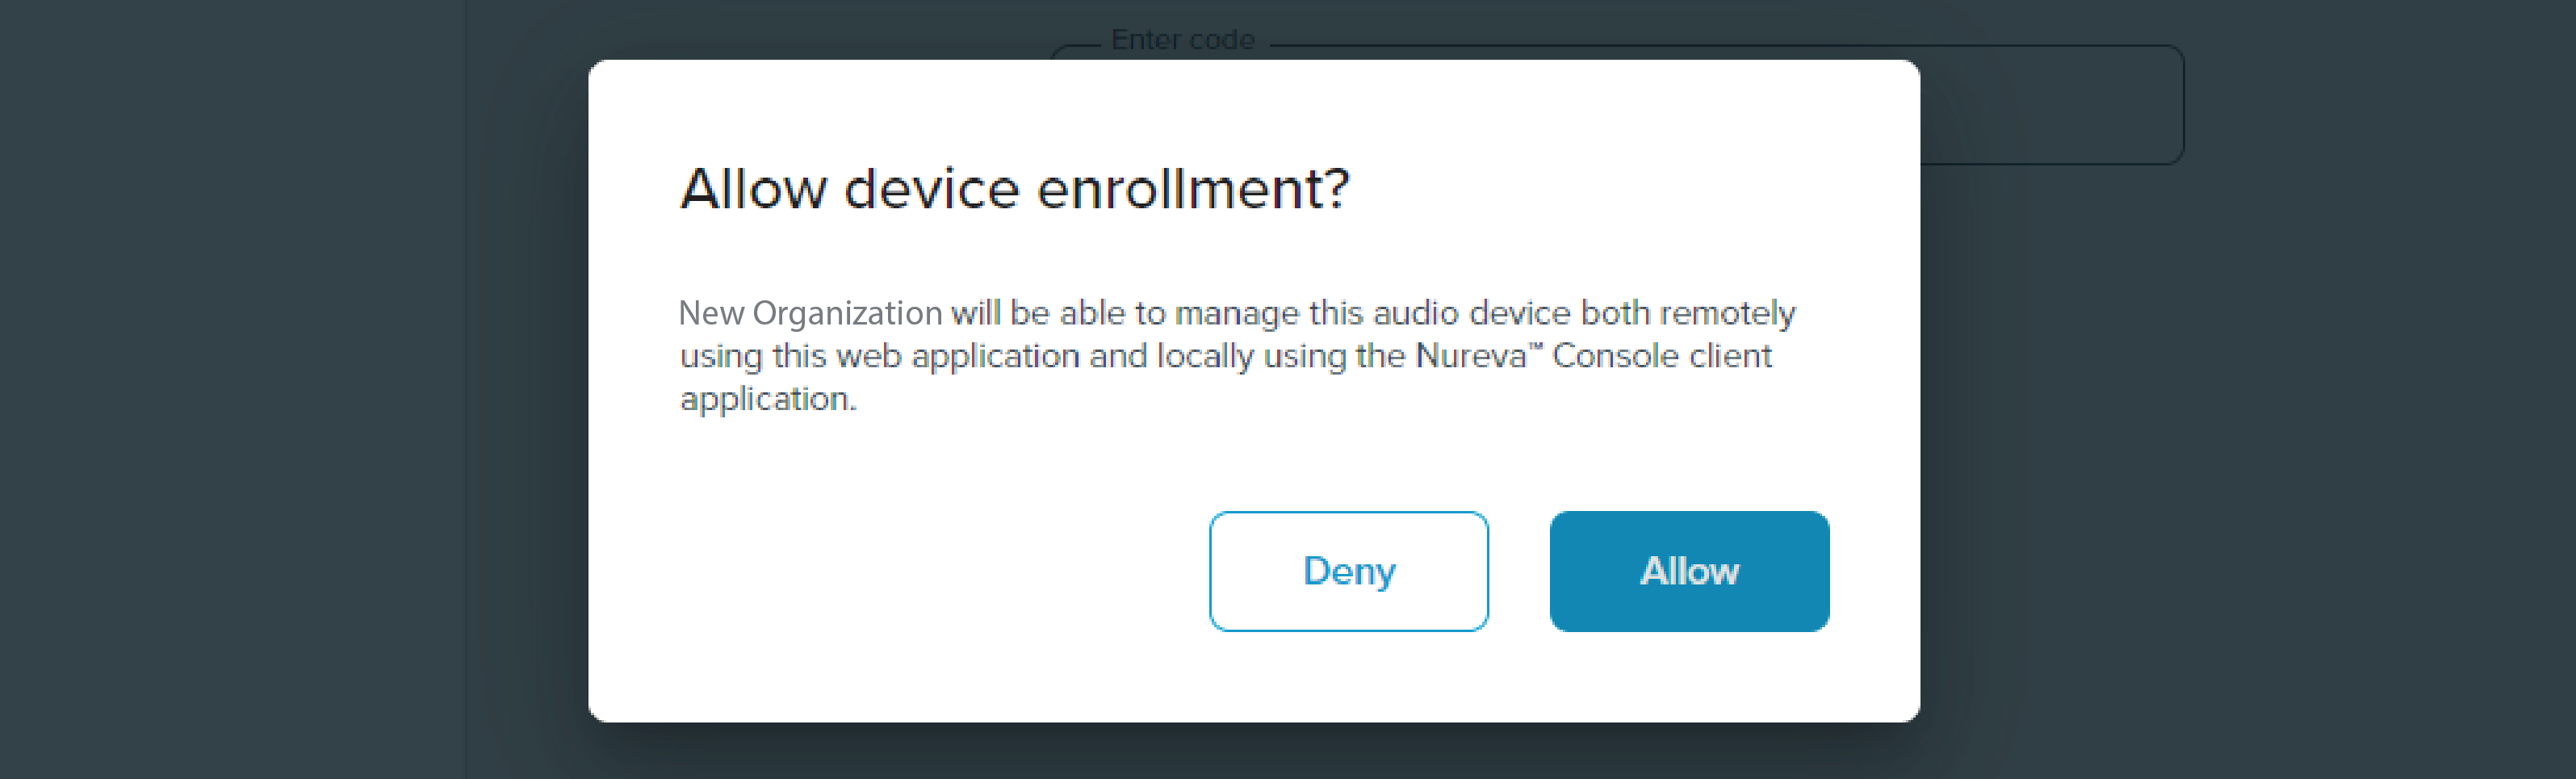
- Select Allow from the pop-up in your browser to continue with device enrollment
Enter some additional device details such as the room name and tags to help you identify your device within your organization.
Example room name: CA-Boardroom-1
Example tags: HDL200, Wall mounted, Floor 1, Room 502, 65" Display
- Click Save
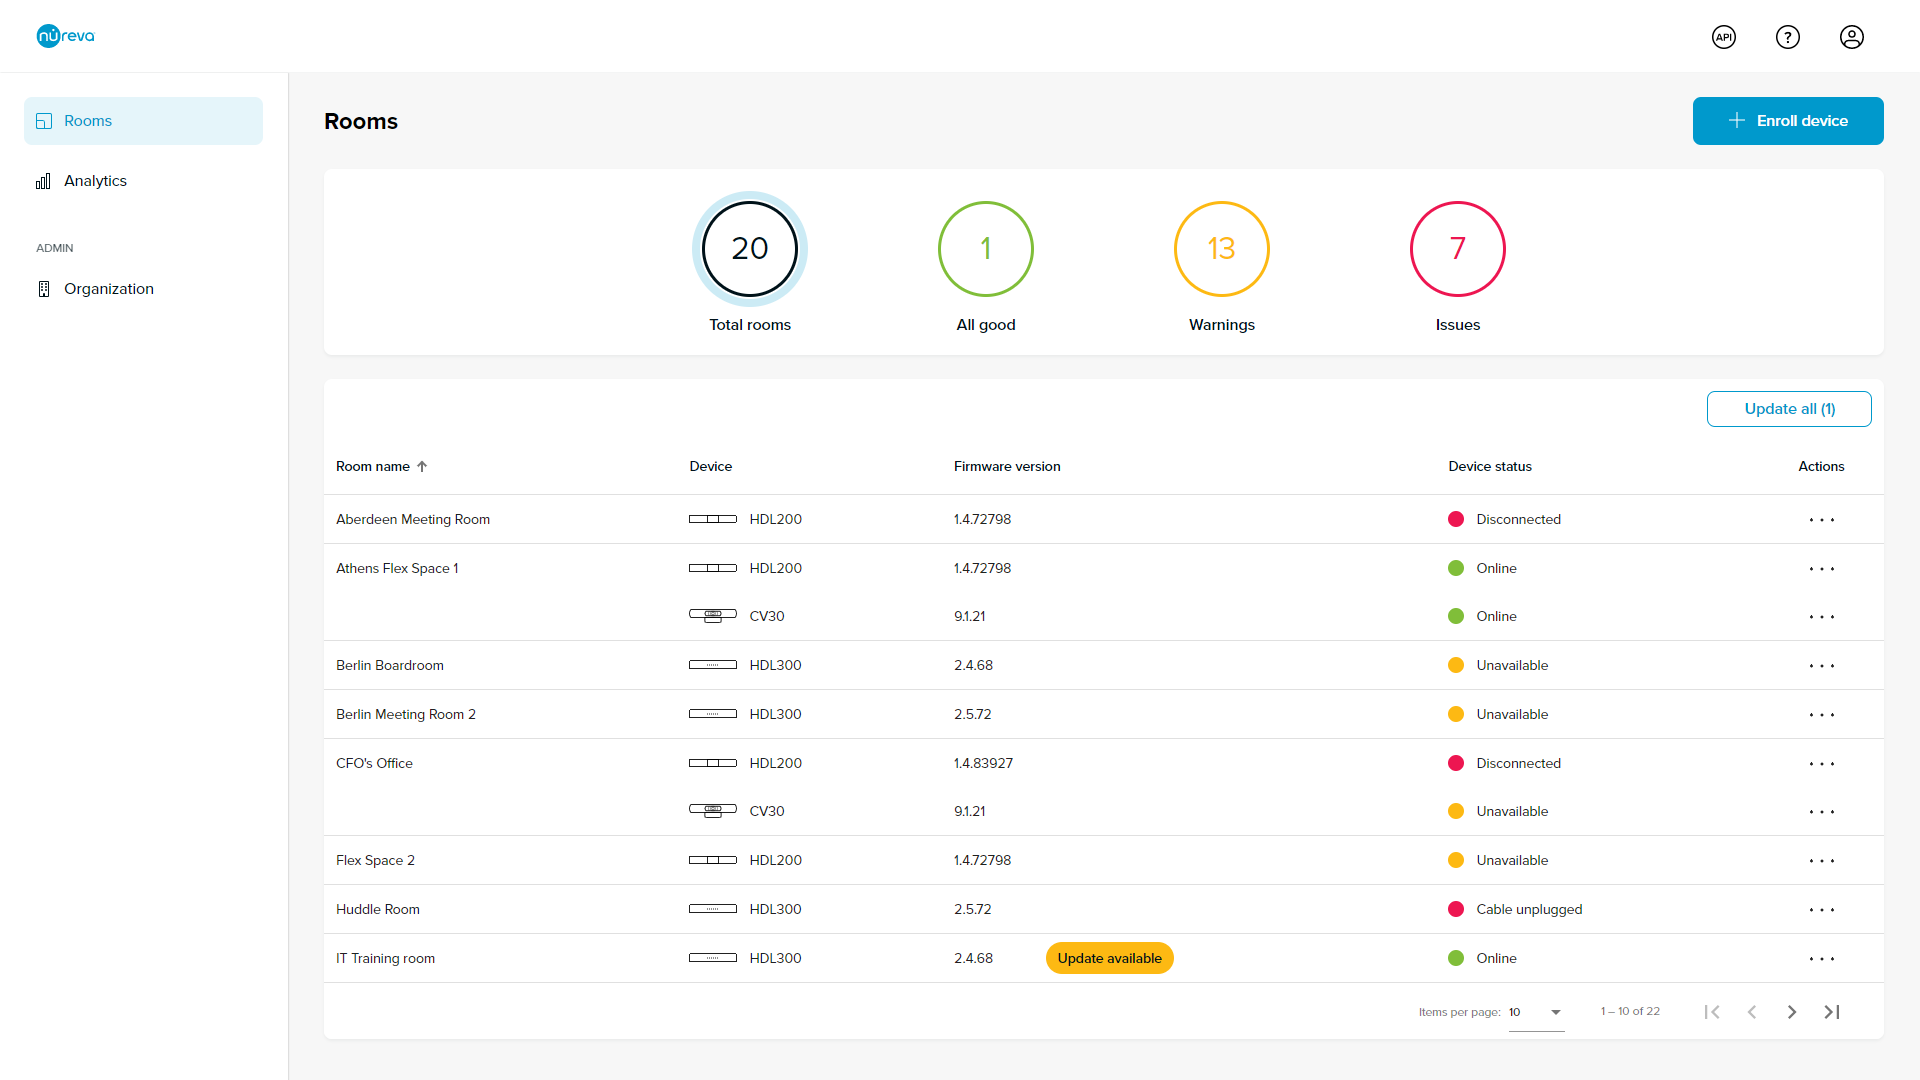
The audio device should now appear in the Rooms list, as shown below.
Conferencing cameras
Before a conferencing camera can be enrolled into Nureva Console cloud, the camera will need to be added to the Nureva Console desktop client. Once the camera has been added to the desktop client, the camera will automatically enroll once into Nureva Console cloud when you log into the cloud application.
Adding a Nureva CV30 camera to the desktop client
Nureva Console client auto detects Nureva conferencing devices including the CV30 camera.
- Ensure that the CV30 camera is connected to the computer
- Open Nureva Console client
- The CV30 camera will be detected and listed as a device
See Connecting a Nureva conferencing system to Nureva Console client for additional information.
Adding a third-party camera to the desktop client
Nureva Console client supports monitoring of many USB cameras. These third-party cameras are monitored alongside Nureva conferencing systems.
NOTE: A Nureva conferencing device must be connected to the computer and detected by Nureva Console client before adding a third-party camera.
- Open Nureva Console client
- Confirm that one or more Nureva conferencing systems are shown in Nureva Console client
- Press the camera icon button in the Devices list on the left
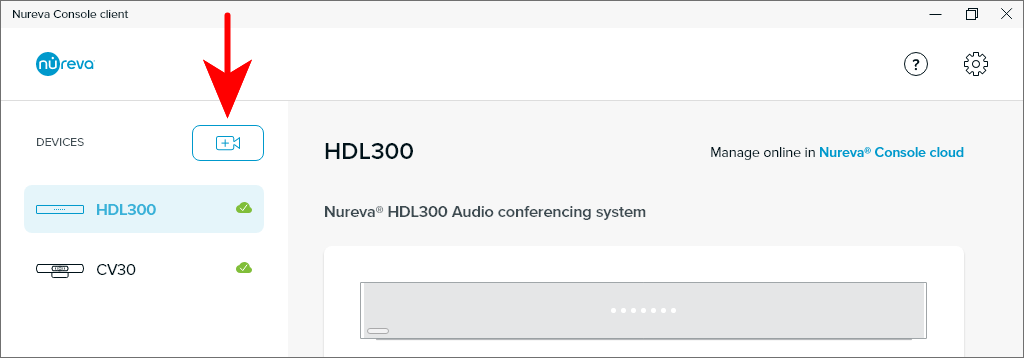
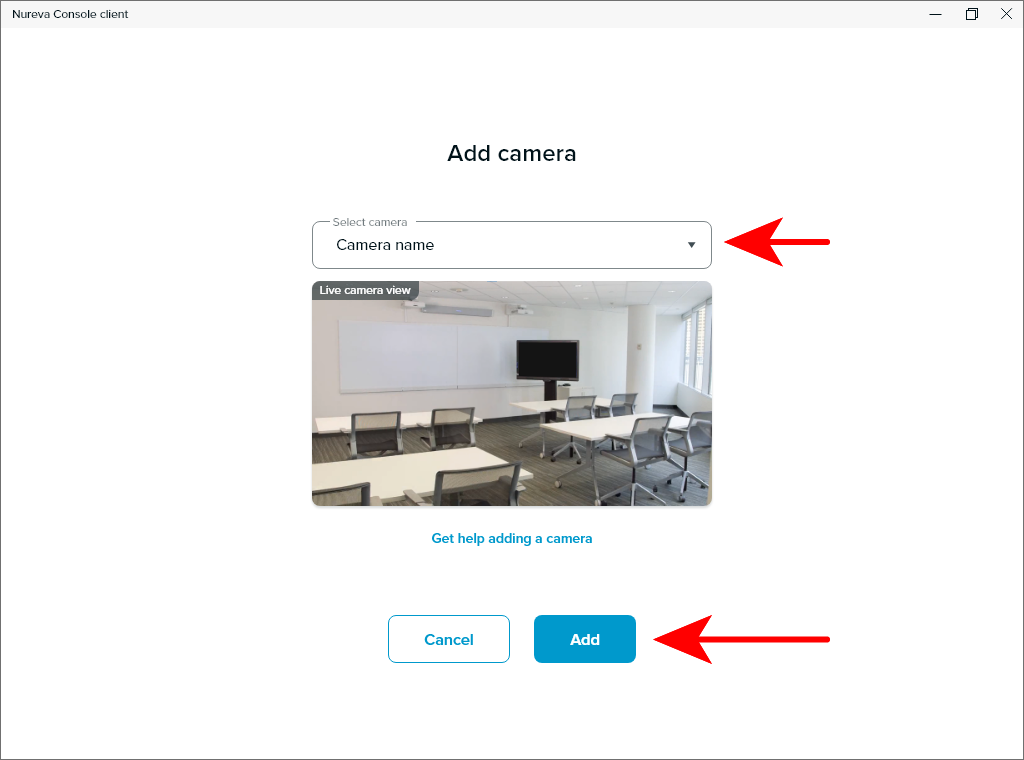
- When the interface opens select the camera you would like to add from the drop-down list
- Once a camera is selected the live camera view will be active in the preview area
- Press the Add button to bring the selected camera into the Nureva Console client device list
NOTE: Some third-party cameras may not be supported. An error notification will advise if a third-party camera cannot be added.
Once the camera has been added, it will appear in the Devices list in Nureva Console client. Some basic camera information will also be displayed under the camera preview to help identify the camera hardware.
If the Nureva audio conferencing device for the room is enrolled in Nureva Console cloud, the third-party camera will automatically start to enroll once it has been added.
