Nureva has determined that the HDL200, HDL300 and Dual HDL300 will work with the ScreenBeam 1100 Plus if configured as shown in this article. To get started, choose the tab of your Nureva audio device.
HDL200 system
On the HDL200
- Plug the 54VDC power supply in to the HDL200
- Connect a computer to the HDL200 using the provided USB-A to USB-B cable
- Download and run Nureva Console client
- Complete the setup of your HDL200 by following the on-screen instructions
- Choose System information
- select Check for firmware update
- Install available updates
- Calibrate the room for the optimum HDL200 experience
- Exit Nureva Console client and disconnect the HDL200 system from your computer
On the ScreenBeam 1100 Plus
- Connect the HDL200 to the USB 3.0 port on the back of the ScreenBeam device
- Connect any ScreenBeam required or optional connections (camera, HDMI, etc.)
- Connect the ScreenBeam power supply to the ScreenBeam device
- The device will power on
On your host computer
- Download and install ScreenBeam Conference Software
- Follow the on-screen steps to install the software
- Launch ScreenBeam Conference Software and connect to the ScreenBeam device
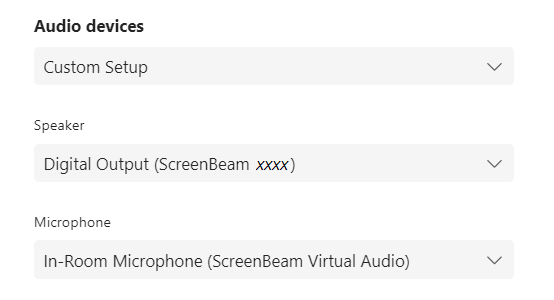
- Inside your conferencing platform's audio settings, set the speaker and microphone as follows:
- Speaker = Digital Output (ScreenBeam xxxx)
- Microphone = In-Room Microphone (ScreenBeam Virtual Audio)
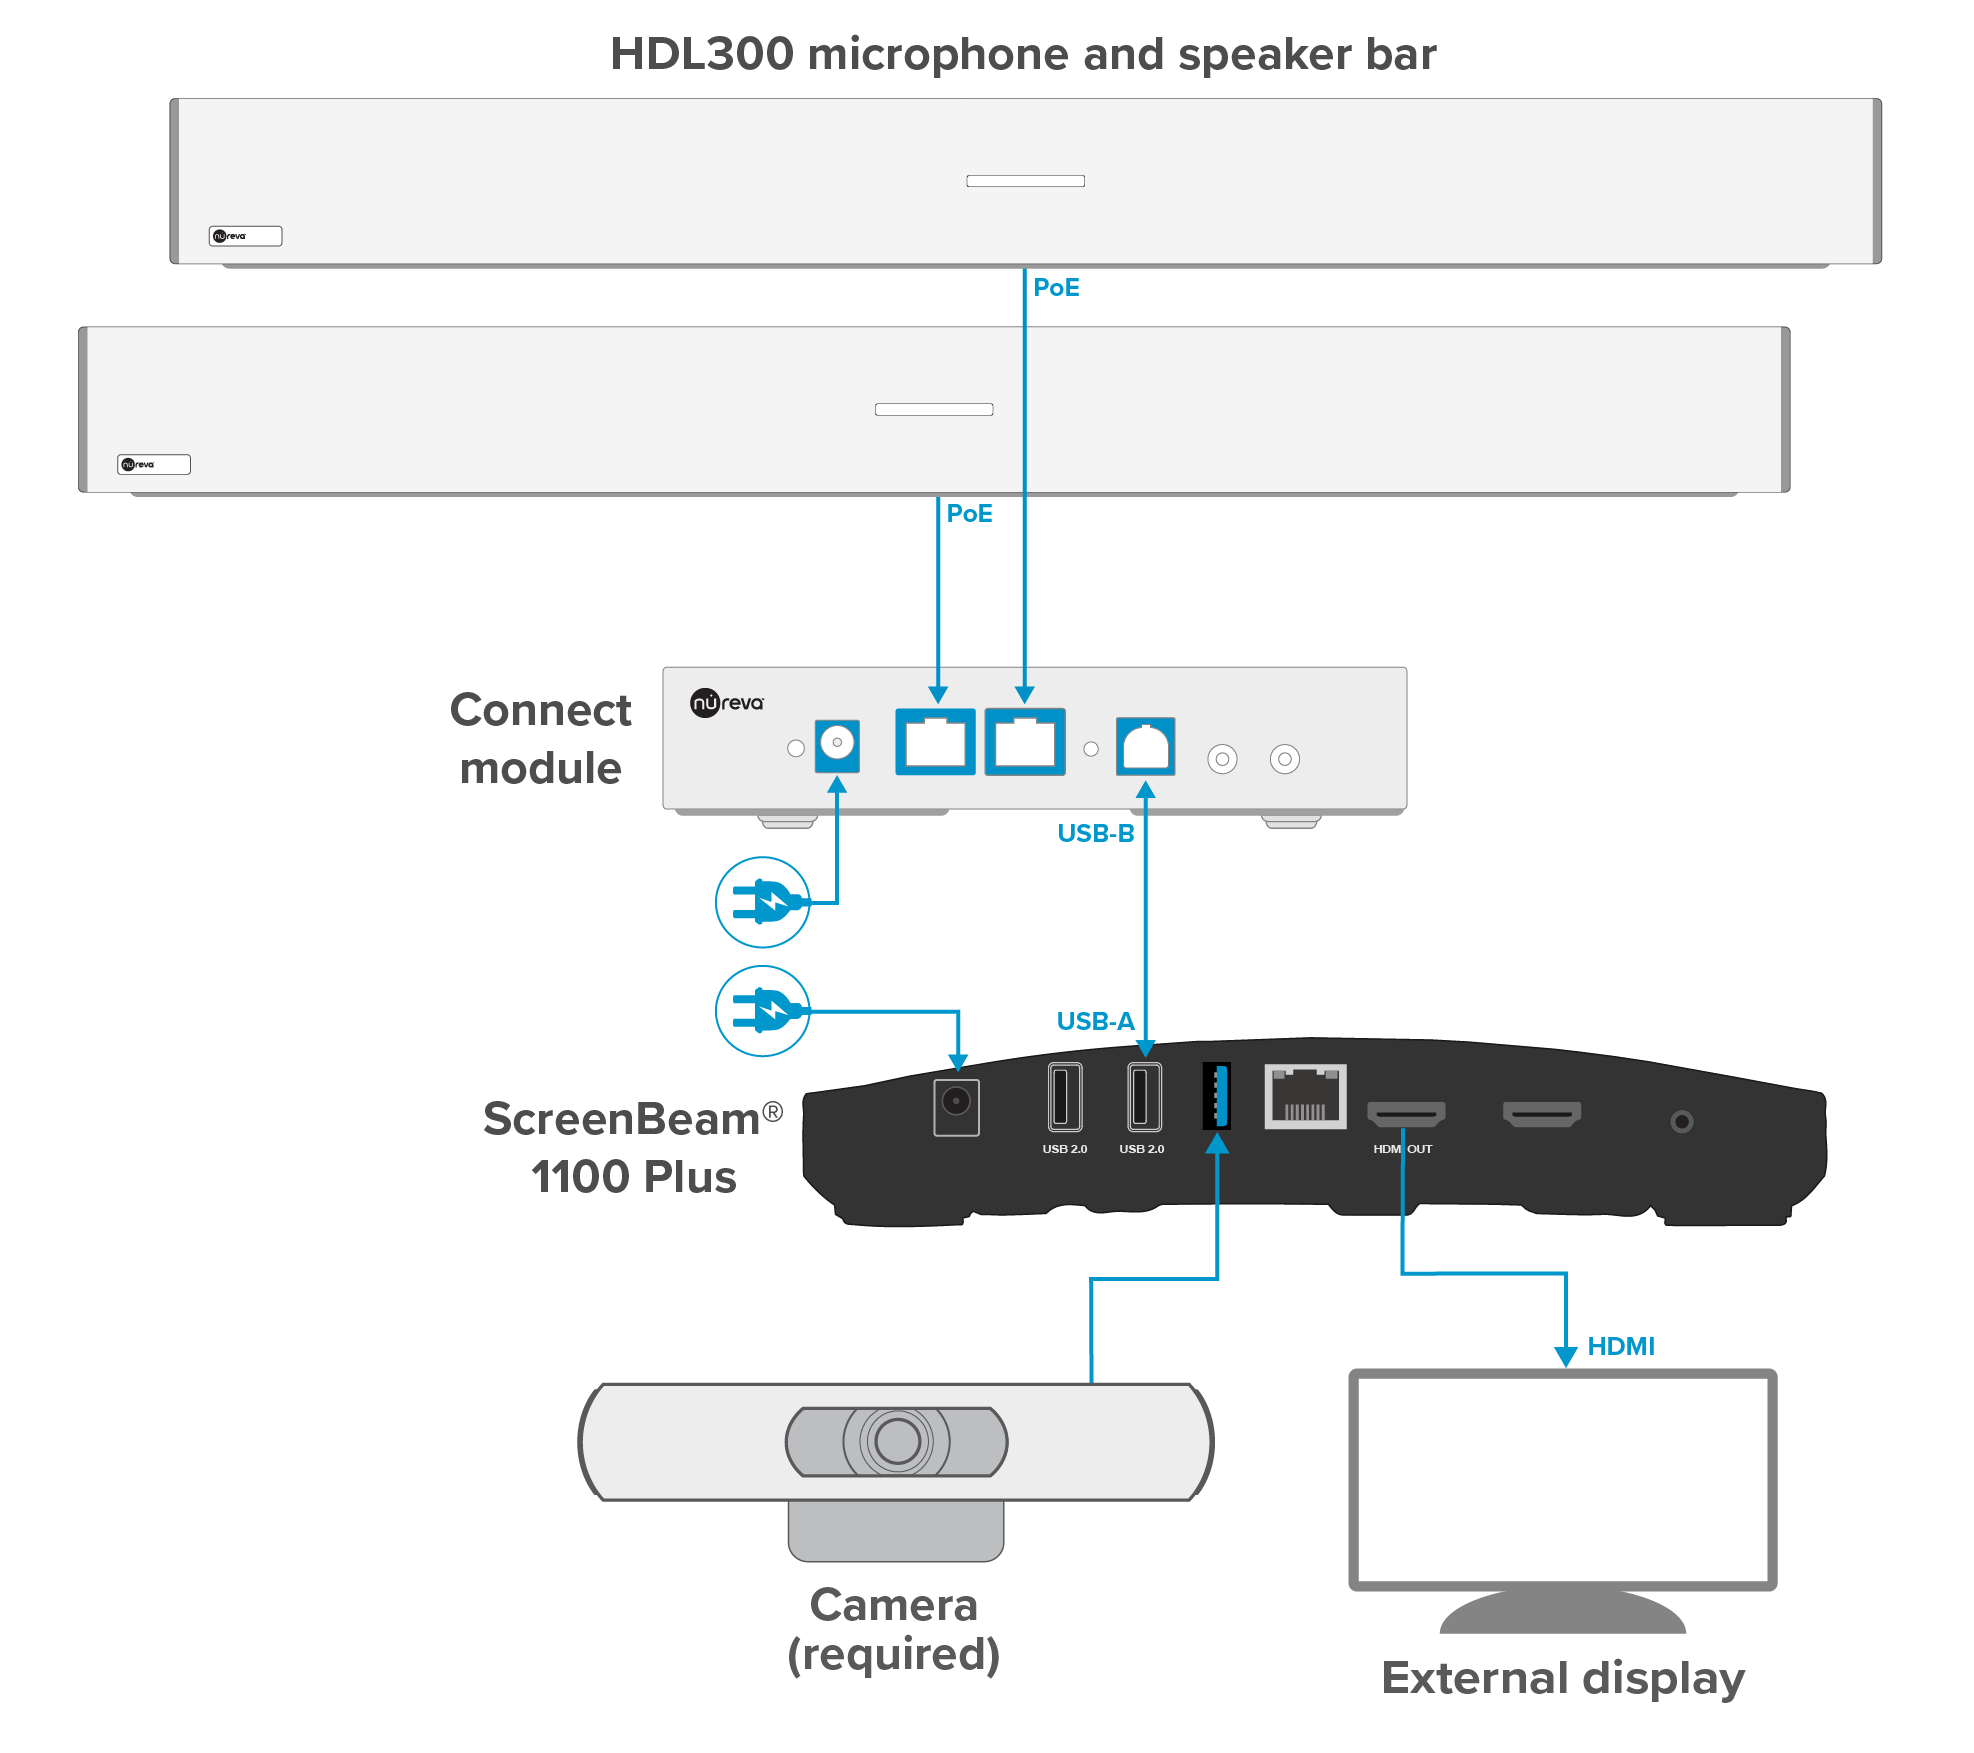
Connection diagram

HDL300 and Dual HDL300 systems
On the HDL300
- Connect the provided Ethernet cable to the RJ45 port on the connect module and to the rear port on the microphone and speaker bar
- For Dual HDL300 systems there will be two Ethernet cables, used with both ports on the connect module and with each microphone and speaker bar
- Plug the 54VDC power supply into the connect module
- Connect a computer to the connect module using the provided USB-A to USB-B cable
- Download and run Nureva Console client
- Choose System information
- select Check for firmware update
- Install available updates
- Calibrate the room for the optimum HDL300 experience
- Choose System information
- Exit Nureva Console client and disconnect the HDL300 system from your computer
On the ScreenBeam 1100 Plus
- Connect the HDL300 to one of the USB 2.0 ports on the back of the ScreenBeam device
- Connect any ScreenBeam required or optional connections (Camera, HDMI, etc.)
- Connect the ScreenBeam power supply to the ScreenBeam device
- The device will power on
On your host computer
- Download and install ScreenBeam Conference Software
- Follow the on-screen steps to install the software
- Launch ScreenBeam Conference Software and connect to the ScreenBeam device
- Inside your conferencing platform's audio settings, set the speaker and microphone as follows:
- Speaker = Digital Output (ScreenBeam xxxx)
- Microphone = In-Room Microphone (ScreenBeam Virtual Audio)
Connection diagram
NOTE: The technical information provided in this article, including specifications and recommendations, is provided for customer convenience. The accuracy of this information is not guaranteed and is subject to change without notice. Please check the user manuals and related documentation from each product manufacturer to ensure that your setup meets the proper recommendations.