Nureva has determined that the SMART Board 7075 interactive display will work with the HDL300 and Dual HDL300 systems when configured as shown in this article.
HDL300 setup
- Connect the PoE cable (provided) to the RJ45-1 port on the connect module to the rear port on the HDL300 system
- Connect the in-room computer to the connect module using the USB-A to USB-B cable (provided)
- Connect the connect module to a power supply as shown in the HDL300 Getting Started guide
- Open a web browser on the in-room computer and download Nureva Console client
- Install the software and restart your computer
Windows®
Open Nureva Console client- Update the firmware if an update is available
- Navigate to Device settings
- Choose Open sound settings
- Restart your computer
macOS®
Open Nureva Console client- Update the firmware if an update is available
- Navigate to Device settings
- Choose Open sound settings
- Select the Output tab
- Select HDL300
- Select the Input tab
- Select HDL300
- Select the Output tab
- Restart your computer
SMART Board 7075 interactive display
- Connect the in-room computer to the connect panel for HDMI
- Connect the in-room computer to the connect panel for USB-A to USB-B cable
- Connect the display to a power supply and update the system or any drivers as described in the SMART Board 7000 and 7000 Pro series User Manual
- Restart your computer
You can now start using the Nureva and SMART Technologies room solution for advanced collaboration with both in-room interactive displays and input from distributed teams via UC&C conference calling supporting near and far-end audio.
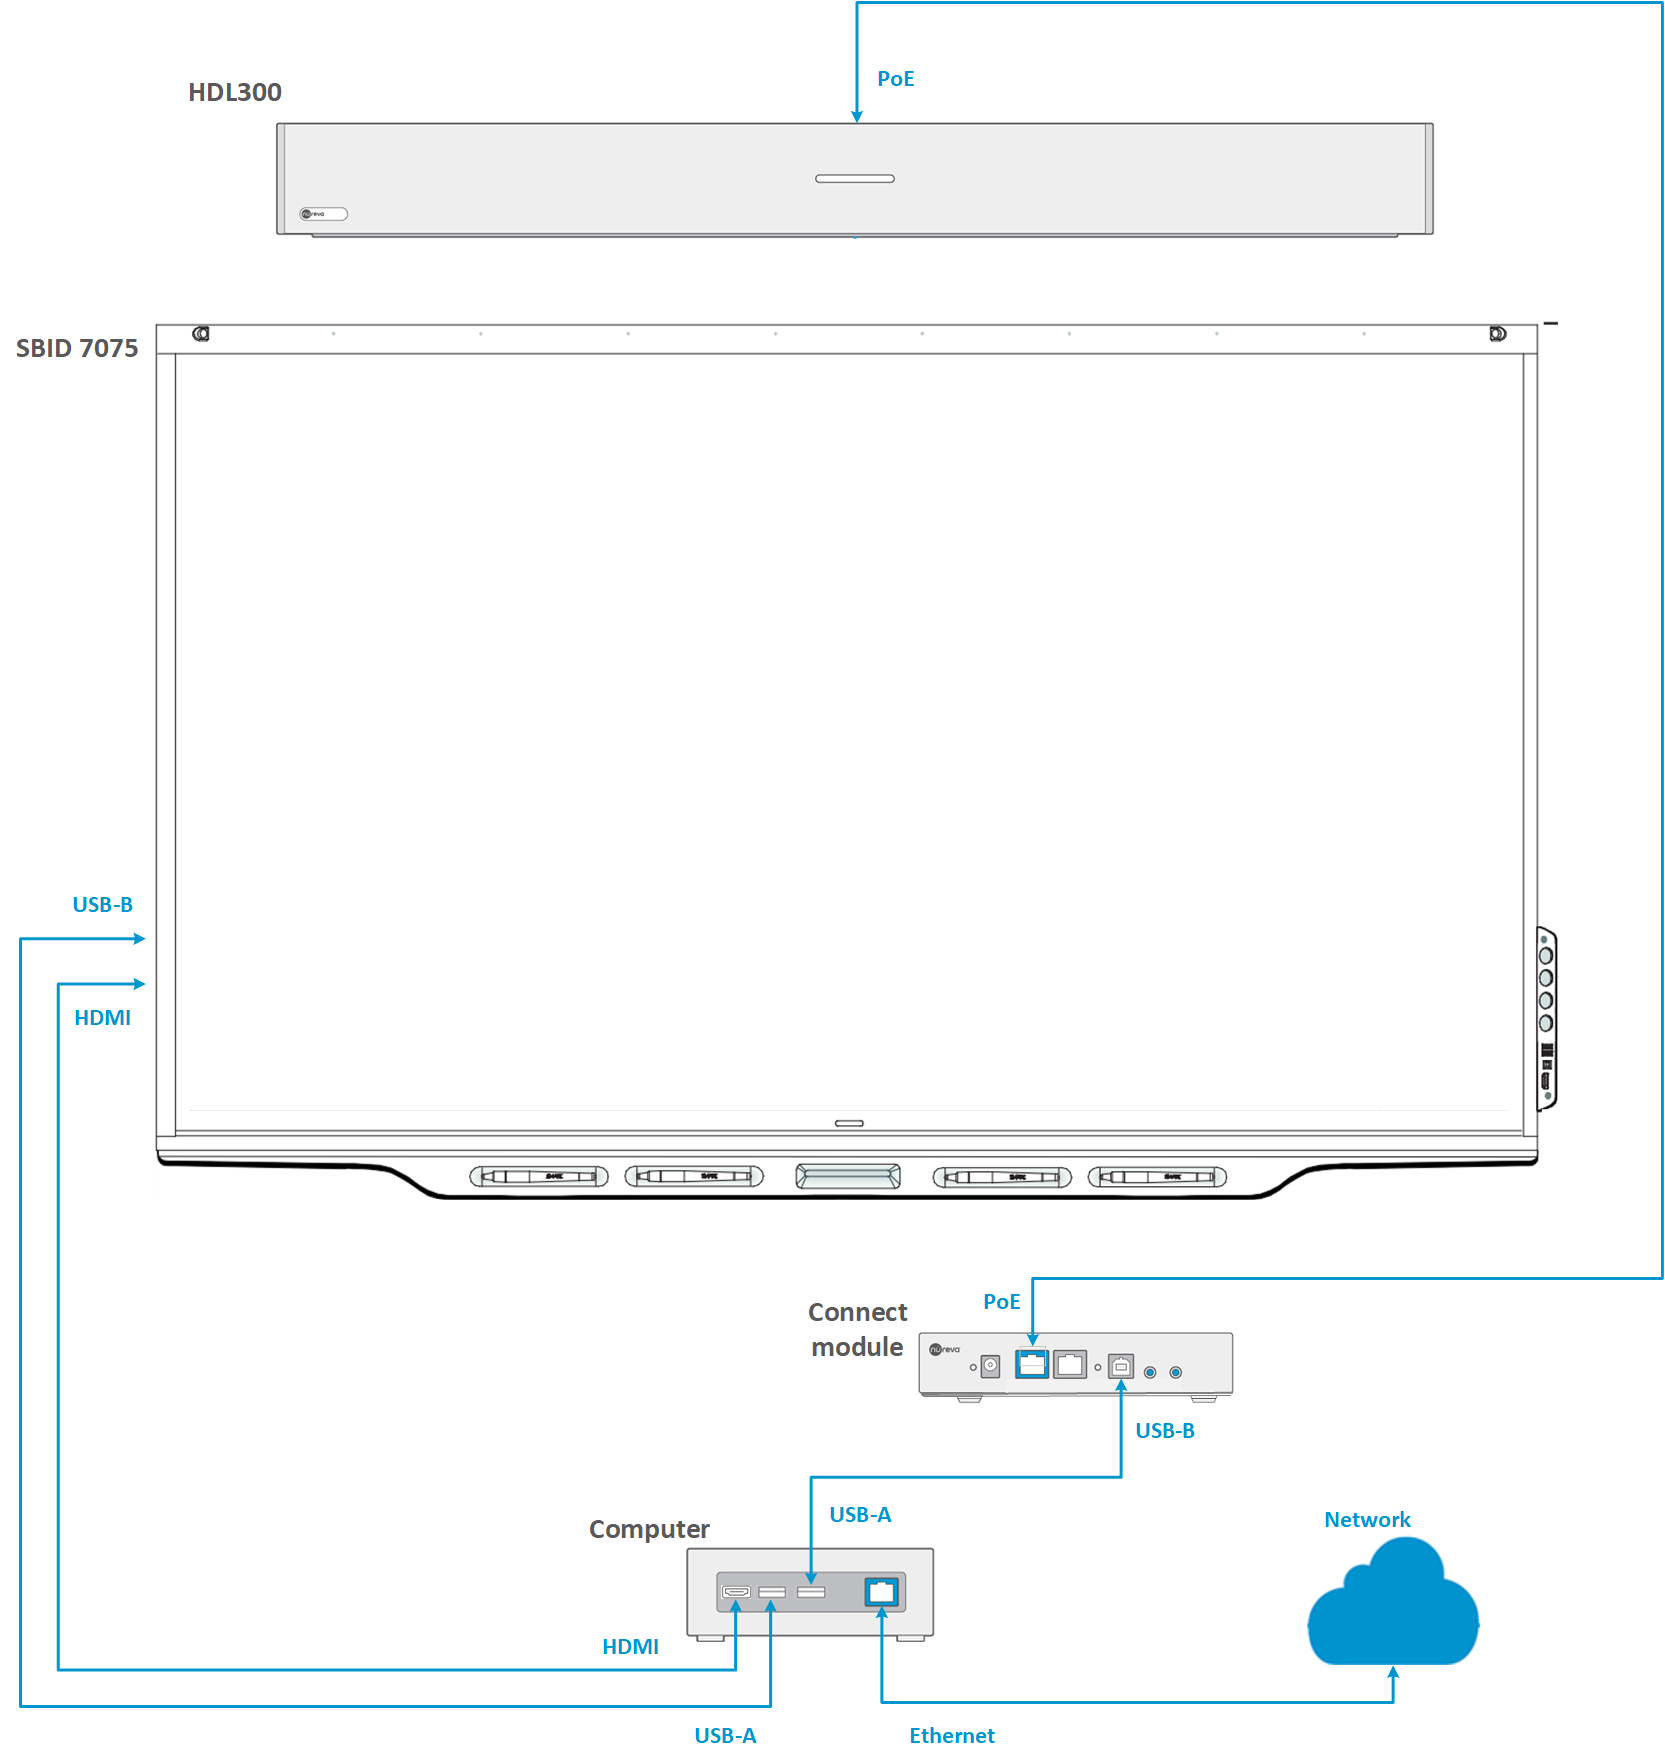
Connection diagram
NOTE: The technical information provided in this article, including specifications and recommendations, is provided for customer convenience. The accuracy of this information is not guaranteed and is subject to change without notice. Please check the user manuals and related documentation from each product manufacturer to ensure that your setup meets the proper recommendations.