What is the unified coverage map?
When an HDL410 system calibrates, it determines the location and orientation of each microphone and speaker bar in a room. A coverage map is generated representing the area between each microphone and speaker bar. The maximum area of the coverage map is 35' x 55' (10.7 x 16.8 m).
As the HDL410 system captures sound location data the coverage map updates to show any changes in the data. The updates occur in near real-time and offer up to five minutes of sound location data. When new data is received the oldest data is replaced.
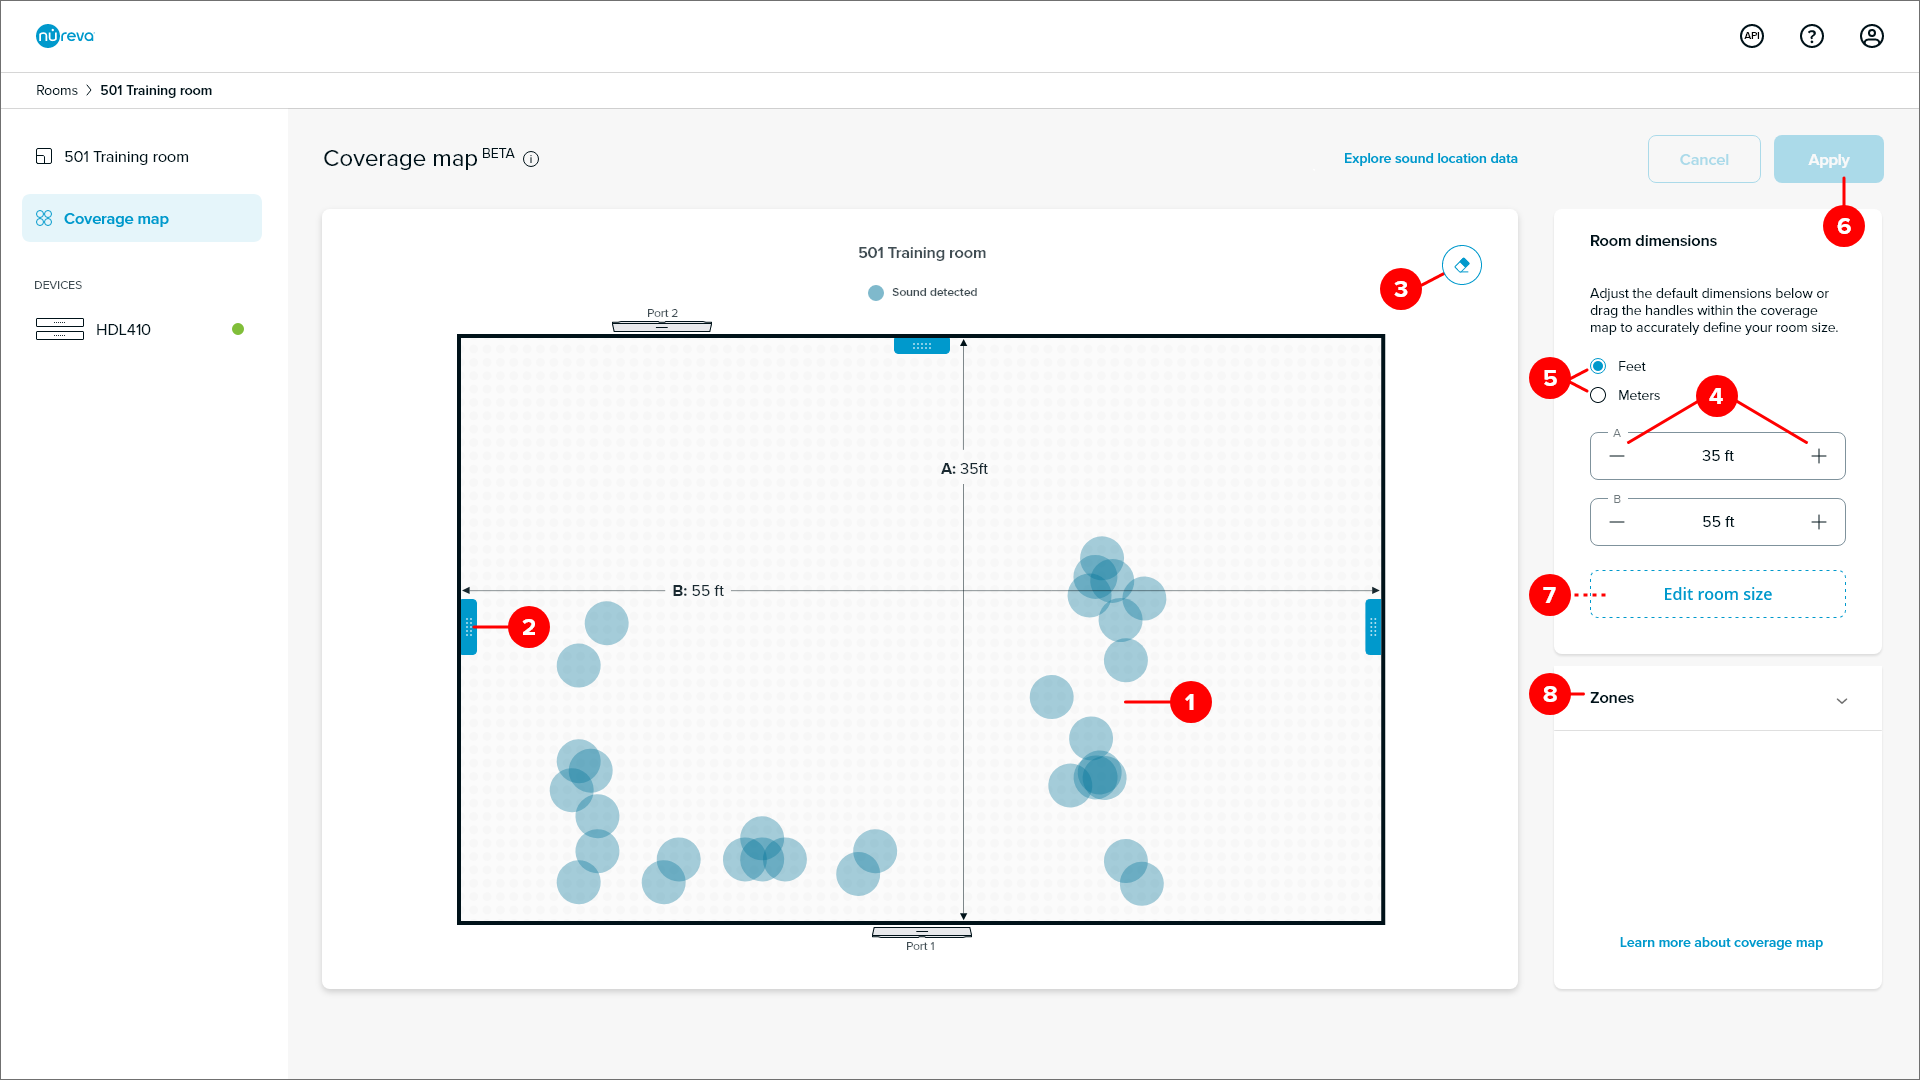
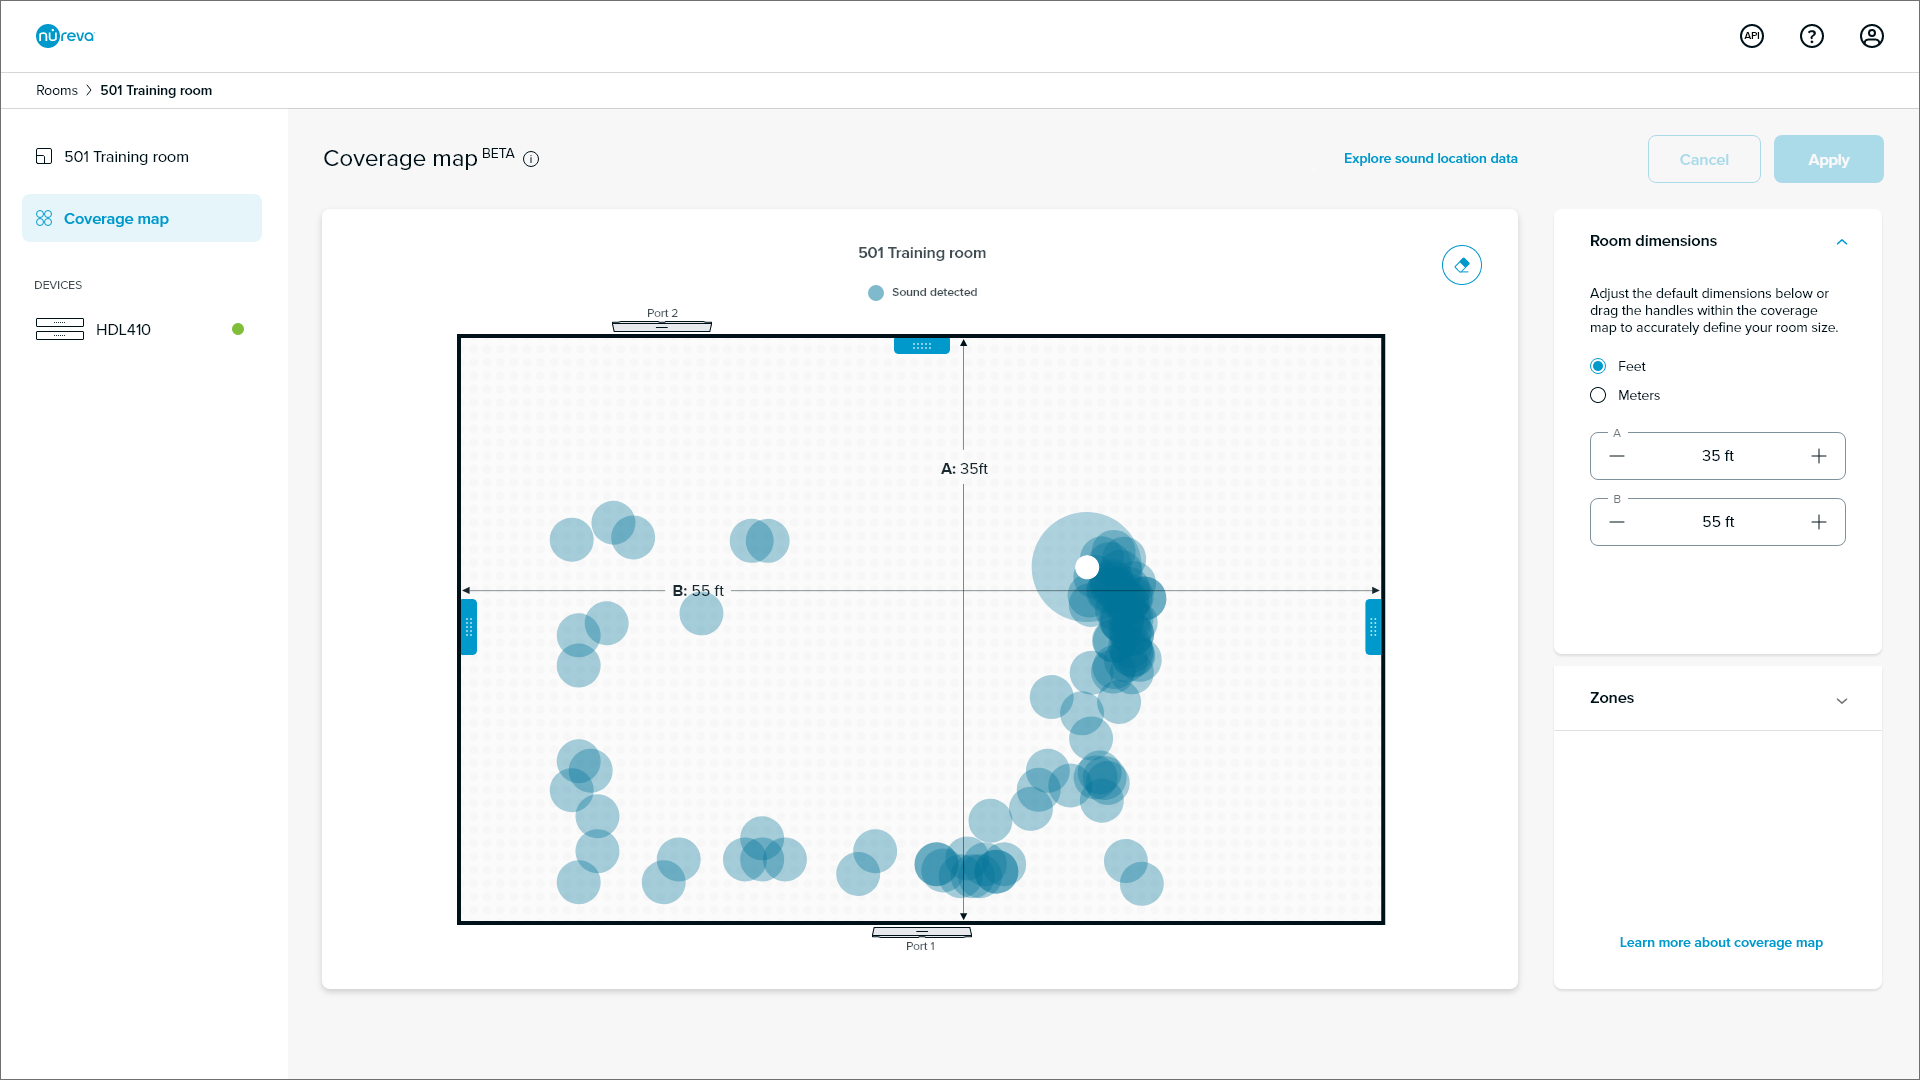
Coverage map overview
- Sound location data
- Drag handles
- Clear sound data
- Room dimension input field with quick buttons to increase and decrease room size
- Room dimension units available in Feet and Meters
- Apply and cancel buttons
- Edit room size is available only after a change to the room size has been applied
- Zone controls
System placement
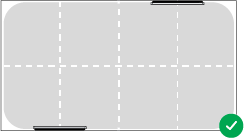
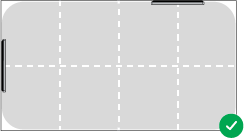
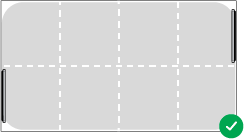
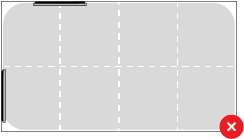
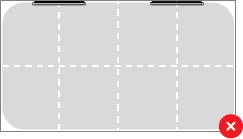
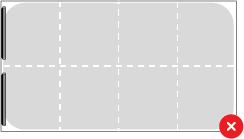
For the HDL410 system to provide the most accurate sound location data, Nureva recommends that the microphone and speaker bars be installed on opposite or perpendicular walls. This positioning produces accurate X and Y data.
Recommended installation positions for using sound location data from the HDL410 system are shown in the diagrams below.
 |
 |
 |
||
 |
 |
 |
Viewing the coverage map
To view the coverage map the HDL410 system must be powered up and enrolled into Nureva Console cloud.
- Launch Nureva Console in a browser and sign into your account
- From the Rooms dashboard choose a room with an HDL410 system
The dashboard for the selected room displays a view of the coverage map. This provides a glance at the system setup, including zone configuration. Select the Coverage map button on the navigation side menu or click the Edit button to view the detailed coverage map.
After the coverage map opens the sound location data will start to populate on the map. Walking around the room perimeter and speaking will provide a source for sound location data. This will help confirm that your configuration is correct.
Ensure accurate room data
If the microphone and speaker bars are not represented accurately in the coverage map, you should recalibrate the HDL410 system.
Nureva Console- Navigate to the device settings Console client or cloud
- Choose Audio processing
- Scroll to Recalibrate and click on Start
- The calibration will be complete when the calibration sound stops
Remote control
- Press the F4 button on the remote five times in quick succession
- Press the Mute button on the remote
- The calibration will be complete when the calibration sound stops
Adjusting room dimensions
For a closer representation of the room size and the location of the microphone and speaker bars, adjust the room dimensions. Adjusting the coverage area to the actual room dimensions helps refine the sound location data and provides a more accurate coverage map. Two options are available for adjusting the room dimensions.
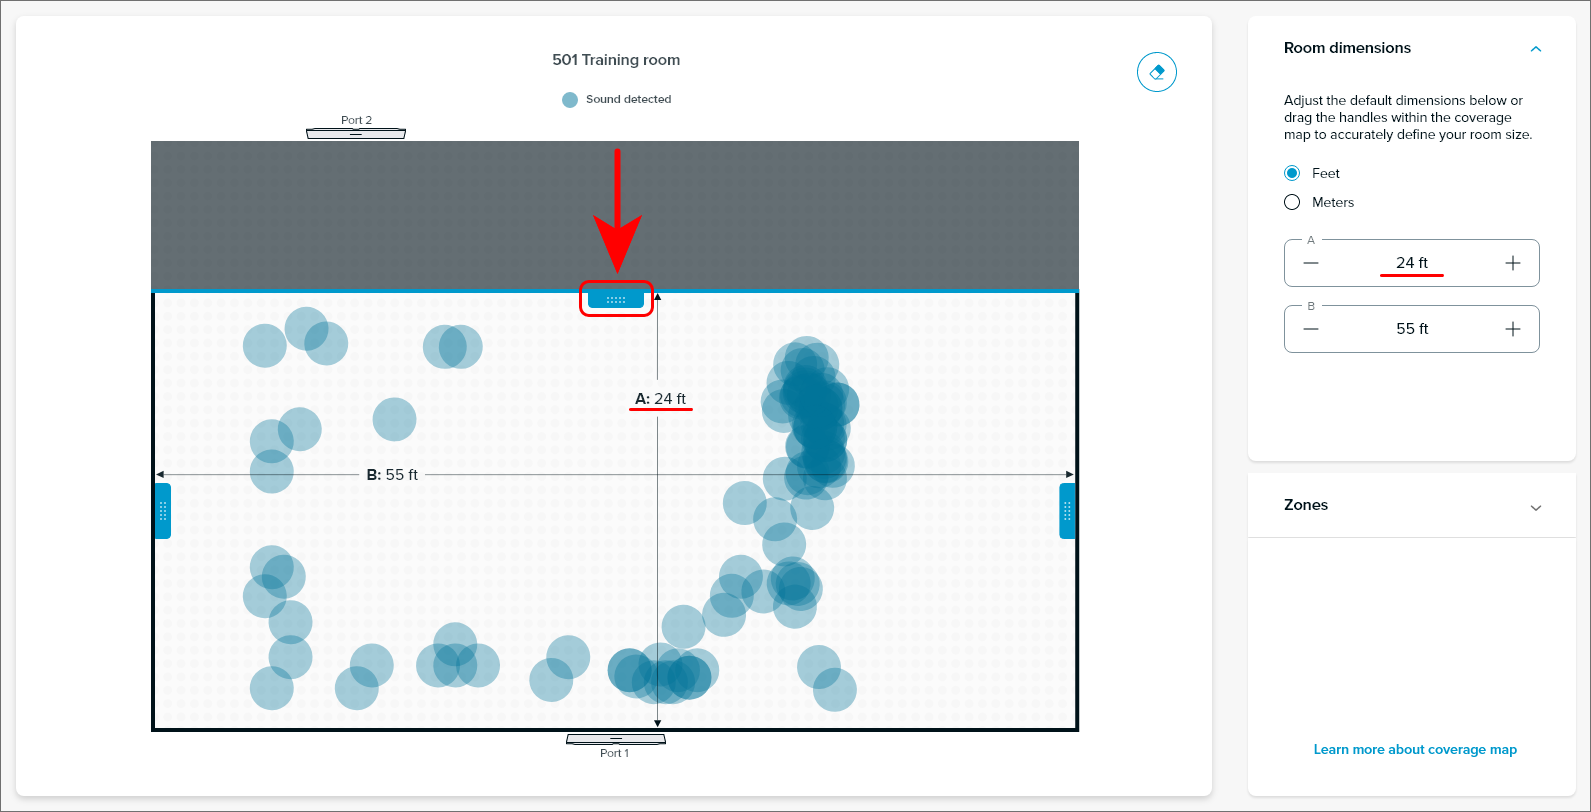
- Walk around the room and speak to confirm sound data is visible on the map
- Open the room dimension accordion on the right-hand side to adjust the room boundaries
- Adjust the room size to create an accurate representation of the space
- When the room dimension adjustments are complete press the Apply button
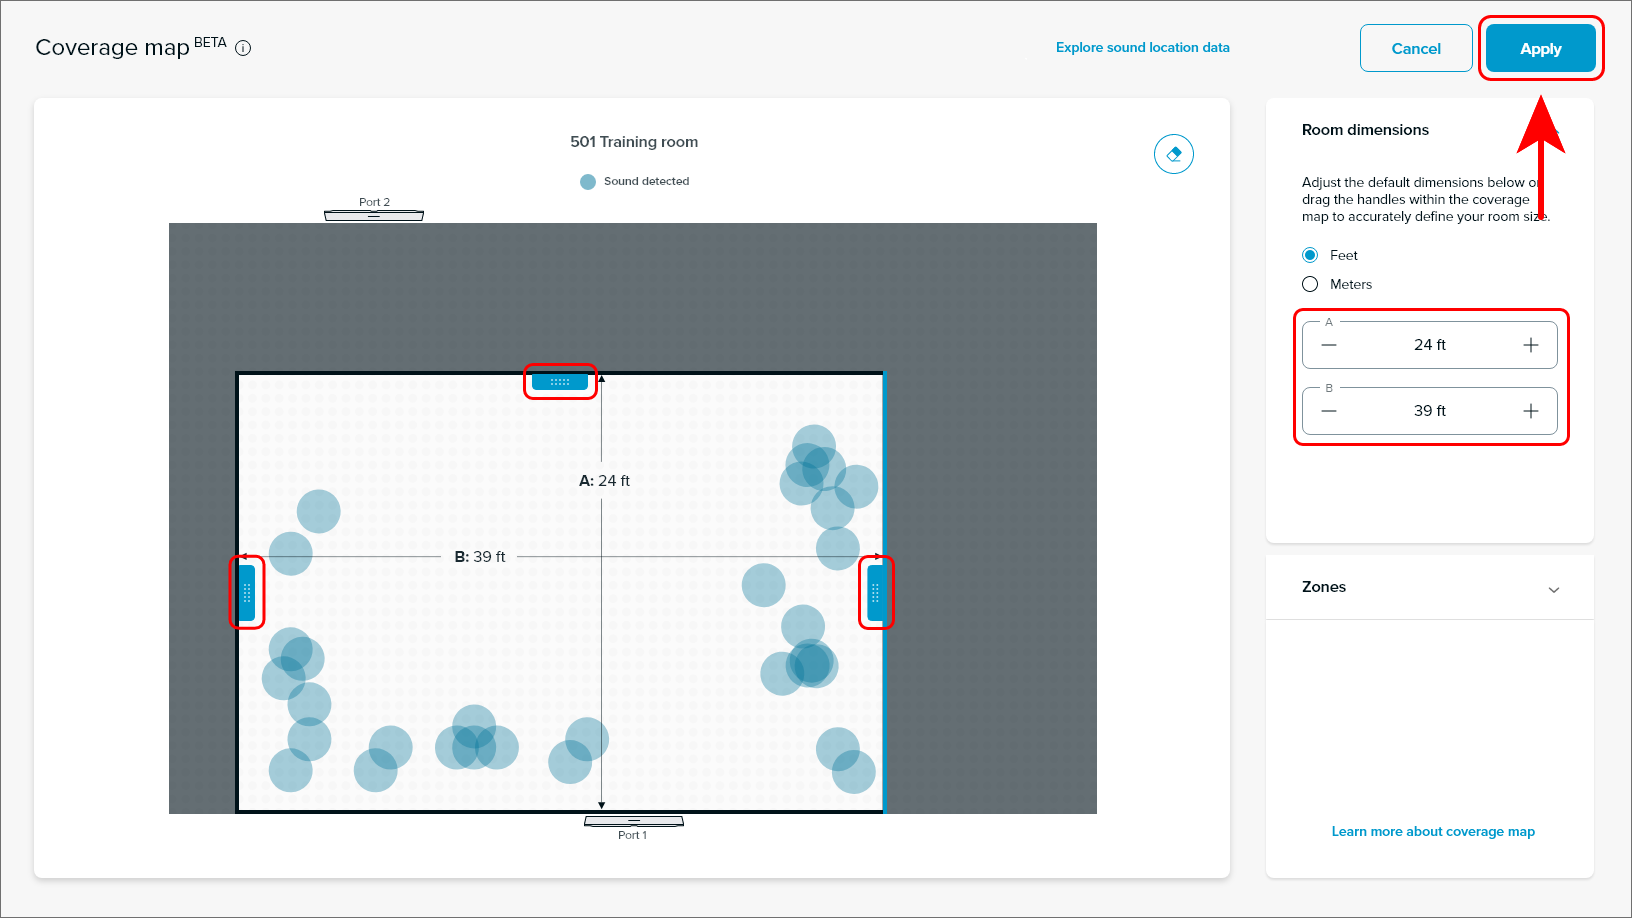
Once the edits have been applied the coverage map will return to a zoomed-in view. It will exclude any sound location data from outside the updated dimensions. Open the room dimension accordion at any time to adjust the room boundaries.
DeleteClearing the sound data
To clear the coverage map and populate new data, press the clear sound data button. After pressing the button the coverage map will clear and new sound data will start to populate.
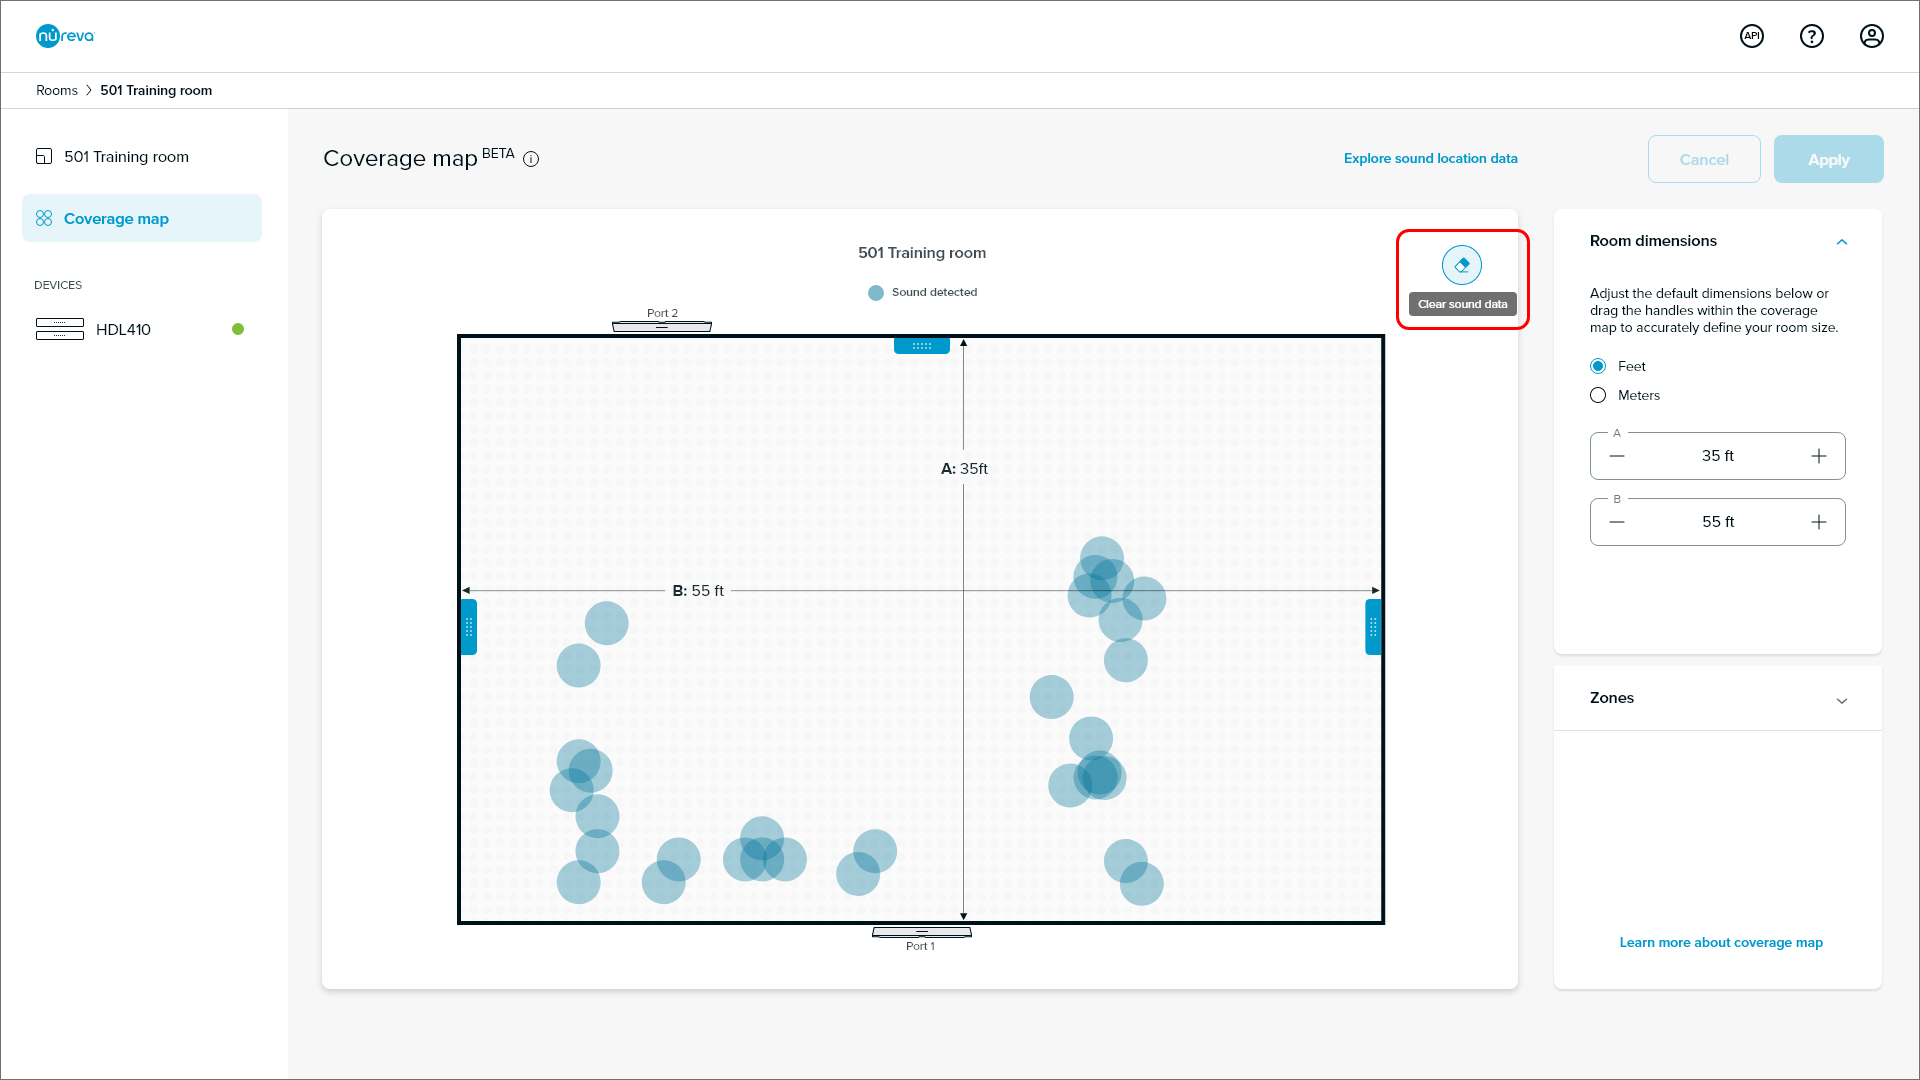
Coverage map before clearing the data
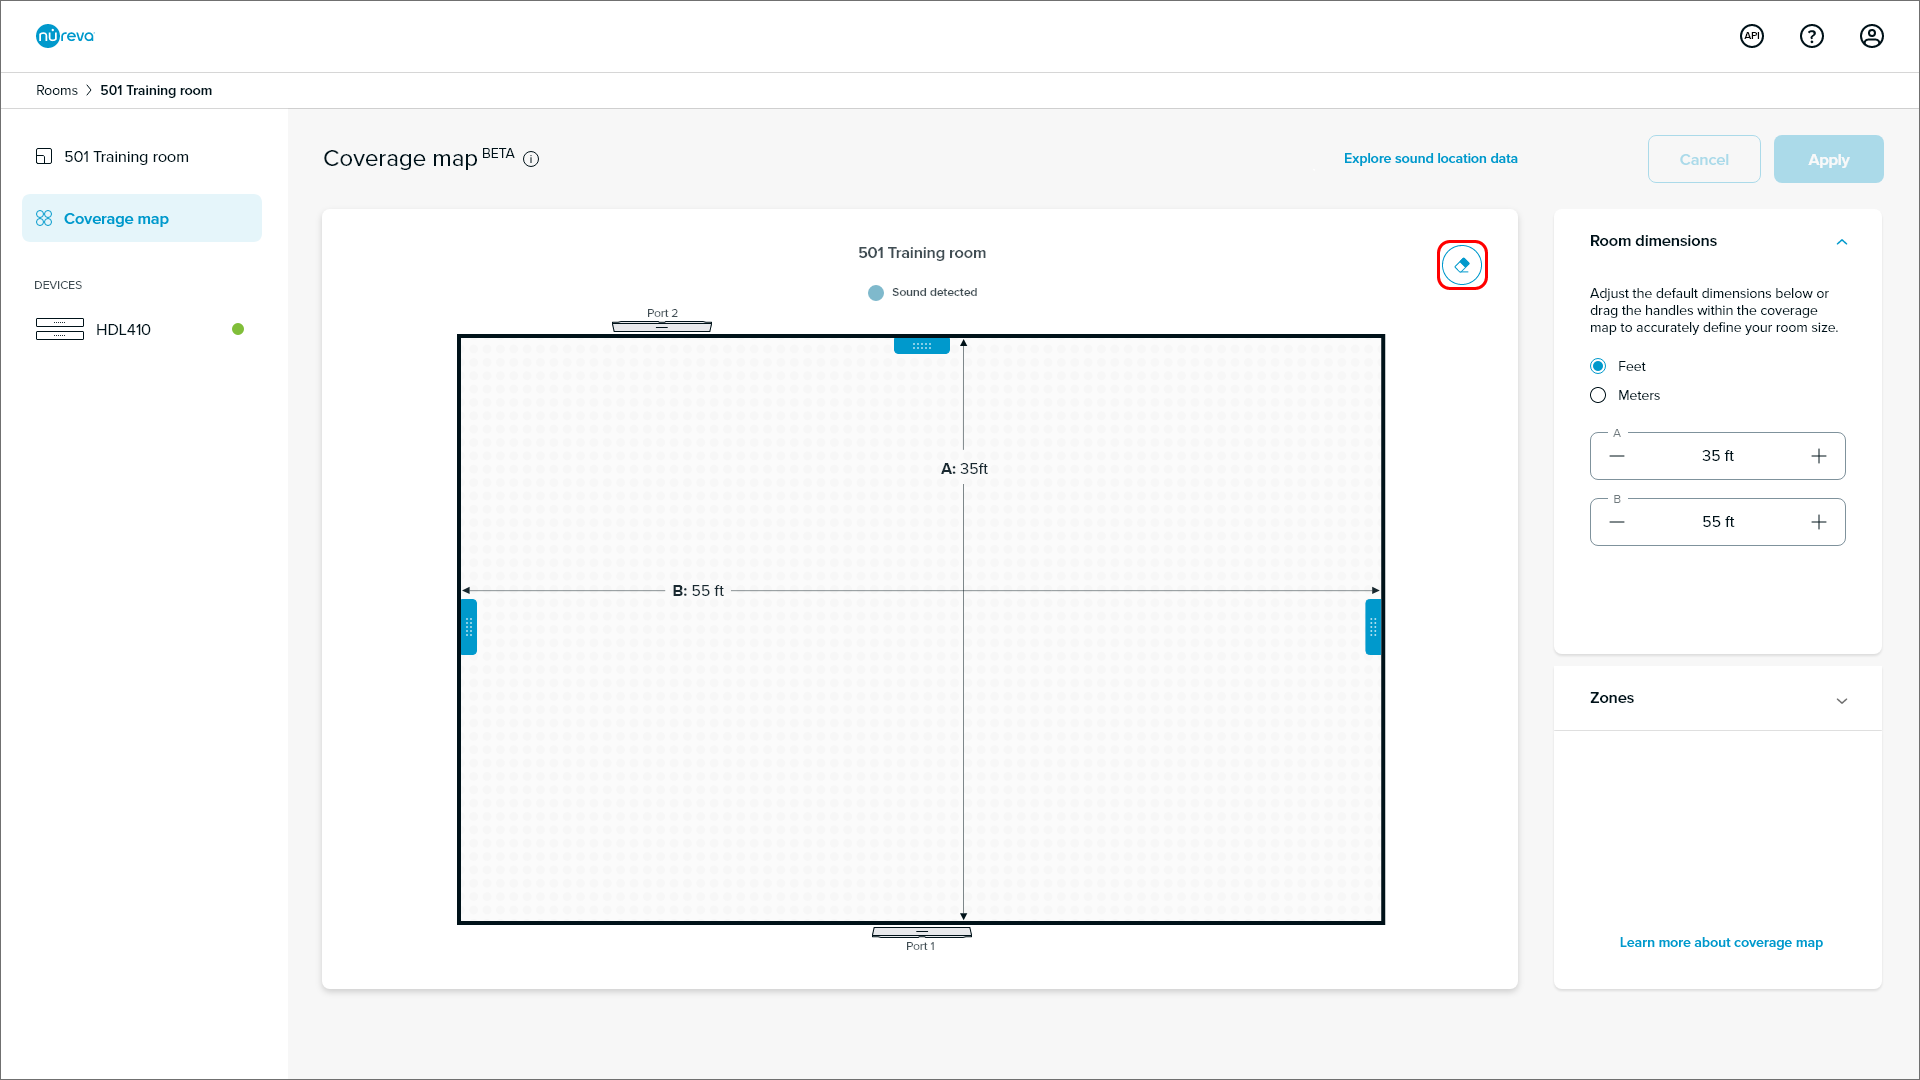
Coverage map after clearing the data
DeleteZones on the coverage map
A zone defines an approximate area within a room. The data to map each zone, as well as the indication of when a sound is detected within each zone, is used to facilitate camera switching.
Creating a zone
- Open the Zones accordion on the coverage map page
- Press the Create zone button
 |
- A zone will appear at the center of the coverage map
- Drag the zone within the Coverage map to the approximate location in the room
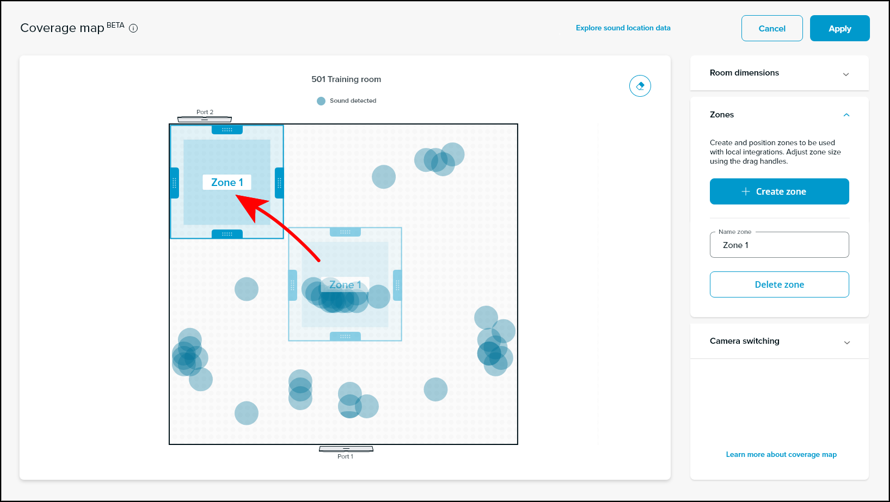 |
- Adjust the zone to the desired size using the drag handles
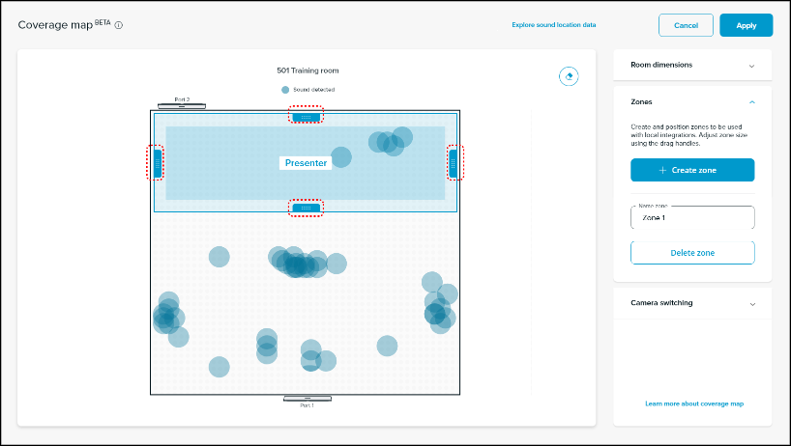 |
-
Edit the zone name to associate it with a camera input and coverage
- For example, if Camera 1 is focused on the front of the classroom, use Front of class for the zone name
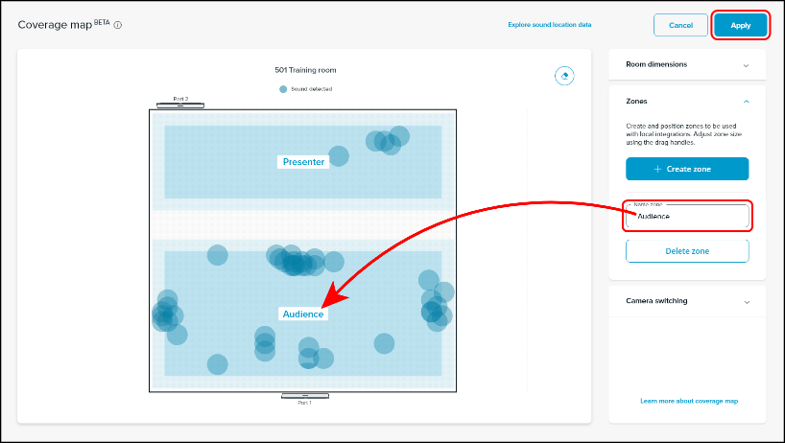 |
- Press Apply to save the zone
Zones can be deleted at any time by opening the zone accordion, selecting the zone from the coverage map and then pressing the Delete zone button.
Testing zones
Zones can be tested by speaking in the desired zone area within the room. It is recommended the tester speak for at least one minute while moving to all the edges of the zone being defined. As sound location data is captured and displayed on the coverage map, it will help confirm the zone position and size. The sound location data refreshes every minute.
Adjust the zone size and position if required. All sound data above 45 dB will be shown on the coverage map but only data above 60 dB for a specified length of time will be used to initiate a camera switch. Zones cannot be applied if:
- Zone(s) are positioned outside the room borders
- Zone(s) are overlapping
- Zone(s) does not have a name
- Zones have the same name
- Zone(s) name exceeds 50 characters