Windows
Follow these steps to set up the Nureva audio conferencing system as the default audio device.
- Locate and click on the speaker icon in the bottom right corner of the desktop
- Right-click Sounds
- The Windows sound settings window will open
In Windows sound settings
-
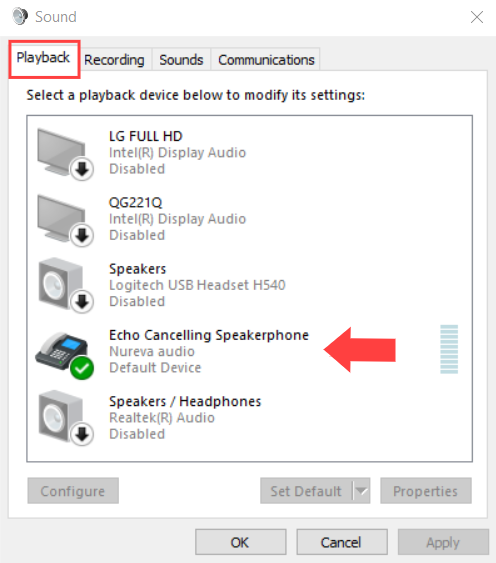
Select the Playback tab
-
Select Echo Cancelling Speakerphone
- HDL200, HDL300 or Nureva audio may also be shown as well
- Locate and open the drop-down menu at the bottom of the panel
- Choose Set as the Default Communication device
- Select Echo Cancelling Speakerphone (Nureva audio)
- Open the drop-down menu again
- Choose Set as the Default device
-
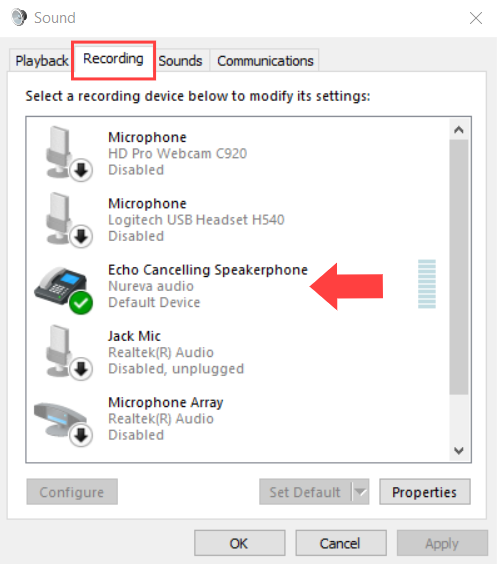
Select Echo Cancelling Speakerphone
-
Select the Recording tab
- Locate and open the drop-down menu at the bottom of the panel
- Choose Set as the Default Communication device
- Select Echo Cancelling Speakerphone (Nureva audio)
- Open the drop-down menu again
- Choose Set as the Default device
 |
 |
Once the sound settings have been set to the Nureva audio conferencing system, close the sound settings window and return to the desktop.
macOS
Follow these steps to set up the Nureva audio conferencing system as the default audio device.
In the computer's sound settings
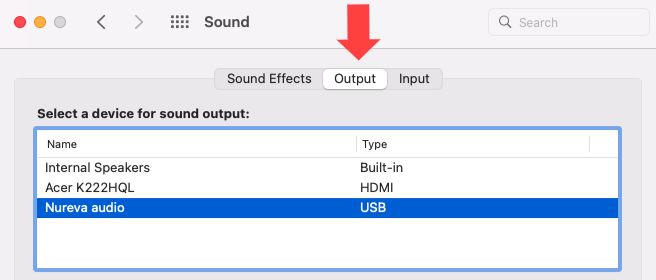
- Click on the Apple® icon in the top left corner of the desktop
- Select System Preferences
- Select Sound
- Choose the Output tab
- Select HDL200, HDL300 or Nureva audio
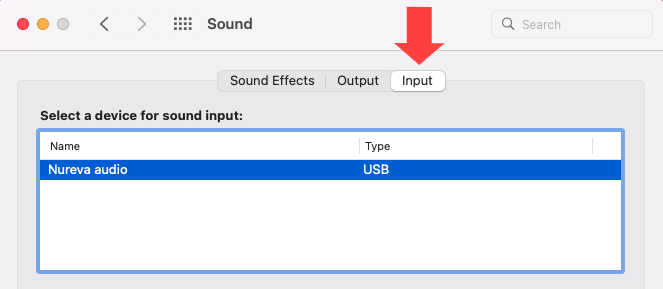
- Choose the Input tab
- Select HDL200, HDL300 or Nureva audio
 |
 |
Once the sound settings have been set to the Nureva audio conferencing system, close the sound settings window and return to the desktop.
Delete