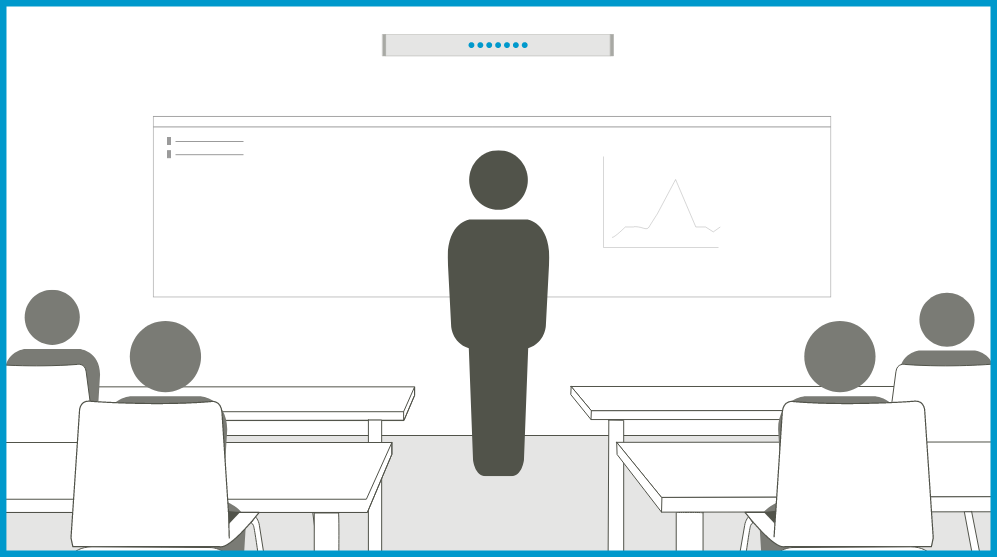
The CV30 camera features automated tracking that uses the 4K image sensor, 84O field of view (FOV) and electronic pan, tilt, zoom (ePTZ) capability to maintain the view of the instructor in the class. The instructor is able to move freely within the classroom view creating an enriched learning experience for the remote students.
Tracking OFF
|
Tracking ON
|
|
 |
||
The camera view is fixed or controlled by the remote. |
The camera view will automatically adjust to maintain the view of the instructor. |
Using tracking:
Pressing the tracking button on the remote will turn the tracking feature on. Through the on-screen display menu, adjustments can be made to the zoom level, area and mode. The default settings for tracking are:
- Automated: Off
- Zoom level: Medium
- Area: Full
- Mode: Auto
Depending on the tracking mode, one person or multiple people in the view will be tracked at a time. The camera view will zoom, pan or tilt to track the selected people. When there is nobody in the tracking area the camera will zoom out to the full view.
Please see the articles below for more information about using the remote control, setting tracking modes and adjusting the tracking area.
In scenarios where the presenter would like to move throughout the room and provide a more engaging environment, allow the camera to track the primary presentation area. This creates a dedicated presentation view for the remote participants as well as a more fluid and less restrictive experience
For scenarios when the local and remote participants need to focus solely on a dedicated area, pressing any of the preset camera buttons on the remote (1, 2 or 3) will stop tracking and switch to the specific preset view. Tracking can easily be enabled again by pressing the tracking buttons on the remote.
Turning on and off automated tracking
Automated tracking can be turned on or off with the remote control, or through the on-screen display (OSD) menu.
Using the remote control
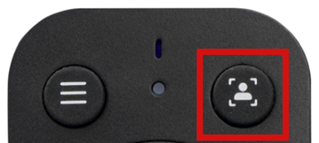
- Press the Tracking button on the top, right corner of the remote to turn on/off tracking
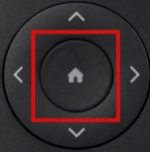
- Press the Home button on the remote to return the camera to full view
Through the OSD menu
- Open an application that accesses the camera
- To view the on-screen display (OSD) the camera must be active
- If there are multiple cameras connected to the computer, ensure that the CV30 is active
- Once the application launches the camera view should be visible
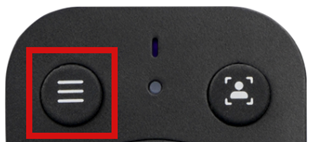
- Press Menu on the remote to launch the OSD menu
- Navigate to Tracking and press the Home button on the remote to enter the tracking settings
- Navigate to Automated
- Use the right/left arrows on the remote control to turn on/off automated tracking
- Press the Menu button to exit the OSD or select Back from the menu to return to the main OSD menu
Tracking ON / OFF
Press Menu on the remote to launch on the onscreen display.
Navigate down to the settings
- Press the tracking button again on the remote to turn off tracking and return the camera to the full view.
- Press any of the preset buttons if presets have been defined. The view of the camera
- Press the home button on the remote will return the camera to the full view.
 |
 |
 |
Menu |
Home |
Tracking |
Zoom level
The CV30 camera offers three zoom levels for automated tracking. Users have the choice between Low, Medium (default) and High settings.
- Press Menu on the remote to launch the OSD menu
- Navigate to Tracking and press the Home button on the remote to enter the tracking settings
- Navigate to Zoom level
- Use the right/left arrows on the remote control to choose Low, Medium or High
- Press the Menu button to exit the OSD or select Back from the menu to return to the main OSD menu
Area
The CV30 camera offers three tracking areas. Users have the choice between Full (default), Top 2/3 and Top half settings.
- Open an application that accesses the camera
- To view the on-screen display (OSD) the camera must be active
- If there are multiple cameras connected to the computer, ensure that the CV30 is active
- Once the application launches the camera view should be visible
- Press Menu on the remote to launch the OSD menu
- Navigate to Tracking and press the Home button on the remote to enter the tracking settings
- Navigate to Area
- Use the right/left arrows on the remote control to choose Full, Top 2/3 or Top half
- Press the Menu button to exit the OSD or select Back from the menu to return to the main OSD menu
|
Full
The camera will look for a person to track within the full view of the camera. When the camera tracking is set to full there is a higher chance that a student's movement may be tracked.
|
||
|
Top 2/3 (default)
The camera will look for a person who is visible in the top 2/3's of the full camera view.
|
||
|
Top half
The camera will look for a person who is visible in the top half of the full camera view.
|
NOTE: The images shown in this article are for representational purposes only.
Mode
The CV30 camera has three modes that can be selected for tracking through the OSD menu. The number of people that you want to track will determine the mode to choose.
Manual - This mode tracks the first or selected person that is detected in the field of view and only tracks one person at a time.
Auto (default) - The auto mode tracks the first or selected person that is detected. This mode will automatically switch to group tracking when the tracked person is not distinguishable by the camera
Group - All of the people detected in the FOV will be tracked.
- Open an application that accesses the camera
- To view the on-screen display (OSD) the camera must be active
- If there are multiple cameras connected to the computer, ensure that the CV30 is active
- Once the application launches the camera view should be visible
- Press Menu on the remote to launch the OSD menu
- Navigate to Tracking and press the Home button on the remote to enter the tracking settings
- Navigate to Mode
- Use the right/left arrows on the remote control to choose Manual, Auto or Group
- Press the Menu button to exit the OSD or select Back from the menu to return to the main OSD menu