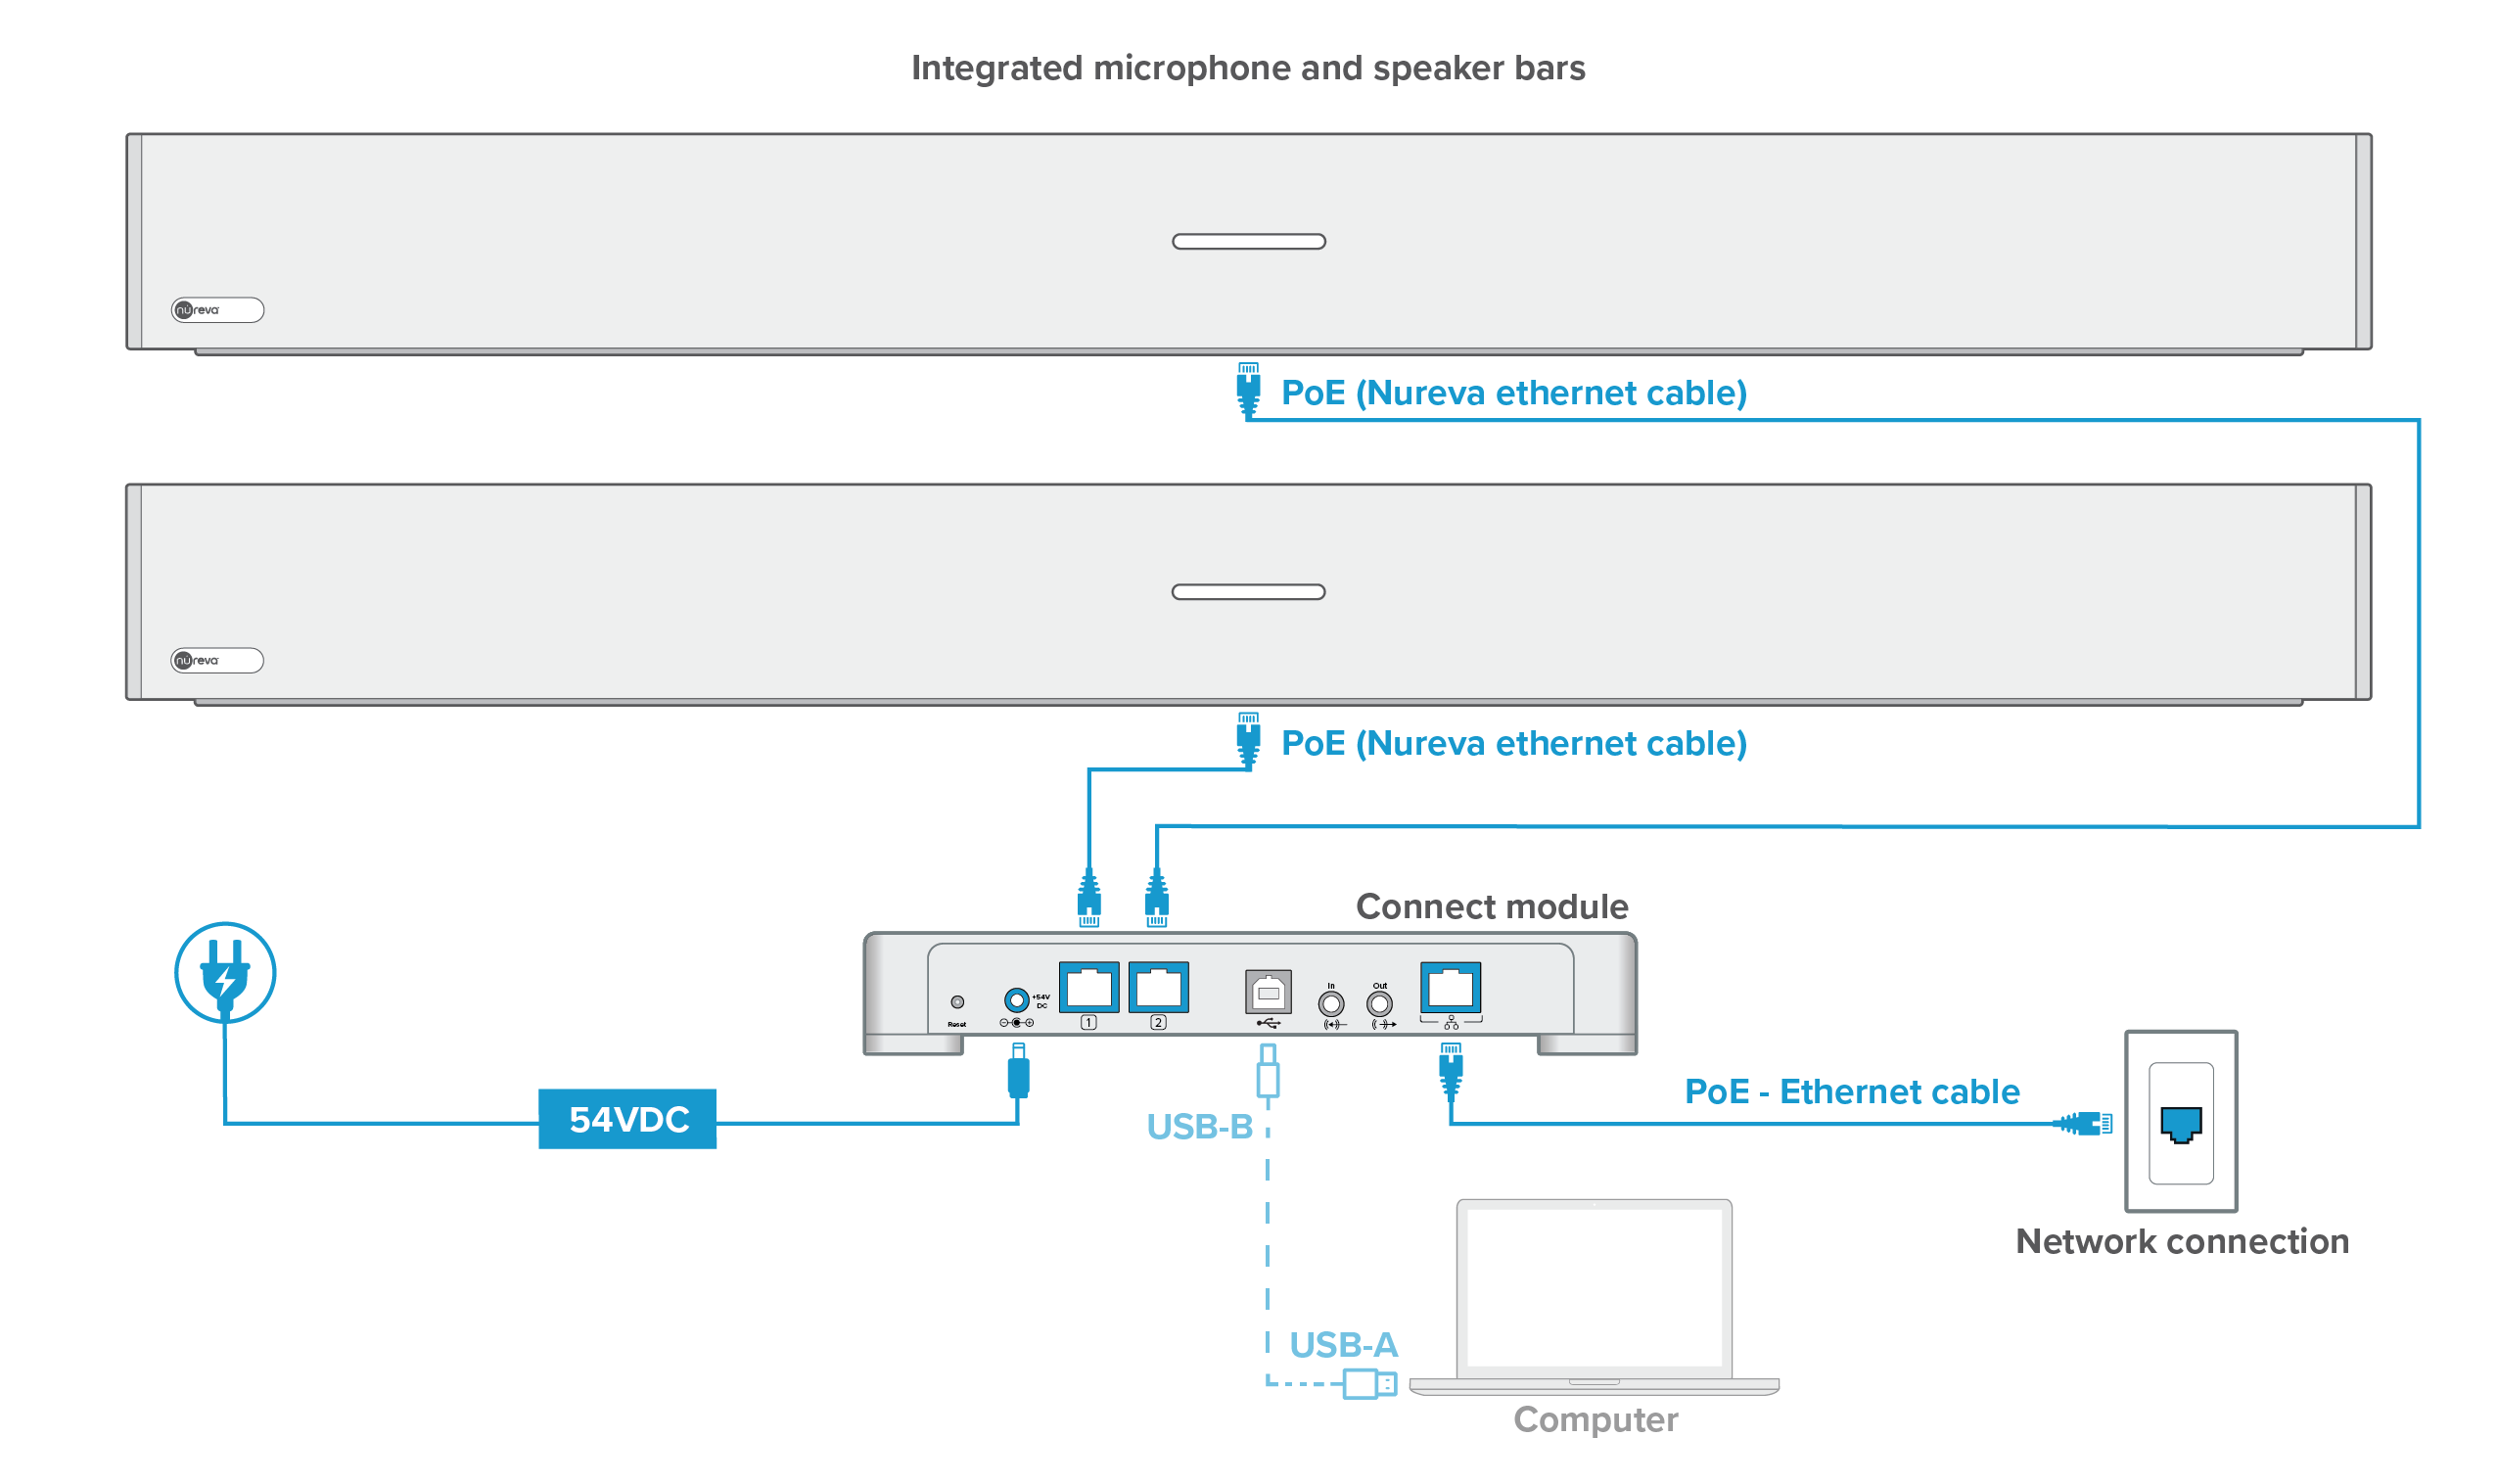
Connecting the HDL410 system
- Connect the provided Ethernet cables to RJ45-1 and RJ45-2 ports on the connect module
- Run the Ethernet cables to the RJ45 ports on each microphone and speaker bar
- Connect your own CAT5E Ethernet cable to the network port on the back of the connect module
- Plug the CAT5E Ethernet cable into an available network port (router, modem, wall jack)
- Connect the provided power supply to the connect module and plug it into an available outlet or power bar
- Once powered up the HDL410 will automatically calibrate
- Please remain quiet in the room until calibration is complete
- Once calibrated the HDL410 system may require a firmware update
Connecting a computer
To participate in an audio or video conference a computer is required.
- Using the provided USB cable, connect to the USB-B port on the connect module
- Run the cable to the computer, connecting to a USB-A port
Once the conference has been completed the computer can be removed from the connect module.
Overheating
- Do not block the vents on the top, bottom or back of the connect module
- Ensure adequate space between all vents and other objects to promote airflow and cooling
- These vents are required to keep the circuits from overheating
- Avoid installing the connect module in a confined space

Enrollment code
The HDL410 system is network-enabled, allowing easy enrollment into the Nureva Console cloud application. An enrollment code is provided on a label that is found at the bottom of the connect module. It is recommended to record the enrollment code before installing the connect module.

NOTE: This code is specific to the HDL410 system and cannot be used by other Nureva systems.