Nureva® audio conferencing systems can be configured to work with Unified Communications and Collaboration (UC&C) software by following the steps below. These instructions apply to the HDL200, HDL300, and Dual HDL300 audio conferencing systems.
Nureva Console and background noise analytics
An important aspect of adjusting your UC&C client's settings is an understanding of the background noise levels of your room. Nureva Console offers an analytics feature through the cloud application. The available analytics include background noise levels for enrolled devices.
- How to start up with Nureva Console client and enroll a device
-
About background noise level
- Getting started with Nureva Console Analytics
- Nureva Pro subscription features
To start, set your Nureva audio conferencing system as the default microphone and speaker.
Setting your default device
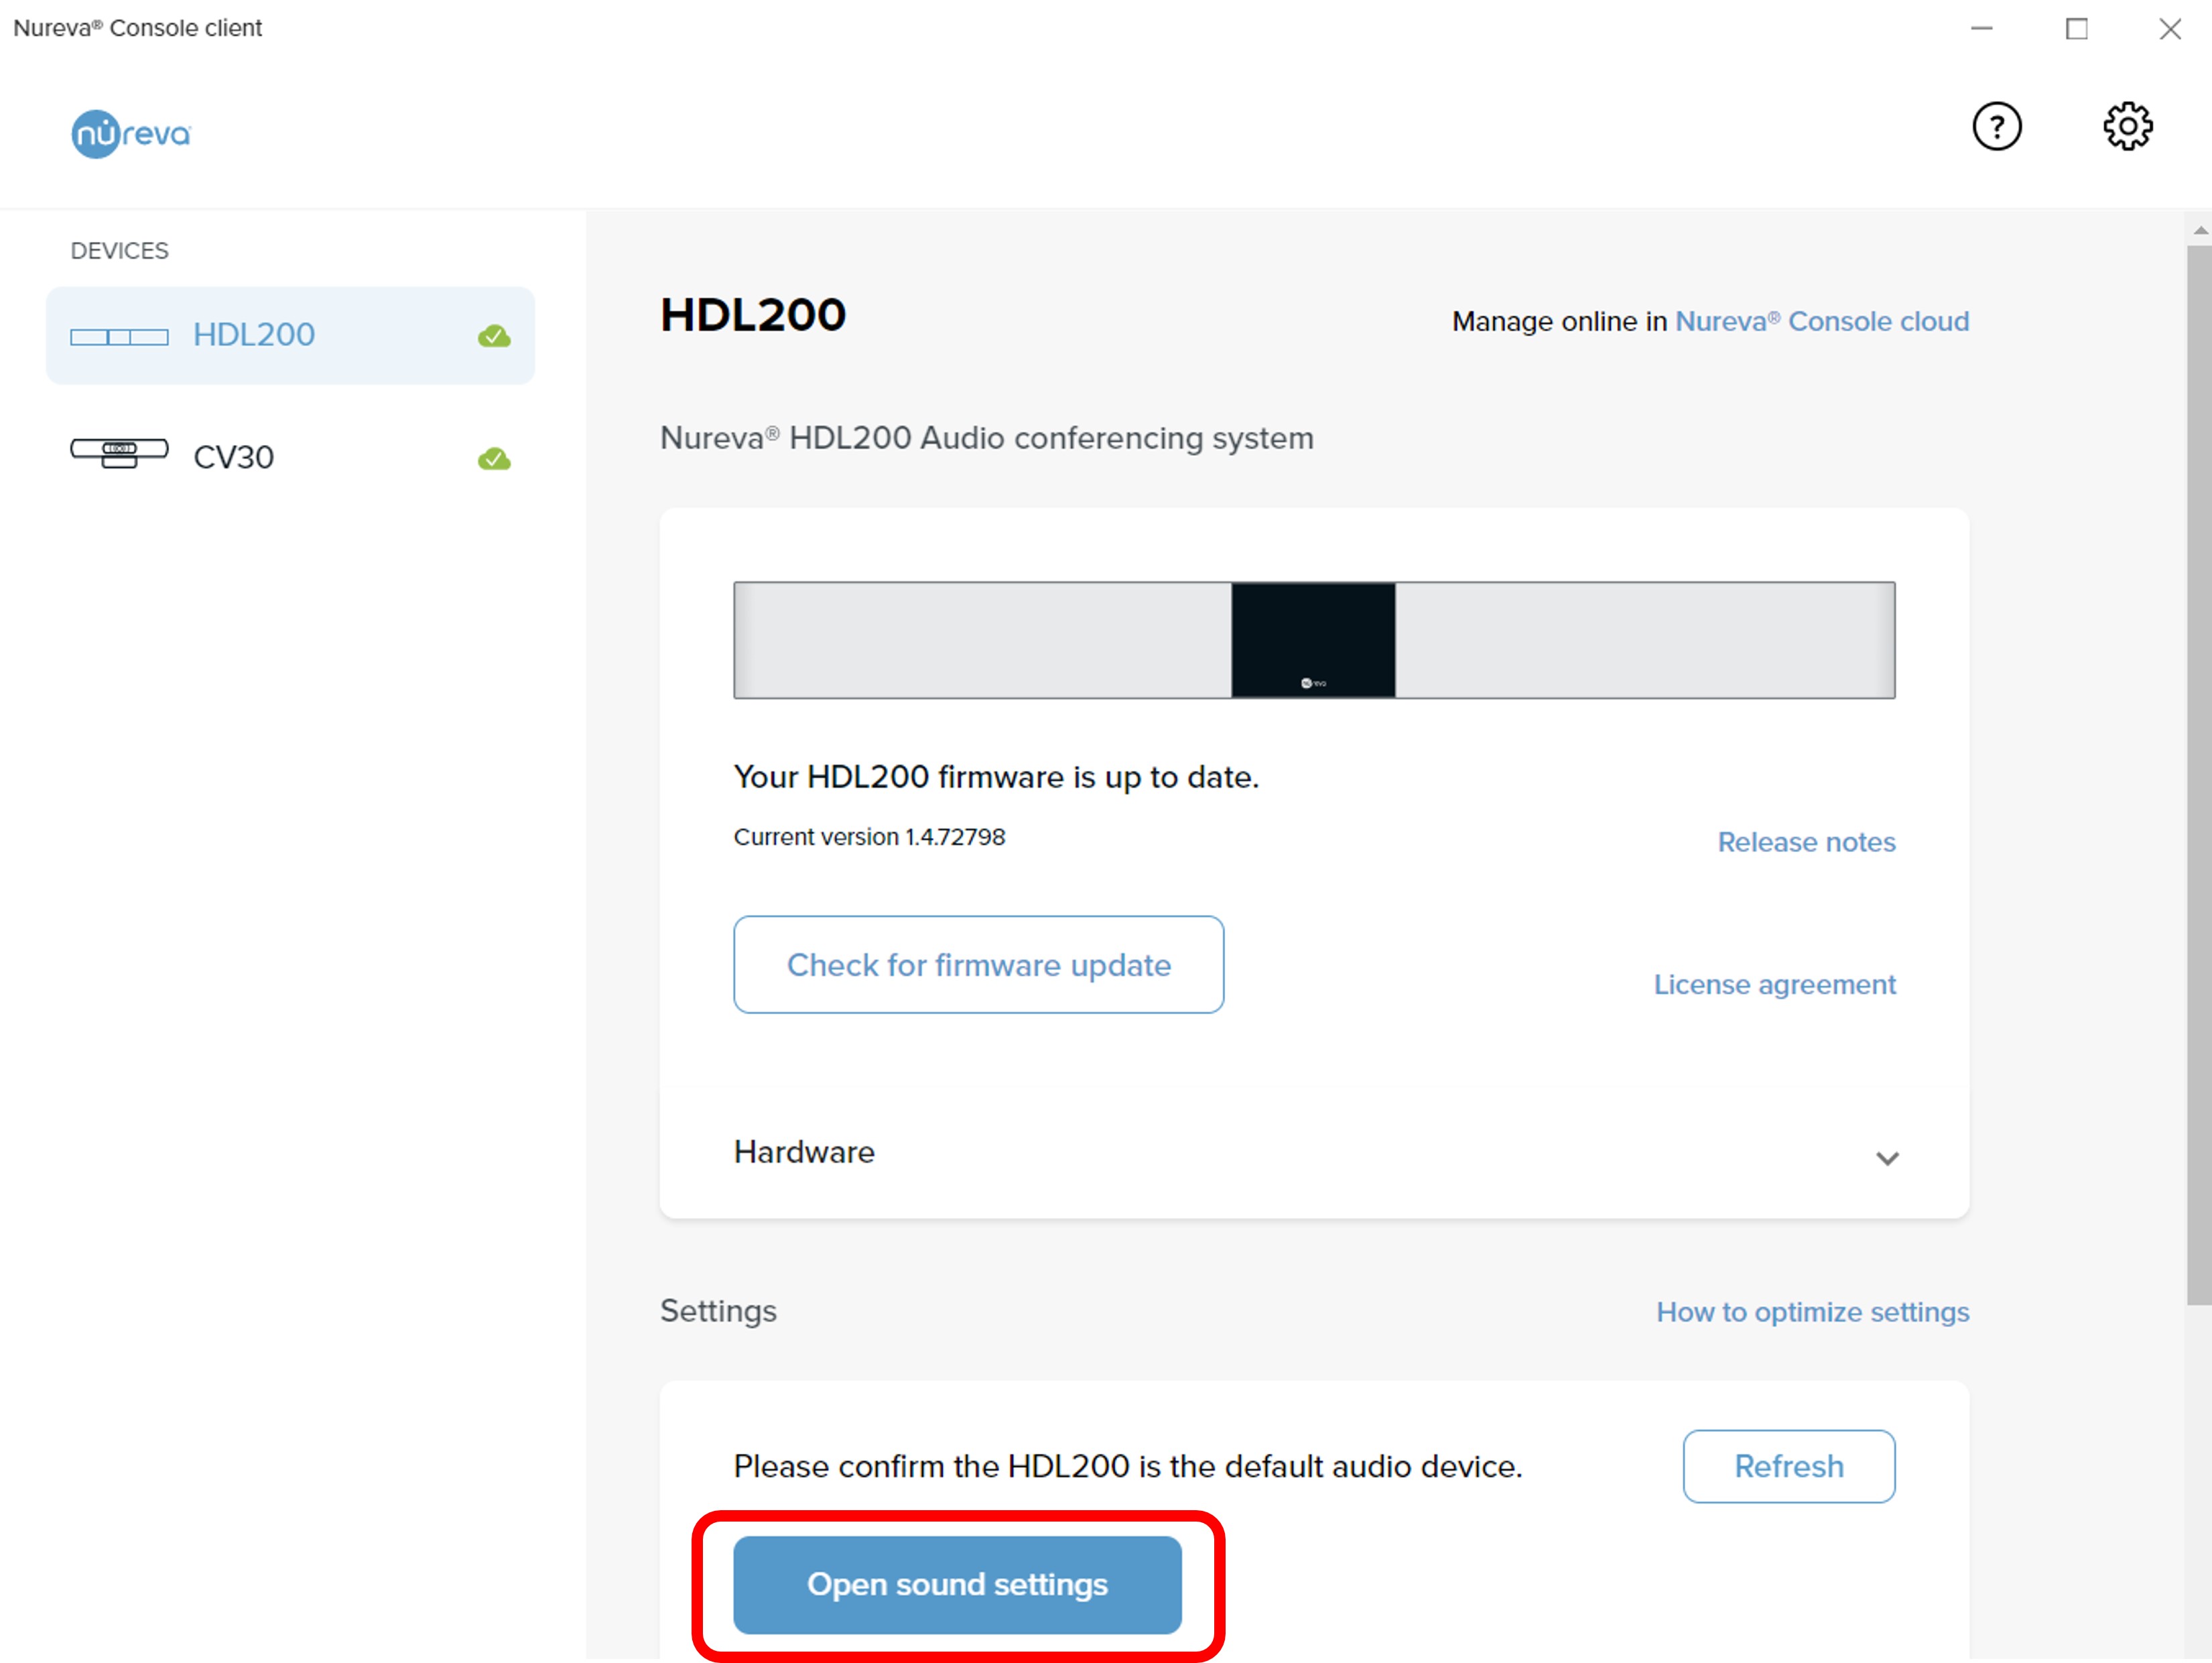
To ensure the Nureva audio conferencing system is ready for conference calls it must be set as the default audio and default communication device for playback and recording within the computer's sound settings.- Open Nureva Console client
- Select the audio conferencing device from the Devices list on the left of the dashboard
- Scroll down the page to Settings and select Open sound settings
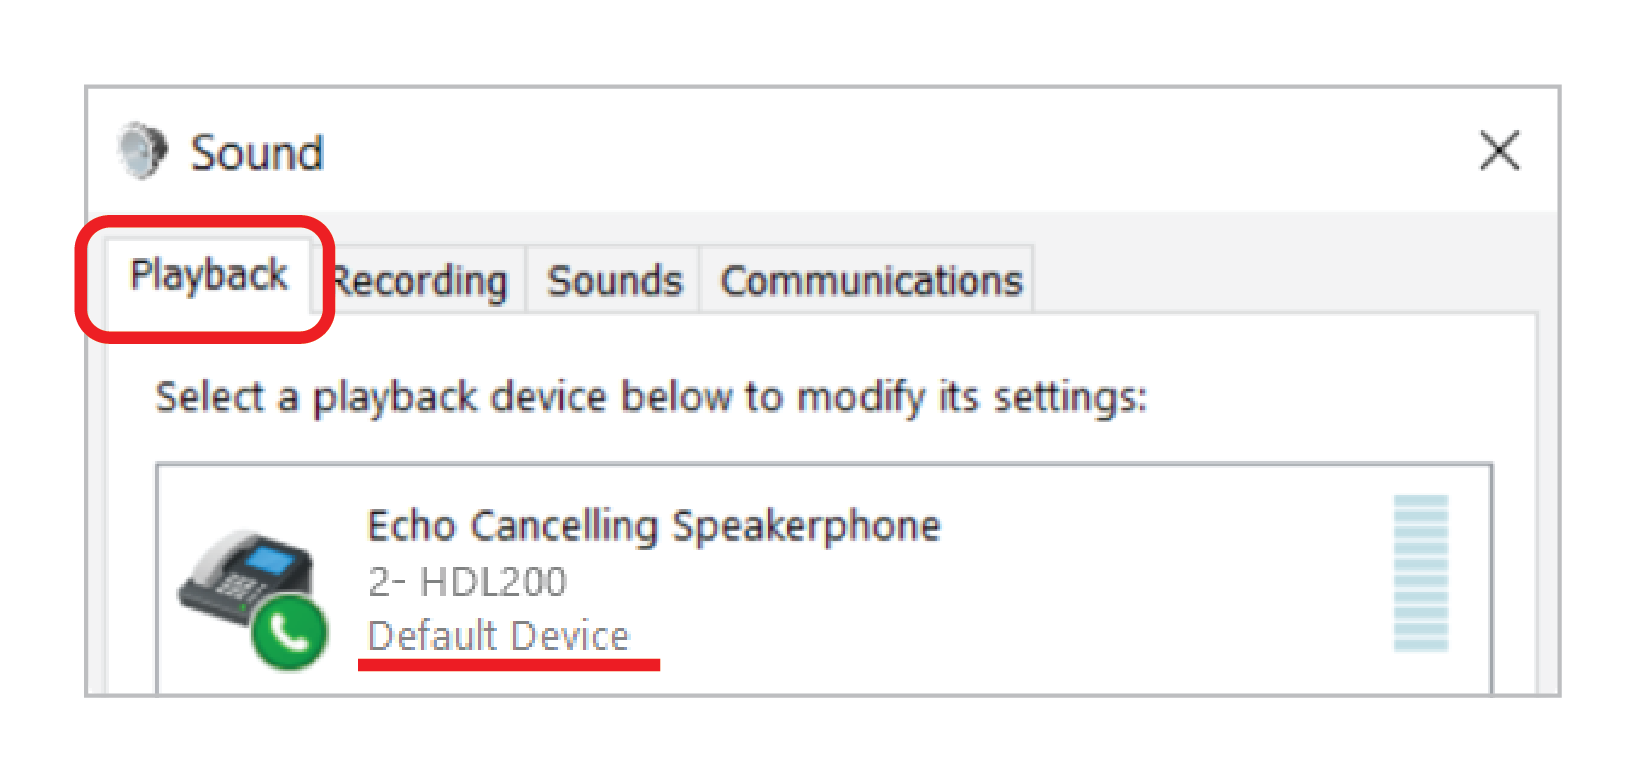
In Windows® sound settings
- Select the Playback tab
- Select Echo Cancelling Speakerphone (HDLxxx)
- Using the drop-down menu at the bottom of the panel, choose Set as Default Communication device
- Select Echo Cancelling Speakerphone (HDLxxx)
- Using the drop-down menu at the bottom of the panel, choose Set as Default device
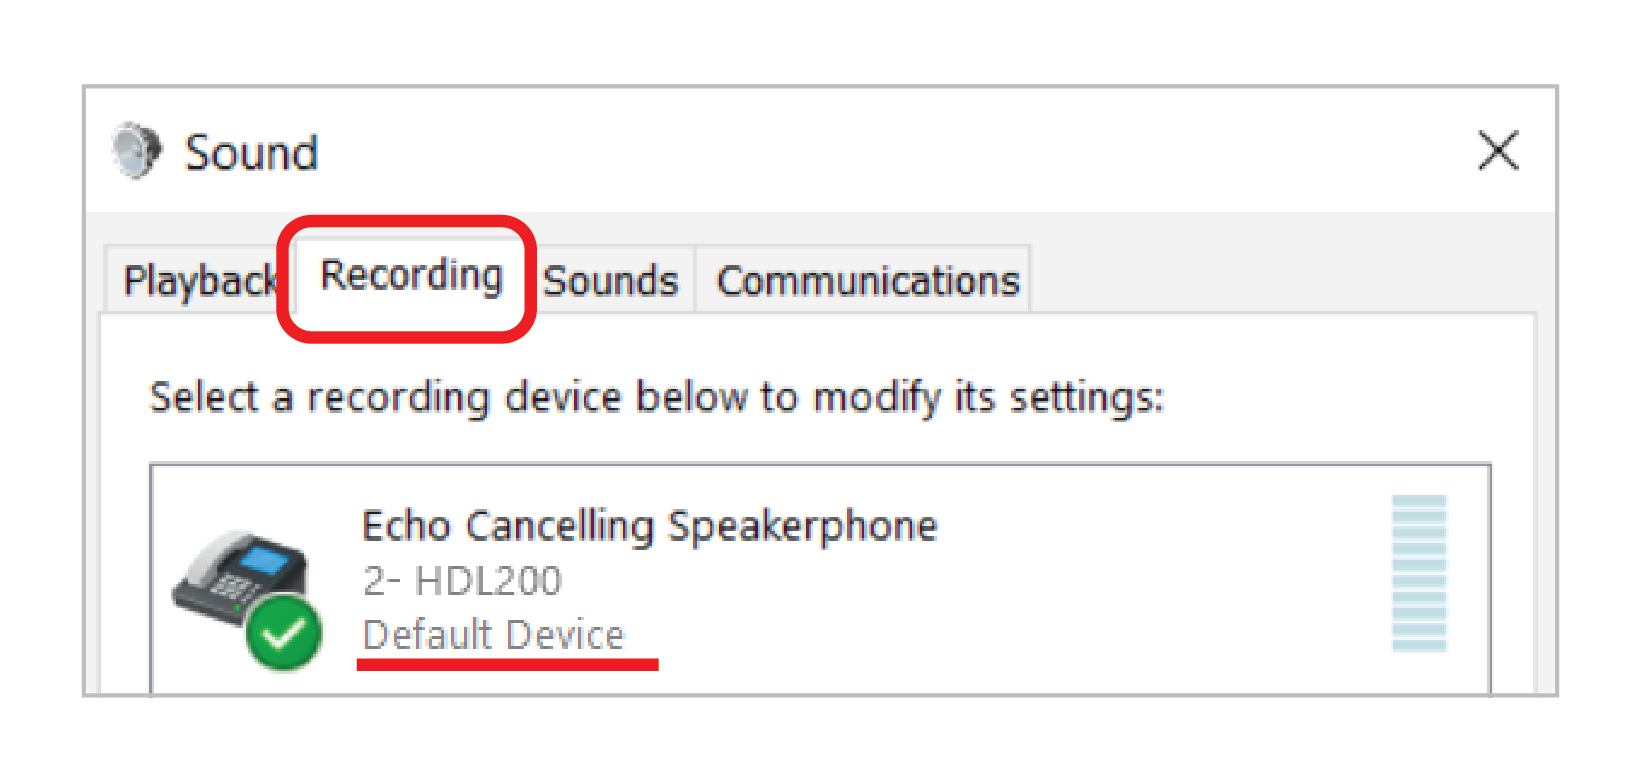
- Select the Recording tab
- Select Echo Cancelling Speakerphone (HDLxxx)
- Using the drop-down menu at the bottom of the panel, choose Set as Default Communication device
- Select Echo Cancelling Speakerphone (HDLxxx)
- Using the drop-down menu at the bottom of the panel, choose Set as Default device
Changing the volume
Adjustments to the input (microphones) or output (speakers) can be made using the Windows sound settings.
Adjusting the input (microphone) volume
From Nureva Console client
- Select the audio conferencing device from the Devices list on the left side of the dashboard
- Scroll down the page to Settings and select Open sound settings
From Windows sound settings
- Select the Recording tab
- Right-click on Echo Cancelling Speakerphone (HDLxxx)
- Select Properties
- Choose the Levels tab
- Adjust the audio level
- Click on OK
Adjusting the output (speaker) volume
From Nureva Console client
- Select the audio conferencing device from the Devices list on the left side of the dashboard
- Scroll down the page to Settings and select Open sound settings
From Windows sound settings
- Select the Playback tab
- Right-click on Echo Cancelling Speakerphone (HDLxxx)
- Select Properties
- Choose the Levels tab
- Adjust the audio level
- Click on OK
If you adjust the speaker or microphone volume in your audio conferencing software, the settings in your Windows system settings may not change. This inconsistency might make it difficult for you to get your audio conferencing system to an optimal input or output volume.
We recommend setting, and leaving, your audio conferencing software to a volume of approximately 80%. Then, when you need to change the system's input or output volume, adjust it using the Windows sound settings.
DeleteMicrosoft Teams desktop client
- In your main Microsoft Teams app, go to Settings
- In the Devices tab, ensure Automatically adjust mic sensitivity is ON
- Scroll down to Noise suppression
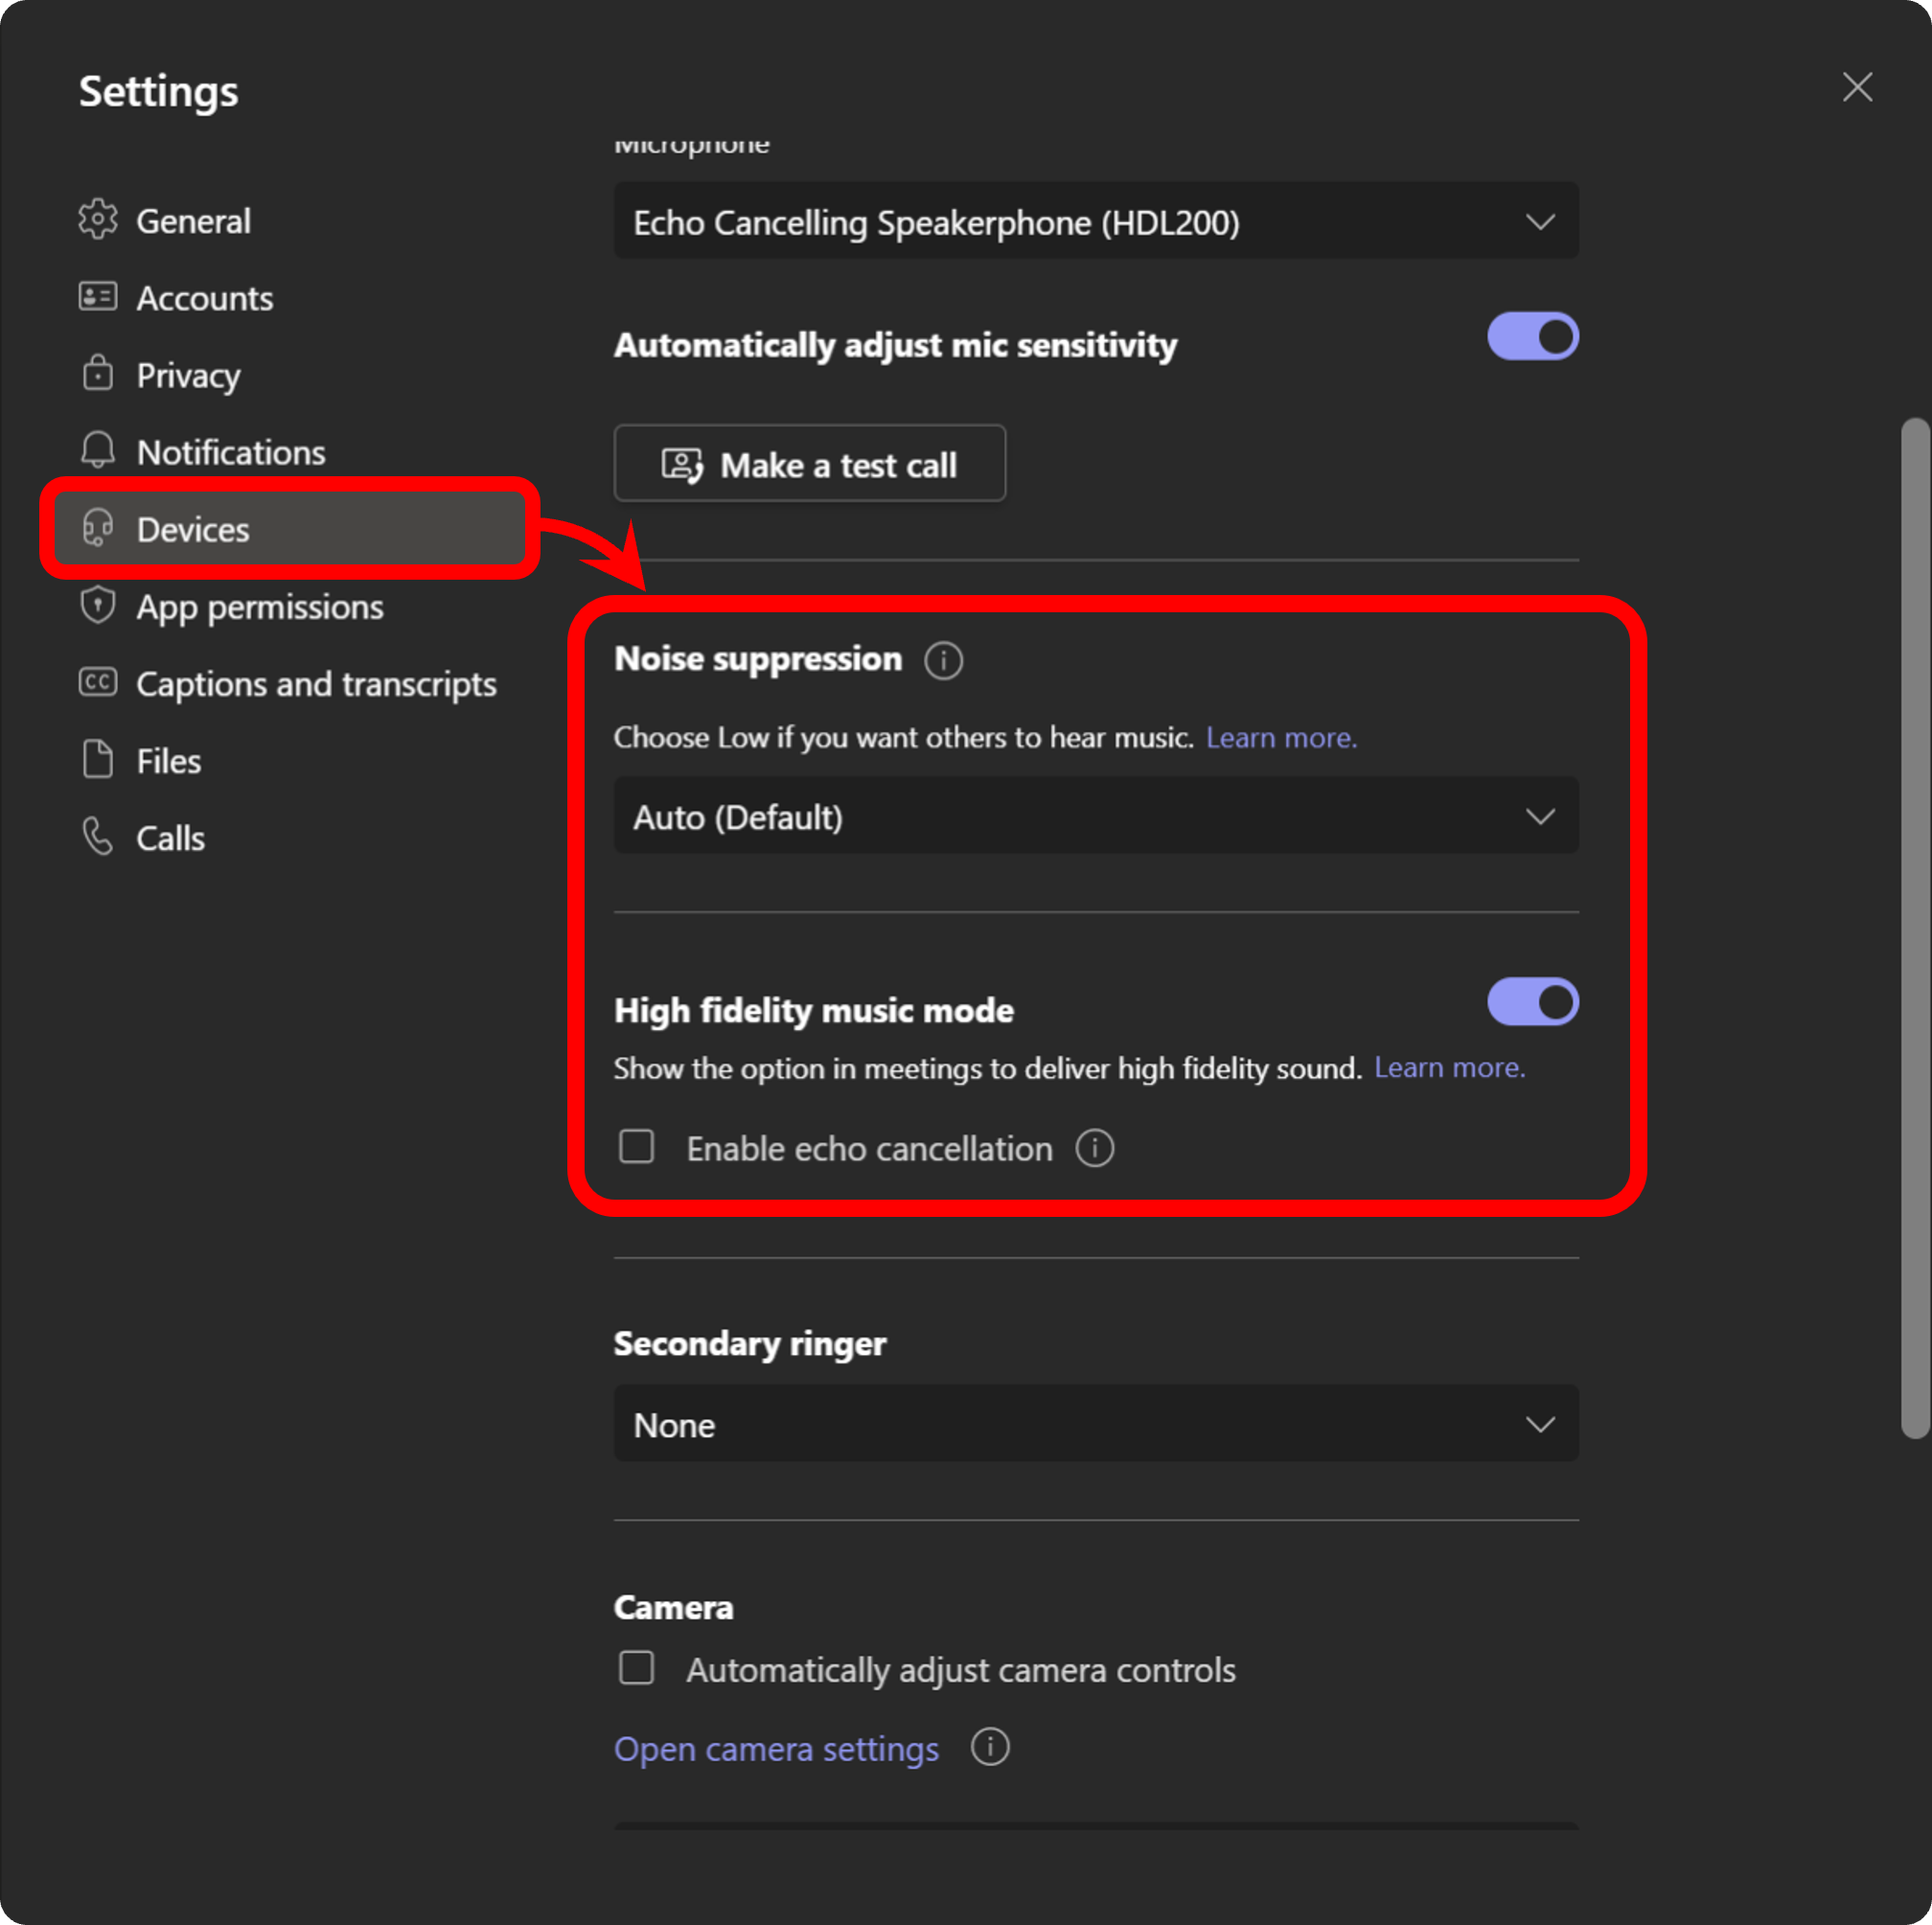
Auto (Default) - Select if your room has random or high background noise
Off - Select if your room has minimal background noise
Close the Settings menu
You will now be able to use your audio conferencing system with the Microsoft Teams desktop client.
Microsoft Teams Rooms
- Currently, there are no audio processing settings to change in Microsoft Teams Rooms.
NOTE: You can modify Nureva audio system audio processing settings by using Nureva Console.
DeleteZoom desktop client
- In your Zoom desktop client, navigate to Settings
- Select the Audio tab
- Scroll down to Suppress background noise

- Select the setting according to your environment or desired sound:
Auto - Select if your room has random or high background noise
Low - Select if your room has minimal background noise
- Ensure that the following options are NOT selected
- Show in-meeting option to enable "Original Sound"
- High fidelity music mode
- Echo cancellation
- Stereo audio
- Click on Advanced
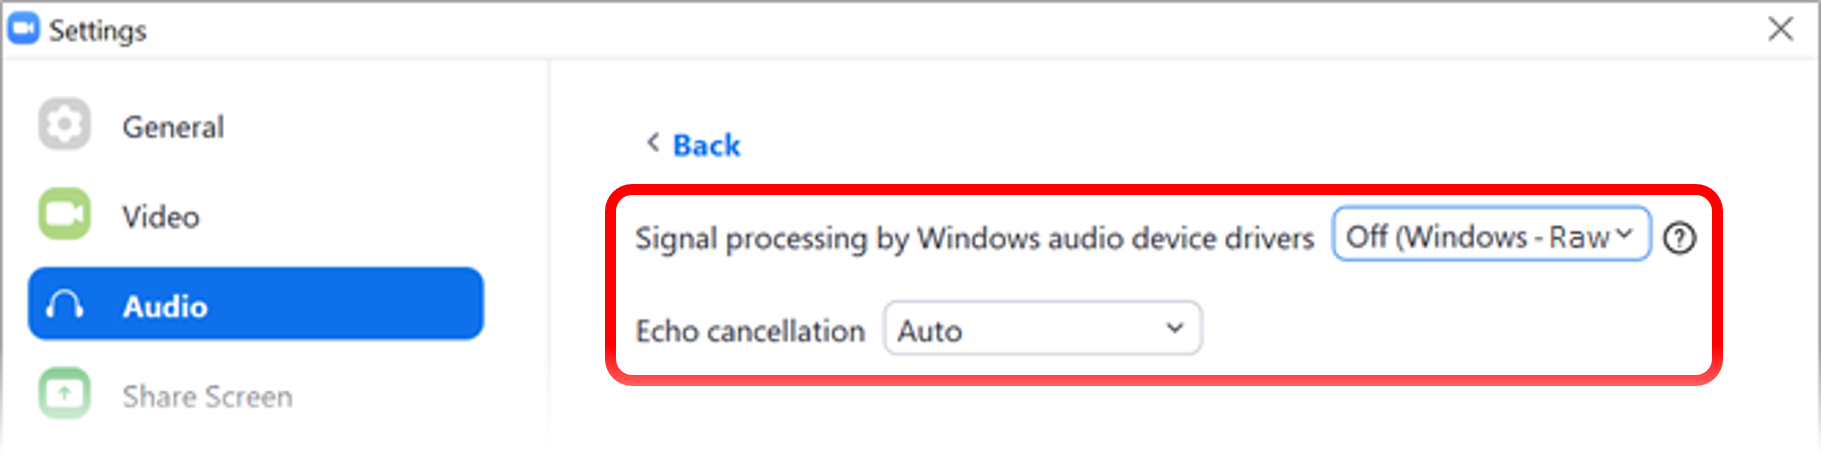
- Set Signal processing by Windows audio device drivers is set to Off (Windows - Raw)
- Set Echo cancellation to Auto
NOTE: Only continue to the next step if your room has high background noise
- Start a new meeting in Zoom
- In the top left corner of the Zoom Meeting window, click on Original Sound
- Select your Nureva audio device to always use Original Sound

You will now be able to use your audio conferencing system with the Zoom desktop client.
DeleteZoom Rooms settings
- On your Zoom Rooms controller, tap the gear in the top right
- Tap on the Microphone section
- Ensure Advanced Software Audio Processing is turned off
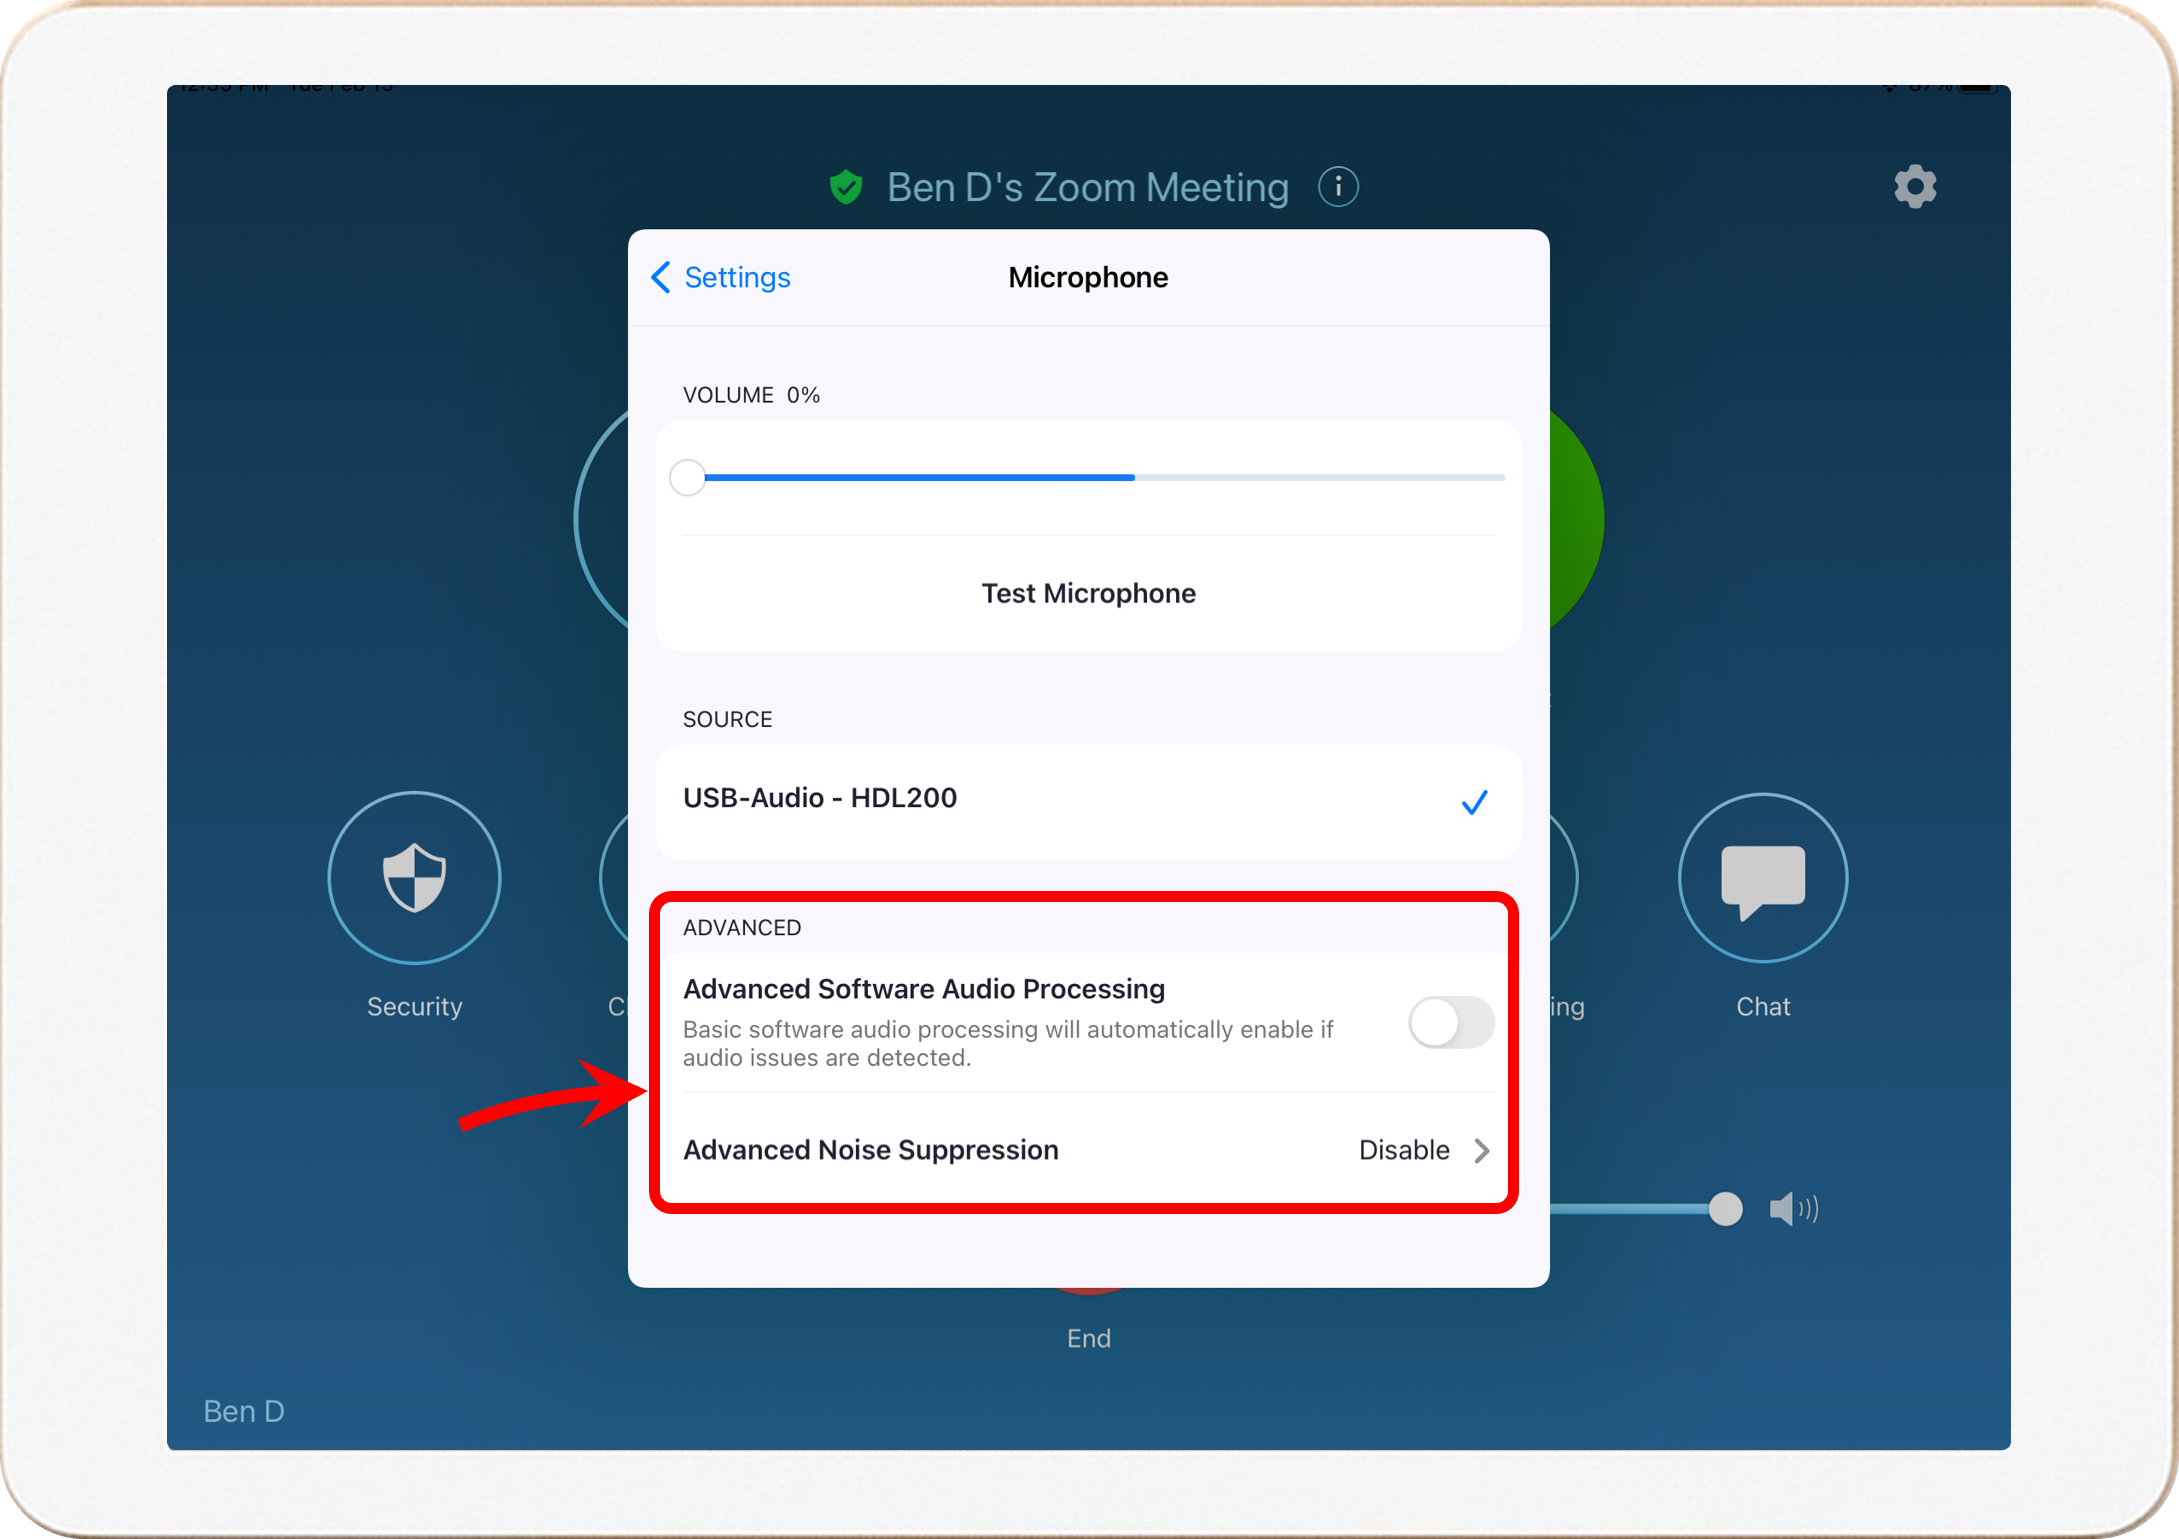
- Select Advanced Noise Suppression
- Choose Aggressive or Moderate if your room or meetings have medium to high background noise levels
- Disable this setting if your room or meetings do not have a lot of background noise levels
You will now be able to use your audio conferencing system with the Zoom Rooms application.
Google Meet settings
- Navigate to Google Meet on your browser
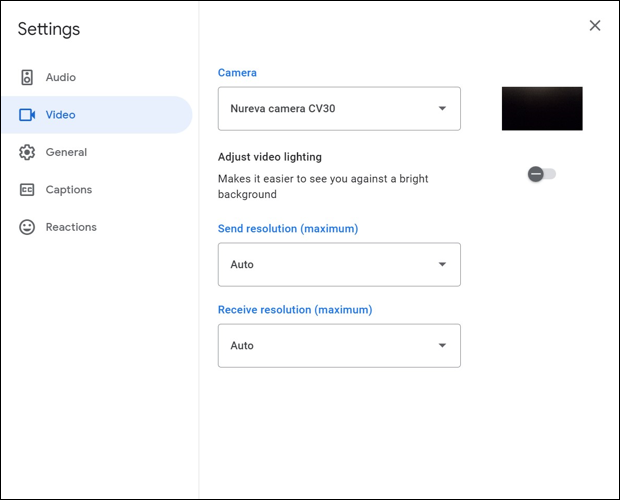
- Open the gear icon in the upper right of the home page
- Under Audio, select your Nureva audio device

- Under Video, select the Nureva CV30 camera
- Leave Send resolution and Receive resolution at Auto
Cisco WebEx settings
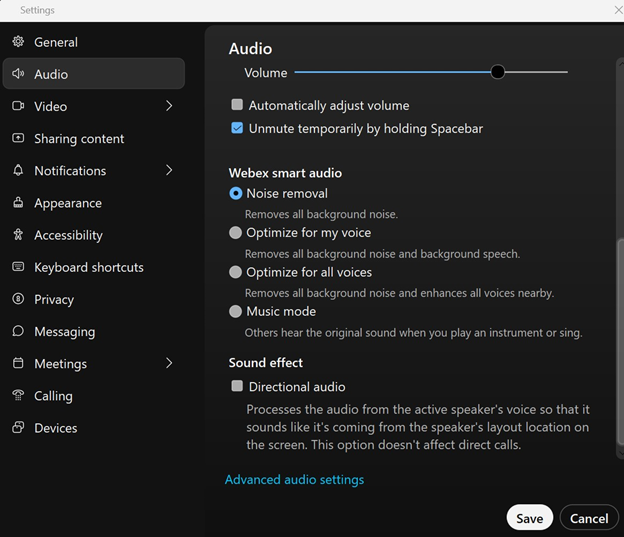
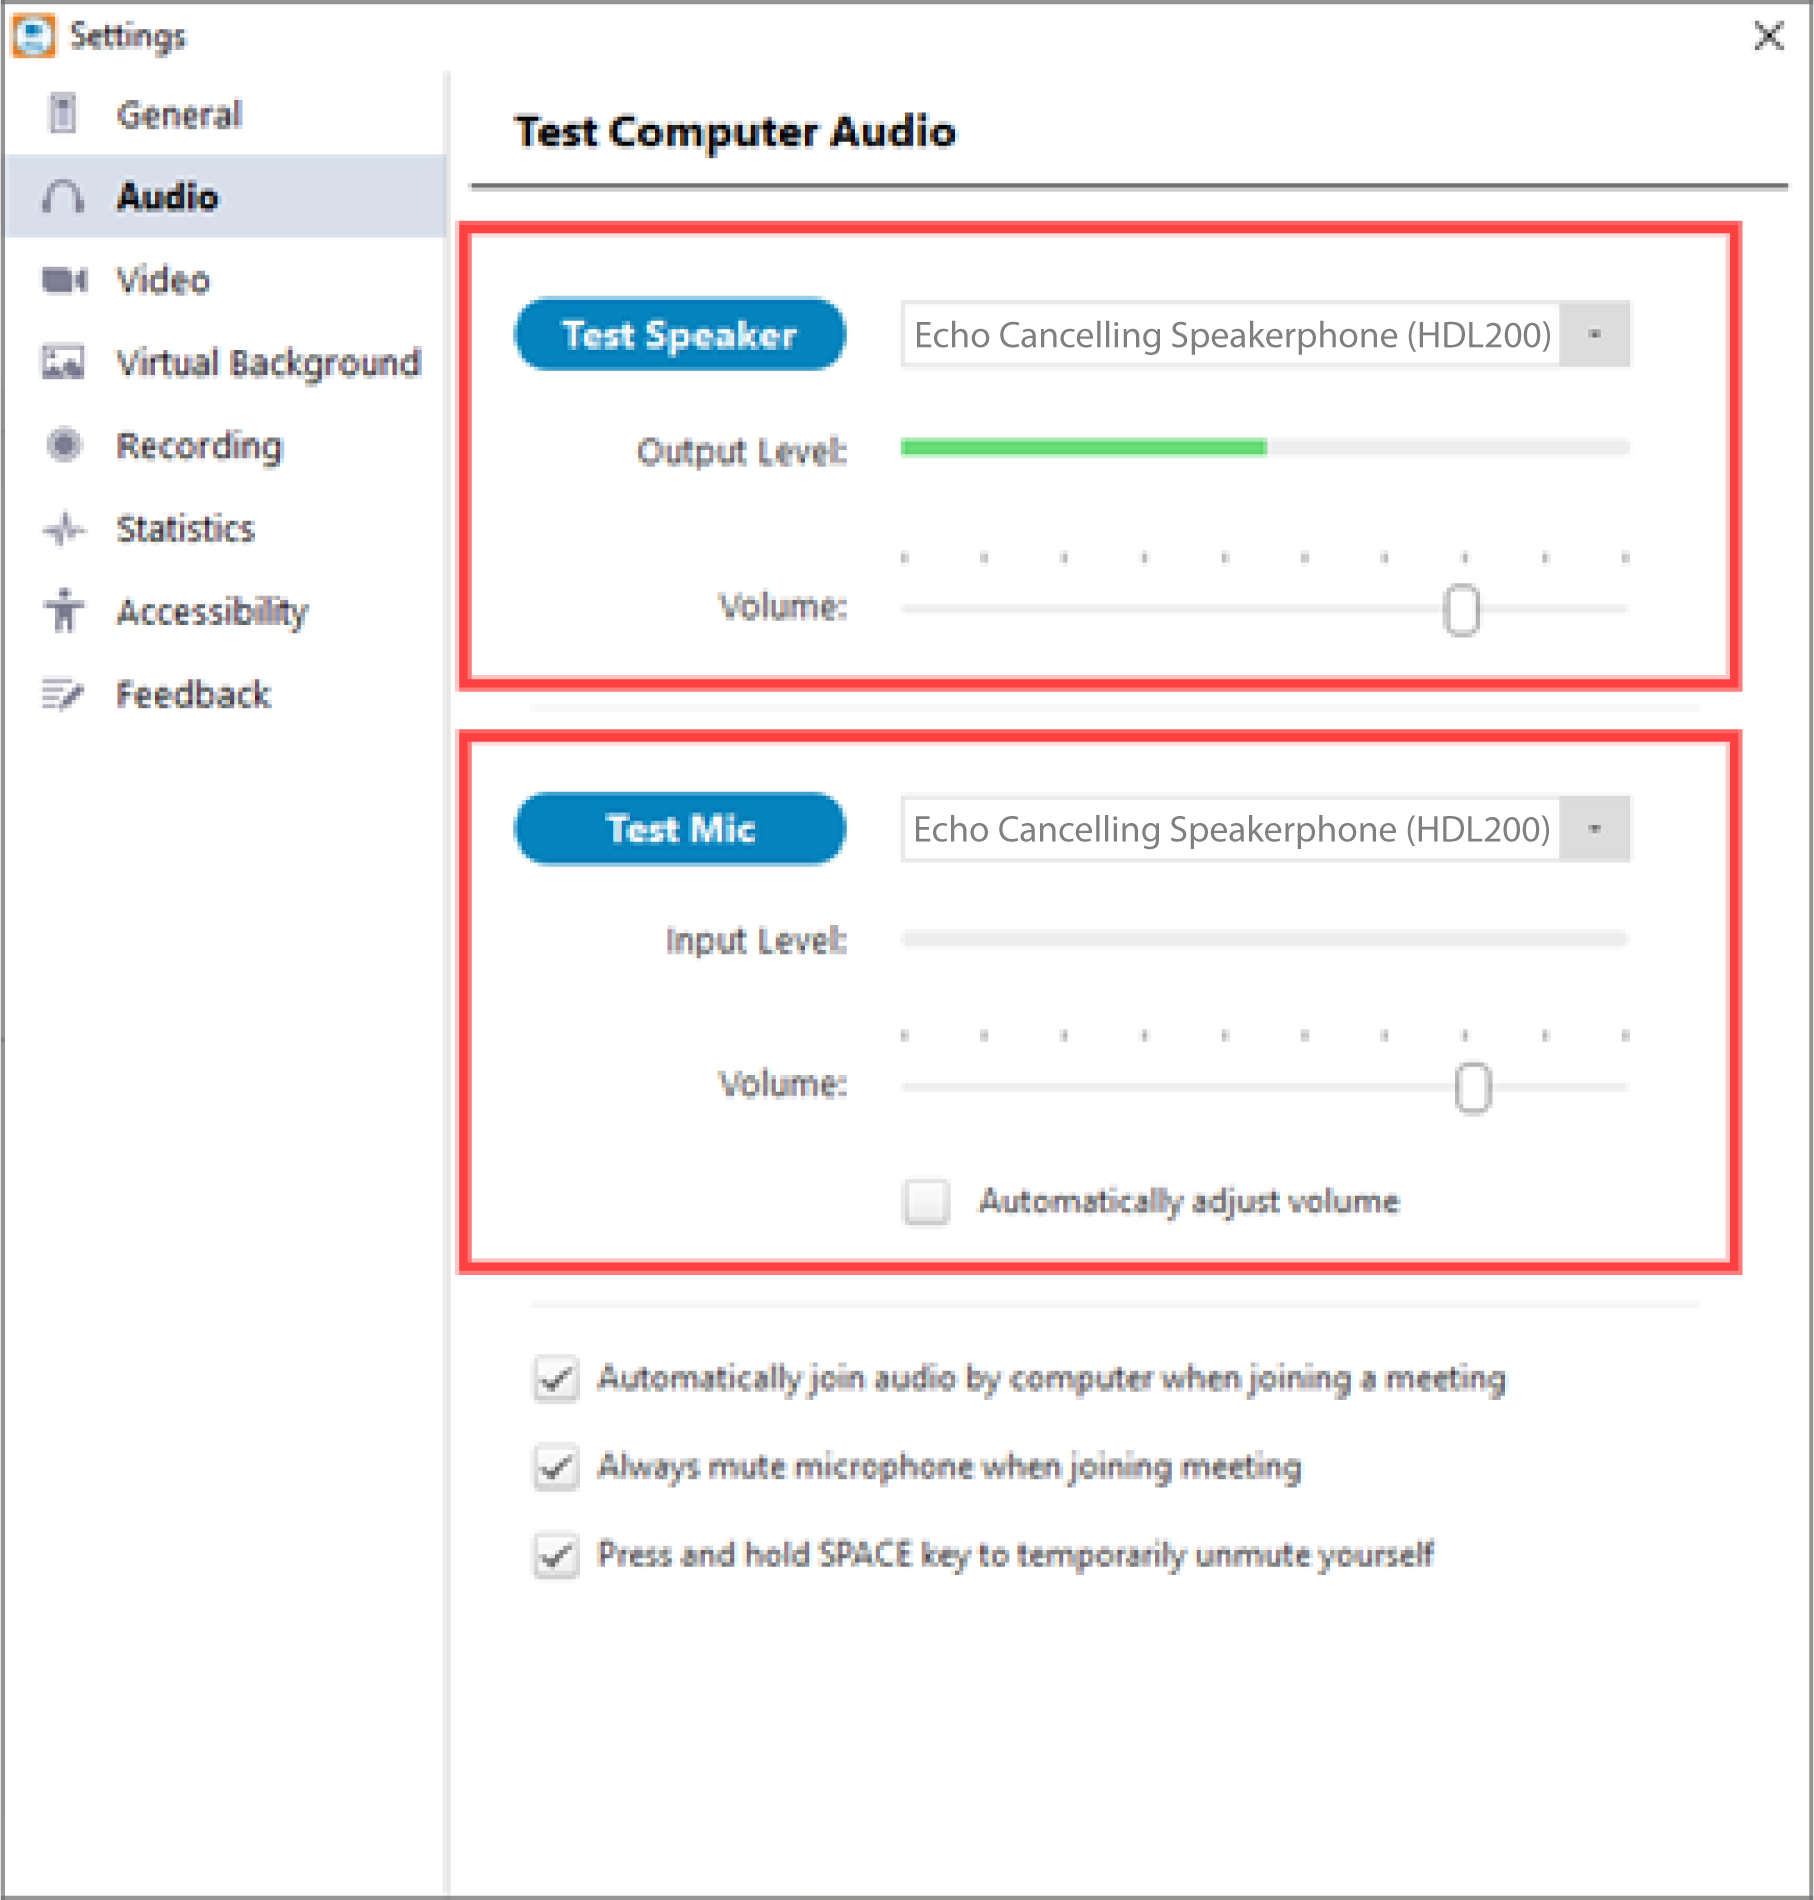
The volume settings in Webex by Cisco are located in the computer audio settings, which are viewed by clicking the More Options button.
- Set the volume for both the speaker and microphone at approximately 80%
- Under Audio, deselect Automatically adjust volume
- Under Webex smart audio, deselect Noise removal
- Under Sound effect, deselect Directional audio
You will now be able to use your audio conferencing system with the Cisco WebEx application.
GoToMeeting settings
The audio settings in GoToMeeting are located in Preferences, under the Audio section.
- Set the Microphone Setup to HDLxxx (Echo Cancelling Speakerphone)
- Set the Speakers Setup to HDLxxx (Echo Cancelling Speakerphone)
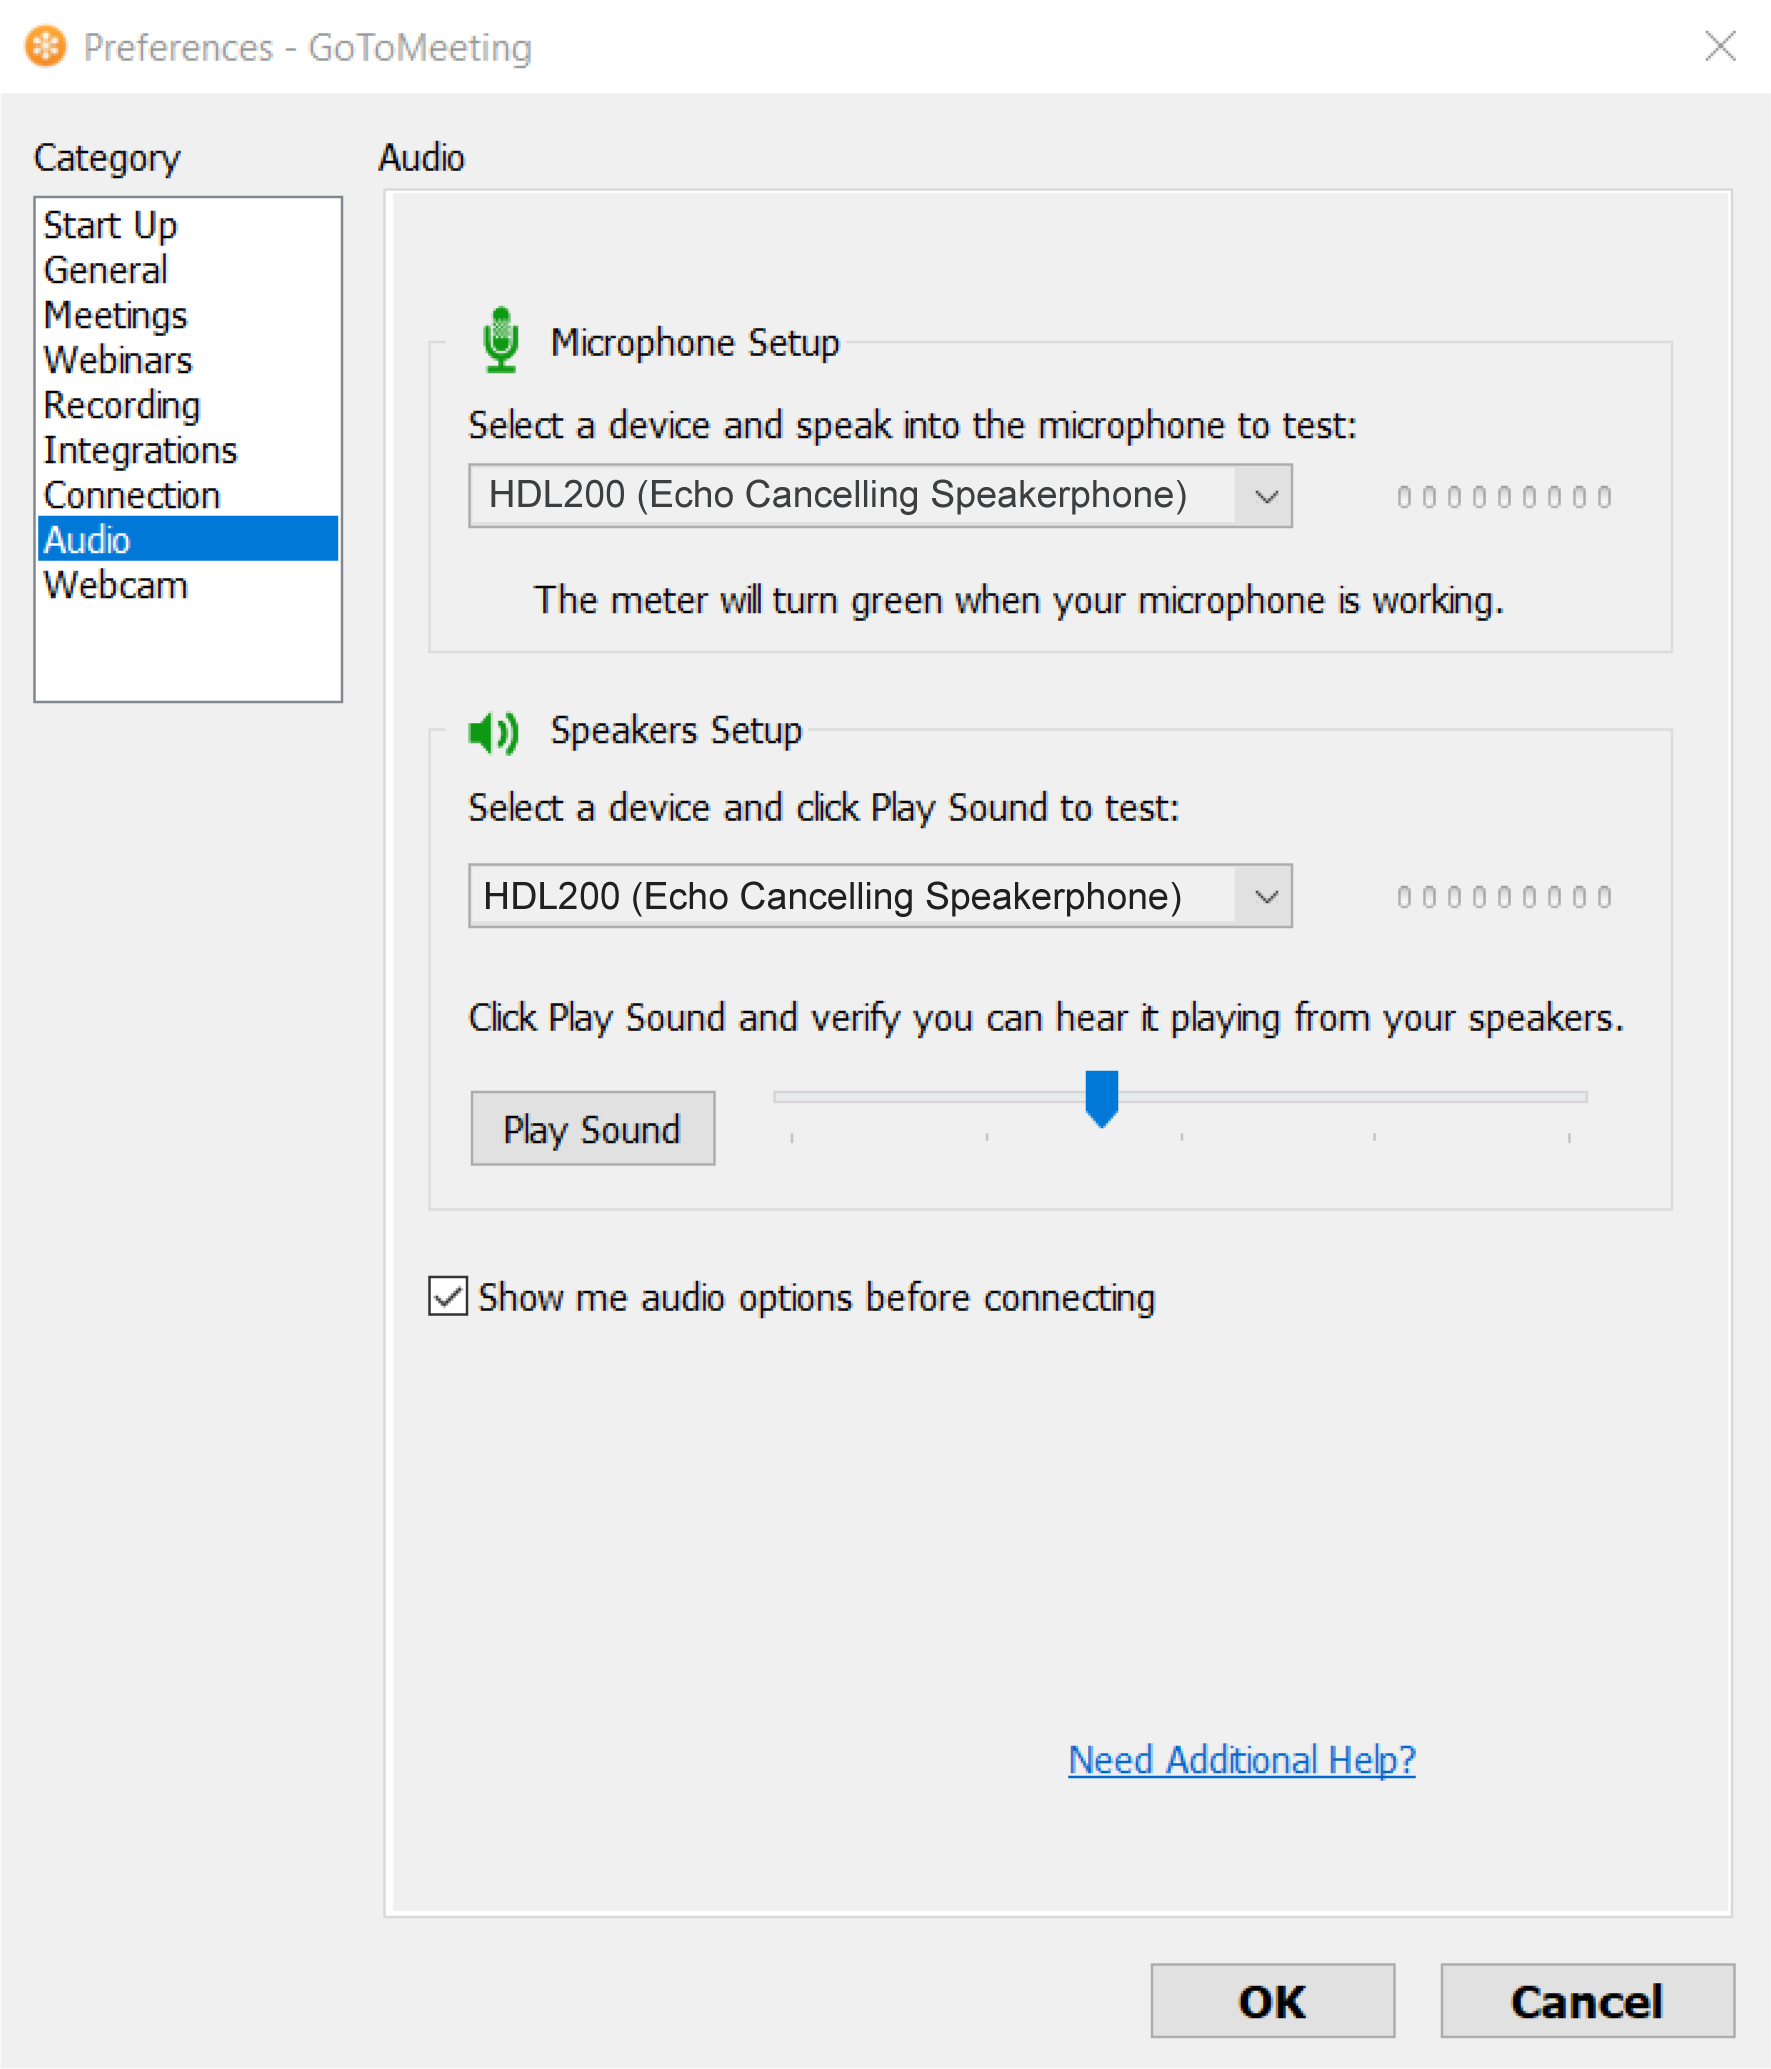
You will now be able to use your audio conferencing system with the GoToMeeting application.
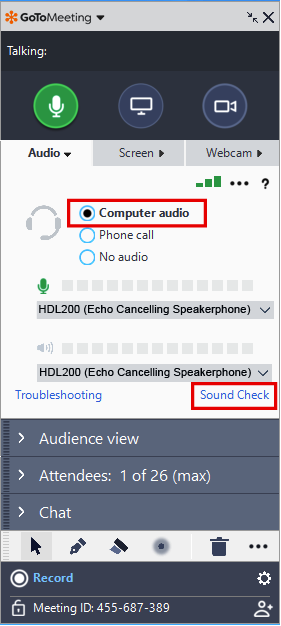
Adjusting Speaker volume settings
After starting your GoToMeeting you can adjust the microphone and speaker settings. From the GoToMeeting window, complete these steps.
- Select Computer Audio
- Left-click on Sound Check
Adjusting Microphone volume settings
Microphone volume settings cannot be adjusted from GoToMeeting. Any adjustments to microphone volume settings can be made through Windows sound settings.
Lifesize settings
The volume settings in Lifesize software are located in Profile => Settings => Audio/Video. Under both Microphone and Speakers pull-downs, set the HDL200 system as the default device.
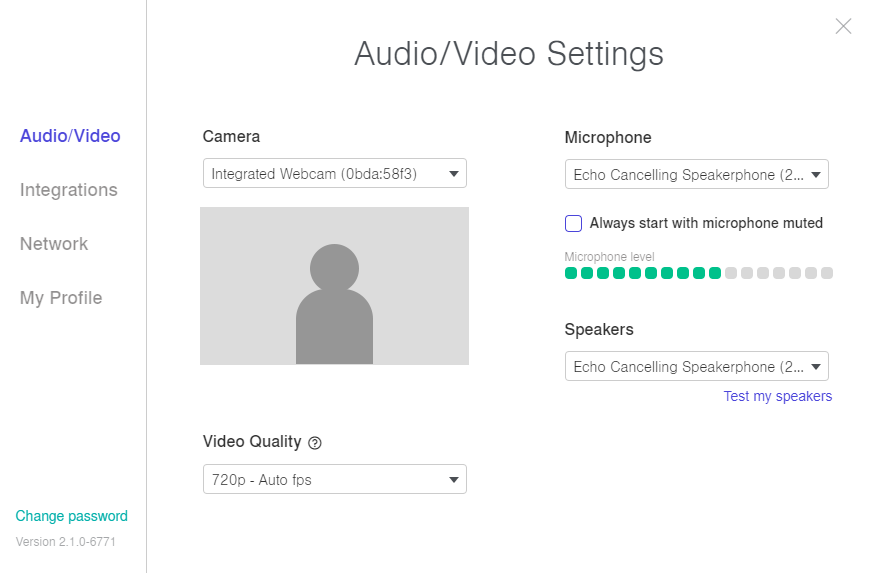
You will now be able to use your HDL200 system with the Lifesize video conferencing software.
RingCentral settings
The volume settings are located in RingCentral's Settings
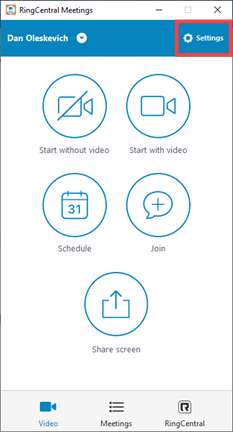
- Under Audio, set both Speaker and Mic to HDL200 system as the default device.
- We recommend setting the microphone to approximately 80%.
- Under Microphone, deselect Automatically adjust volume
You will now be able to use your HDL200 system with RingCentral meetings.
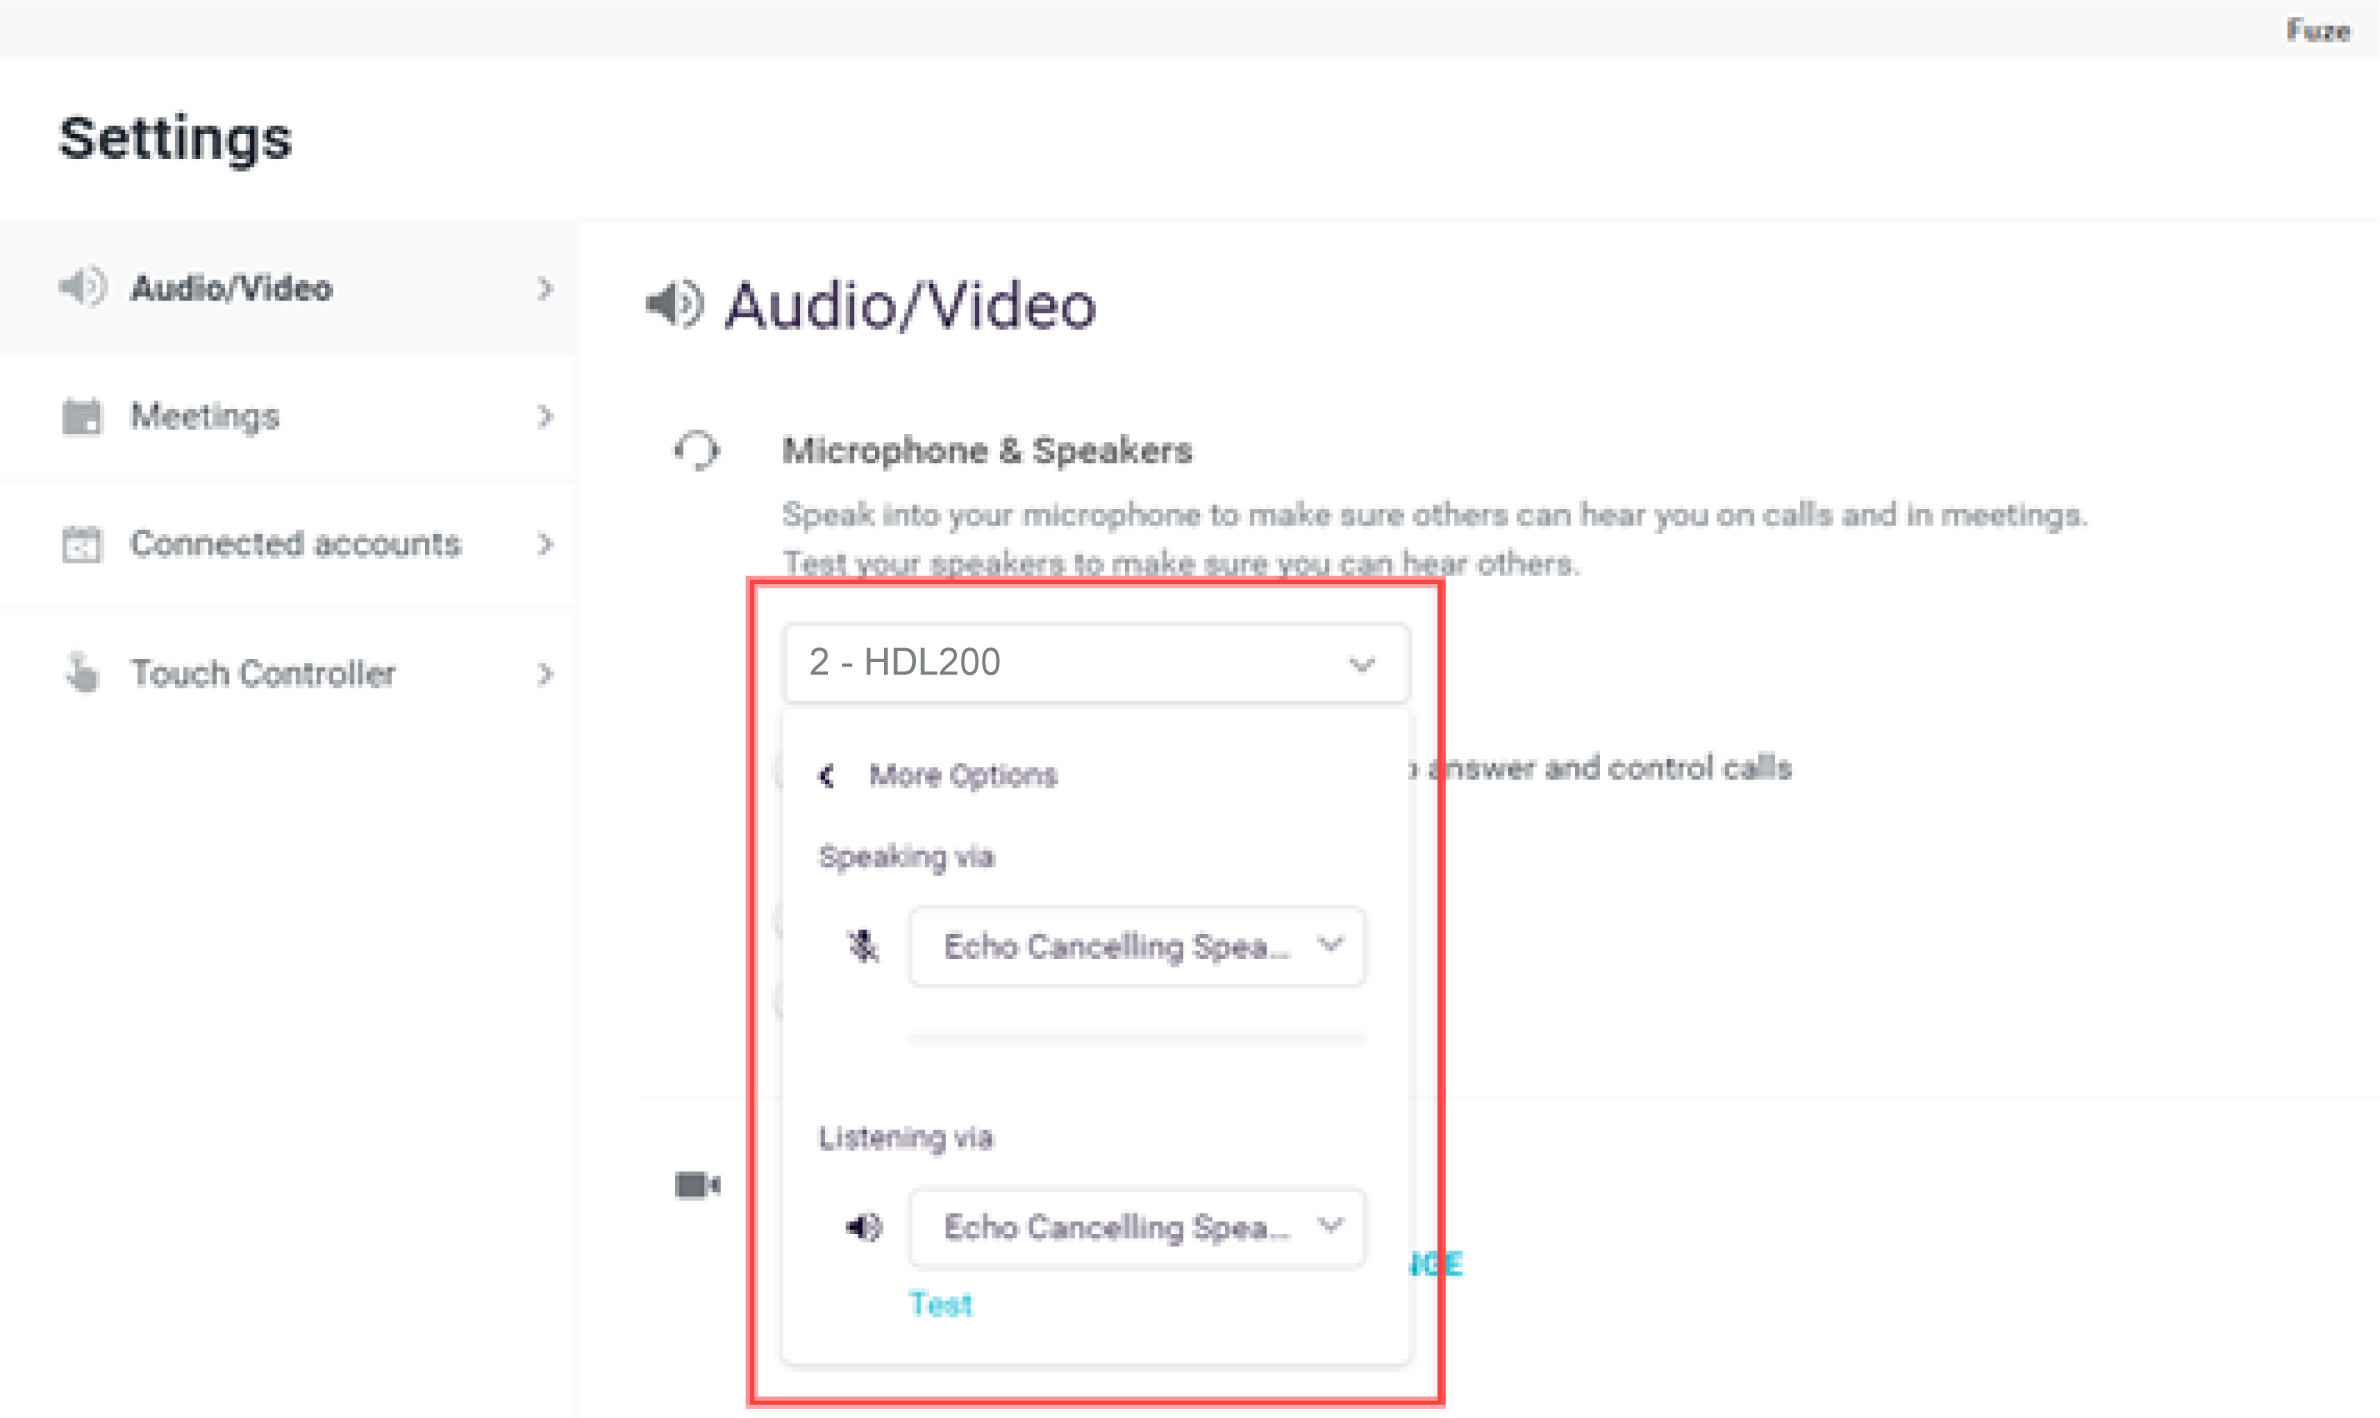
Fuze Rooms settings
The volume settings in Fuze are located in Profile Settings => Audio/Video.
- Under Microphone & Speakers, set the HDL200 system as the default device
- Under Advanced, deselect both:
- Enable acoustic echo cancellation
- Enable automatic gain control
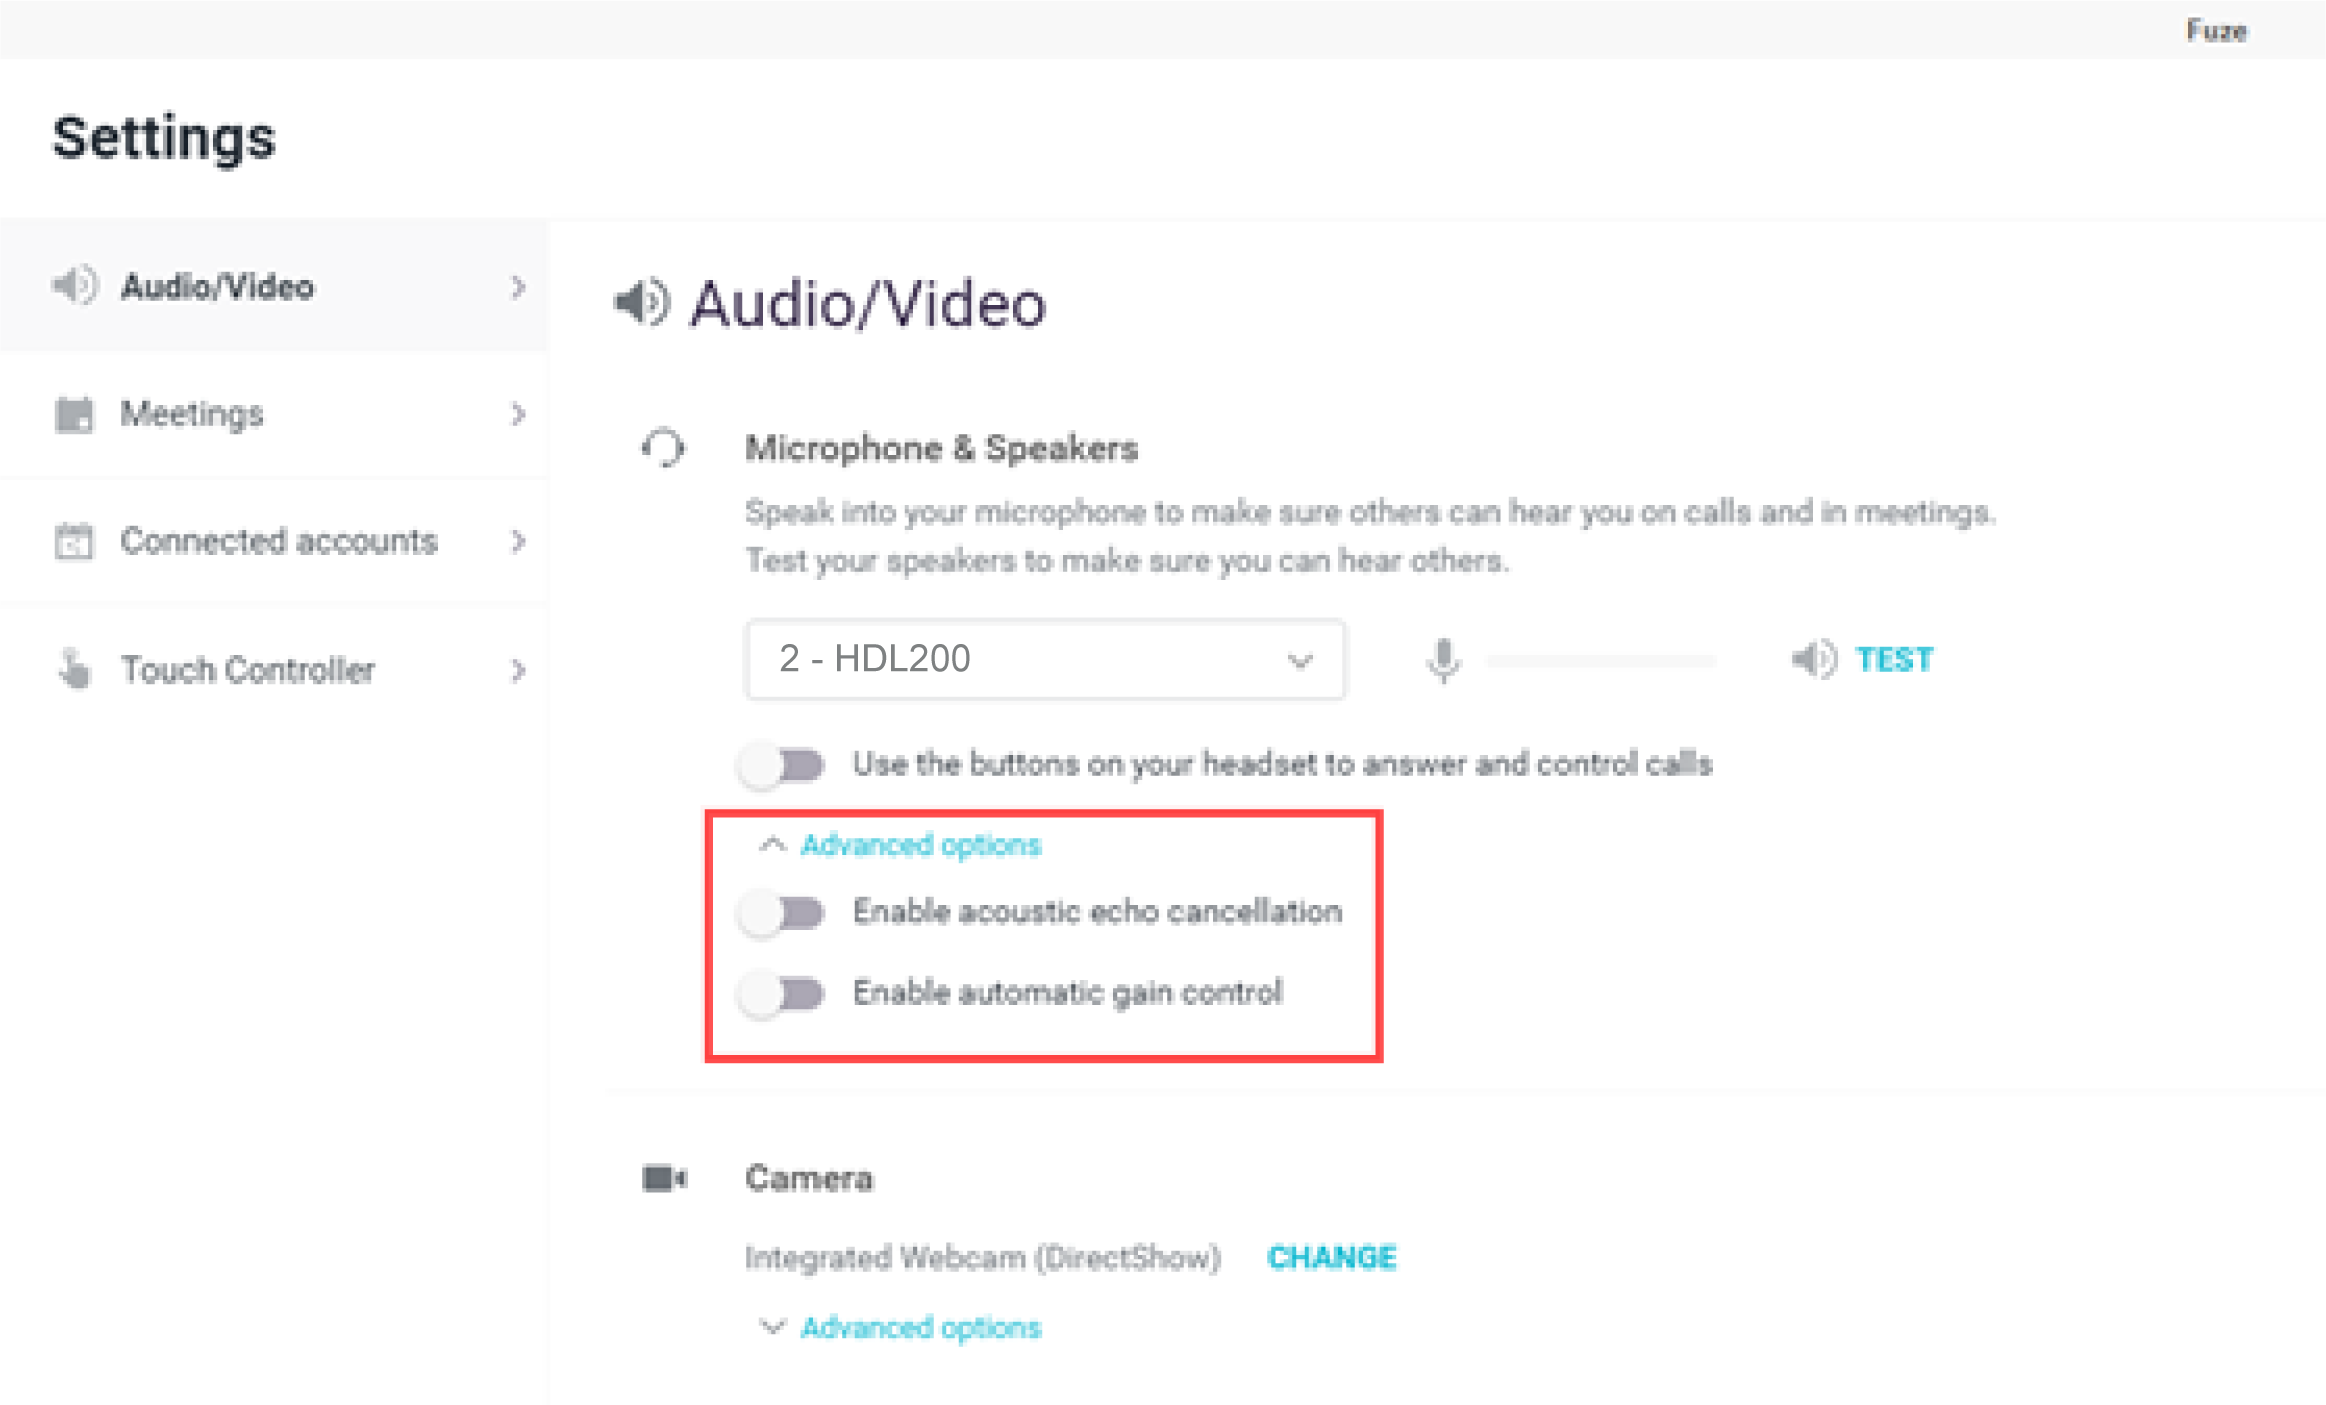
You will now be able to use your HDL200 system with the Fuze application.