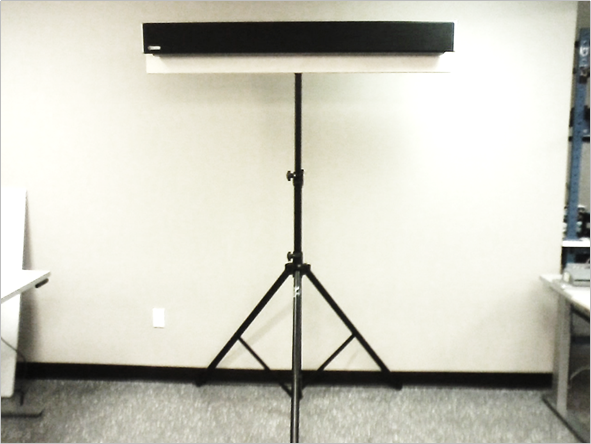
The HDL300 system mobile stand can be set up quickly for testing, demonstrations or other temporary uses. For situations where the microphone and speaker bar cannot be mounted on the wall (trade show environments where you can't put holes in the wall, etc.), the mobile stand can help provide optimal height and audio coverage for the system.
The mobile stand is top-heavy. Move and adjust with caution to avoid the stand tipping over and causing harm to people, objects around it or the HDL300 system. We do not recommend using the mobile stand as a long-term solution.
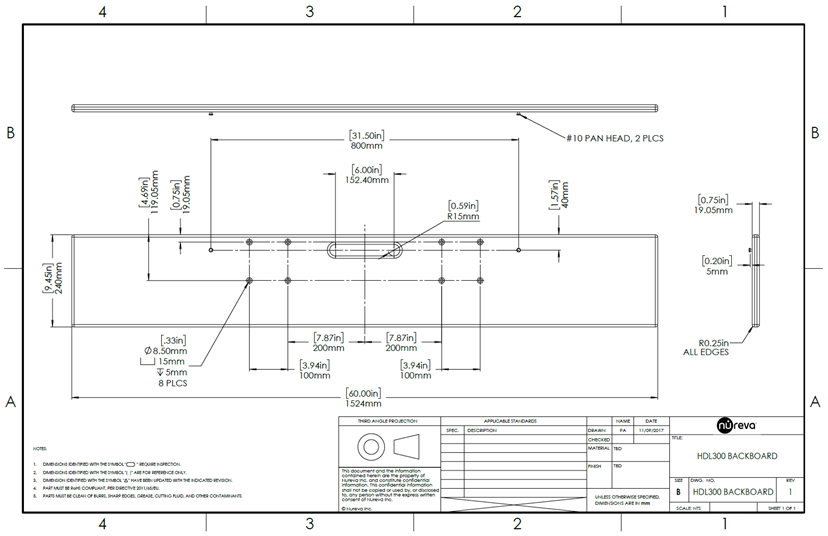
Mobile stand parts
The mobile stand consists of the following items:
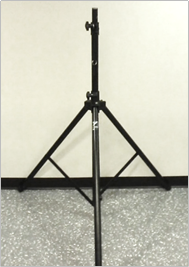
- A portable stand (Yorkville stand SKS-21B or similar)
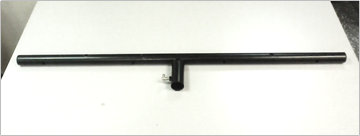
- A mounting T-bar (Yorkville SKS-TBAR1 or similar)
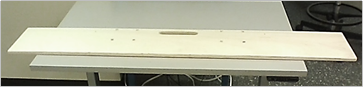
- A pre-cut and pre-drilled mounting backboard (drawing provided below)
- Mounting hardware
- 2 mounting bolts
- 2 mounting nuts
- Washers
- 2 mounting screws
Simple tools, such as a drill, screwdriver and wrench set are required to create the stand.
Choosing a stand
HDL300 integrated microphone and speaker bar weighs 18.0 lbs. (8.2 kg). The Yorkville SKS-21B stand is specified up to carry up to 100 lbs. (45.4 kg) and can be mounted at a height of 100 inches (2.54 m).
This Yorkville stand gives the stability and height required for this application. Other stands may also be considered if they can handle the weight and be stable at the required height. Alternate stands can be considered if they can hold up to 80 lbs. (36.2 kg) and mounted at a height of 100 inches (2.54 m).
The additional weight support for the stand is required for safety factors. The stand needs to be sturdy and stable, able to safely hold the mounting backboard, the mounting hardware and the integrated microphone and speaker bar. Vendors such as American DJ and Odyssey have similar products that could be evaluated for stability and function.
 |
 |
 |
Assembling the stand
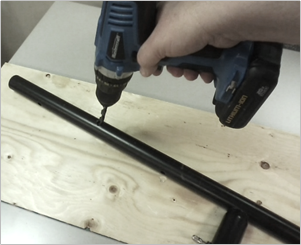
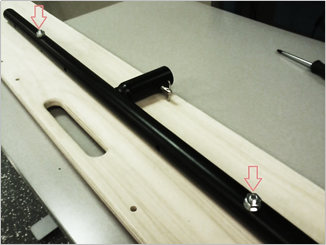
- Drill two holes on either side of the T-bar to line up with the two pre-drilled holes on the mounting backboard. Make sure the two holes are centered equidistant to the middle of the bar.
 |
|
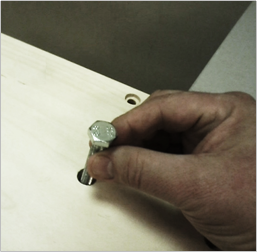
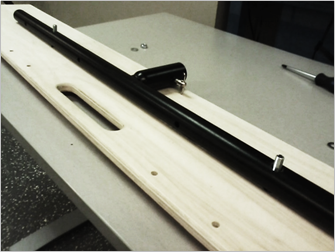
- Insert the bolts through the backboard and then through the drilled holes on the T-bar
 |
|
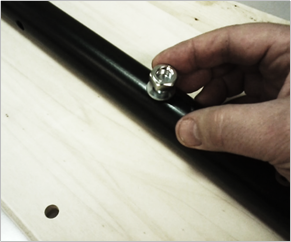
- Put the washers and nuts on the bolts, fastening the backboard and the T-bar together. Use wrenches to tighten the bolts adequately.
 |
 |
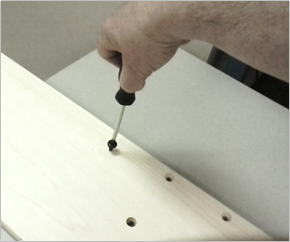
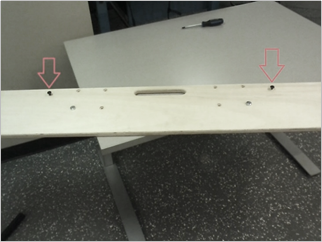
- Put the HDL300 mounting screws in the backboard. Make sure that the screws are #10 or M5 Pan Head to allow for secure installation.
 |
|
The screws go on the opposite side of the board to where the T-bar is mounted. Make sure the screw has enough thread engaged into the wood so that it can hold the weight of the HDL300 integrated microphone and speaker bar.
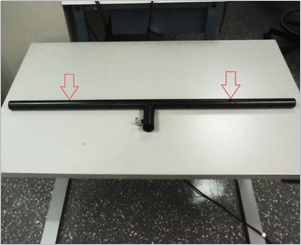
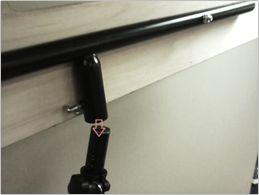
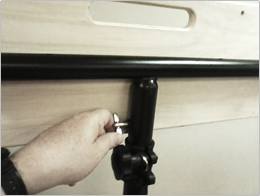
- Take the T-bar assembly and mount it on the stand. Tighten the clamp for the T-bar. Make sure the assembly is sturdy.
 |
|
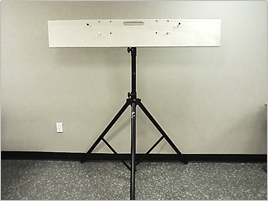 | |
Using the mobile stand
- Open the stand’s legs far apart for stability
- Tighten the clamp for the legs so that they do not move
- Mount the HDL300 integrated microphone and speaker bar on the backboard, sliding the keyhole slots on the back of the system onto the screws of the backboard
- Extend the neck of the stand upward until the desired height is reached.
For safety and stability reasons, use a second person to help hold the system while the shaft is extended. Be careful not to extend beyond the maximum height of the stand.
- Once the desired height is reached, secure the shaft with the lock pin and tighten the clamp.
Do not move the stand and system when the shaft is fully extended, it is very top heavy and can easily tip
Taking down the stand
The procedure can easily be reversed to take the system down. Both the T-bar assembly and the HDL300 integrated microphone and speaker bar can be removed from the stand and the stand can be collapsed to allow for easy transport.
Mobile stand design drawing