The CV30 camera has three tracking area settings which can be selected through the settings menu. Choosing from Full, Top 2/3 or Top 1/2 settings will help determine how the camera looks for the person to track.
|
Full (default)
The camera will look for a person to track within the full view of the camera. When the camera tracking is set to full there is a higher chance that a student's movement may be tracked.
|
||
|
Top 2/3
The camera will look for a person who is visible in the top two-thirds of the full camera view.
|
||
|
Top half
The camera will look for a person who is visible in the top half of the full camera view.
|
NOTE: The images shown above are for representational purposes only.
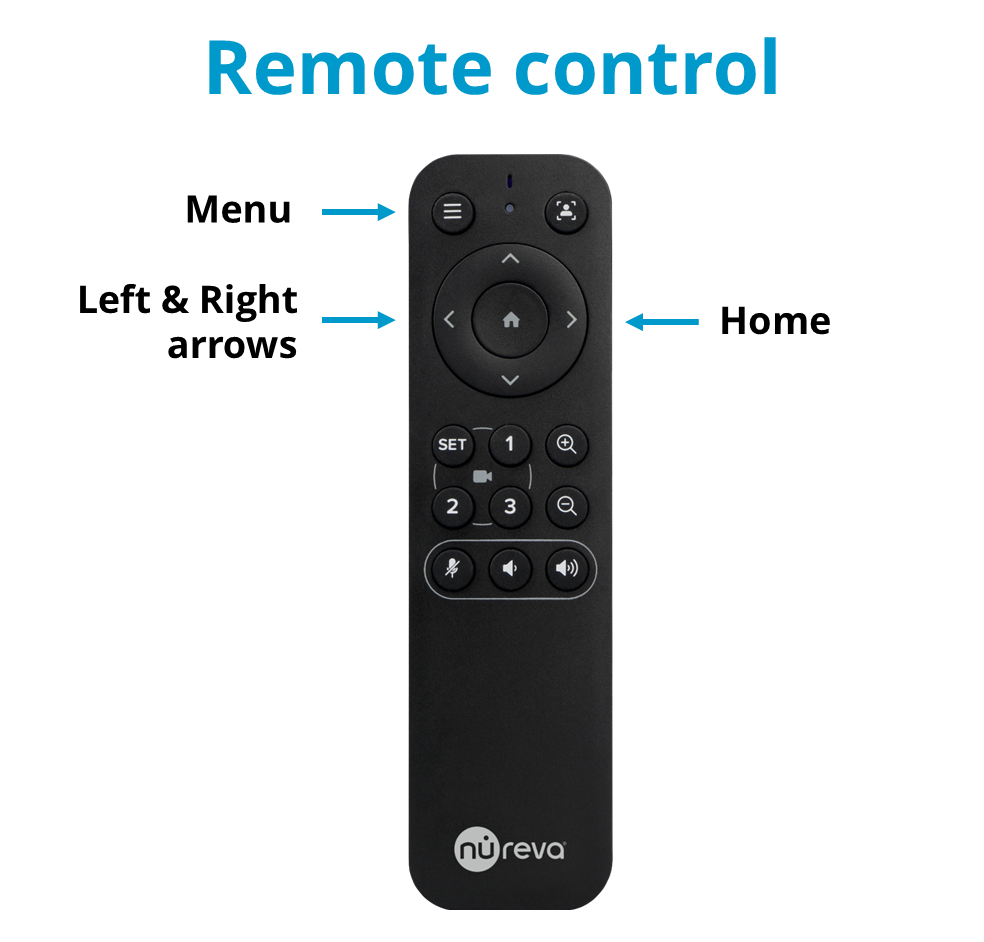
Changing the tracking area setting
- To view the on-screen display (OSD) the camera must be active
- Open an application that accesses the camera
- Once the camera application launches the camera view should be visible
- If there are multiple cameras connected to the computer ensure that the CV30 is active
- Press Menu on the remote to launch on the OSD
- Navigate to Tracking and press the Home button on the remote to enter the tracking settings
- Once in the settings, navigate to Area
- Use the Left and Right arrows on the remote control to choose Full, Top 2/3 or Top half
- Once a mode is selected navigate to Back and press the Home button
- Press the Menu button to exit the OSD or select Back from the menu to return to the main OSD menu
 |