When using Nureva Console with Nureva audio conferencing systems for large and extra large spaces, there is microphone gain adjustment available. This feature is available for systems that have been updated to a firmware version that supports this feature. This setting is available with the Nureva Console desktop client and the Nureva Console cloud application.
- HDL300 - updated to firmware version 2.2.56 (or later)
- Dual HDL300 - firmware version 2.2.56 (or later)
- HDL310 - firmware version 1.4.230803 (or later)
- HDL410 - firmware version 1.4.230803 (or later)
The examples shown below depict an HDL300 system. These steps also apply to the Dual HDL300, HDL310 and HDL410 systems.
Option 1 - Nureva Console client
- Choose the Nureva audio device from the Devices list on the left-hand side of the dashboard
- Scroll down to show the Settings options
- Open the Microphone drop-down menu
- Toggle Show troubleshooting to the "on" position
- The “Microphone volume gain” setting will now be visible
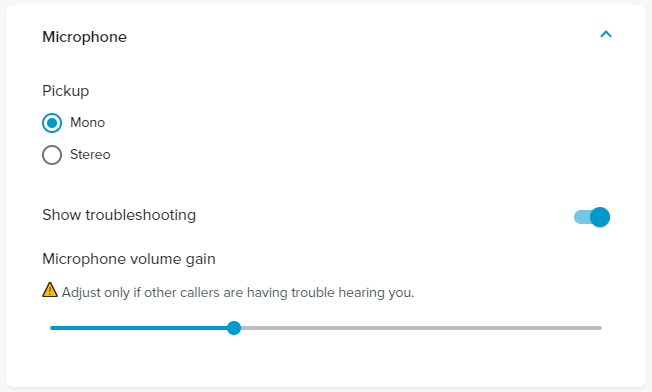
- Dragging the slider to the left side will reduce microphone gain and dragging the slider to the right end will increase microphone gain
- Your adjusted settings will automatically be saved
- When you have completed your adjustments Nureva Console client can be closed
NOTE: Toggling Show troubleshooting to the "off" position does not reset the slider to the 0 dB position. The settings are saved but the slider will no longer be active unless Show Troubleshooting is toggled "on" again.
Option 2 - Nureva Console cloud
- Choose the room with the device that you want to adjust with the Microphone gain feature
- Choose the Nureva audio device from the Devices list on the left-hand side of the dashboard
- Scroll down to show the Settings options
- Open the Microphone drop-down menu
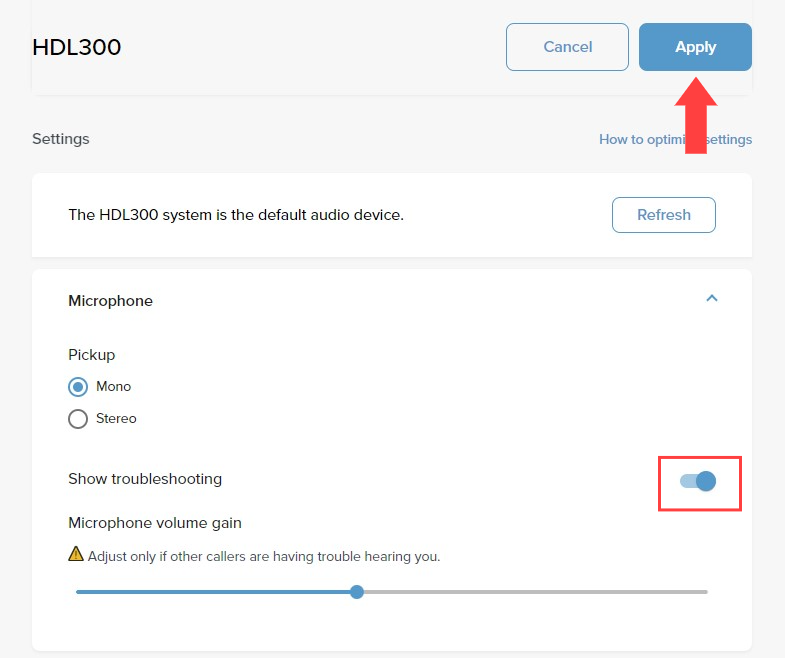
- Toggle Show troubleshooting to the "on" position
- The “Microphone volume gain” setting will now be visible
- Dragging the slider to the left side will reduce the microphone gain and dragging the slider to the right end will increase the microphone gain
- When your adjustments are complete, click on the Apply button
NOTE: Toggling Show troubleshooting to the "off" position does not reset the slider to the 0 dB position. The settings are saved, but the slider will no longer be active unless Show Troubleshooting is toggled "on" again.
How it works
The Microphone volume gain setting consists of a single slider, with tick marks at the 1/3 and 2/3 points. The default (0 dB adjustment) setting is at the 1/3 tick. Dragging the slider all the way to the left side will reduce microphone gain by 6 dB. Dragging the slider all the way to the right end will increase microphone gain by 12 dB.
What it does
The Microphone volume gain setting adjusts the volume of the processed microphone signal that is sent from the Nureva system to the connected meeting room computer. Unlike the microphone volume setting that was found in Nureva Room Manager, this new setting does not simply adjust the OS microphone level. It creates a second microphone gain adjustment in series with the OS microphone gain adjustment.
When to use it
This setting is intended for situations where the UC&C client is taking control of the OS microphone volume setting and making the audio picked up by the Nureva system either too loud or too quiet for remote participants. Currently, we see this setting as a solution for situations where UC&C clients create a low-volume issue. This setting is hidden behind the Show troubleshooting toggle button because it should only be used to address specific problems.