Installation of a Dual HDL300 system is similar to the installation of a single system.
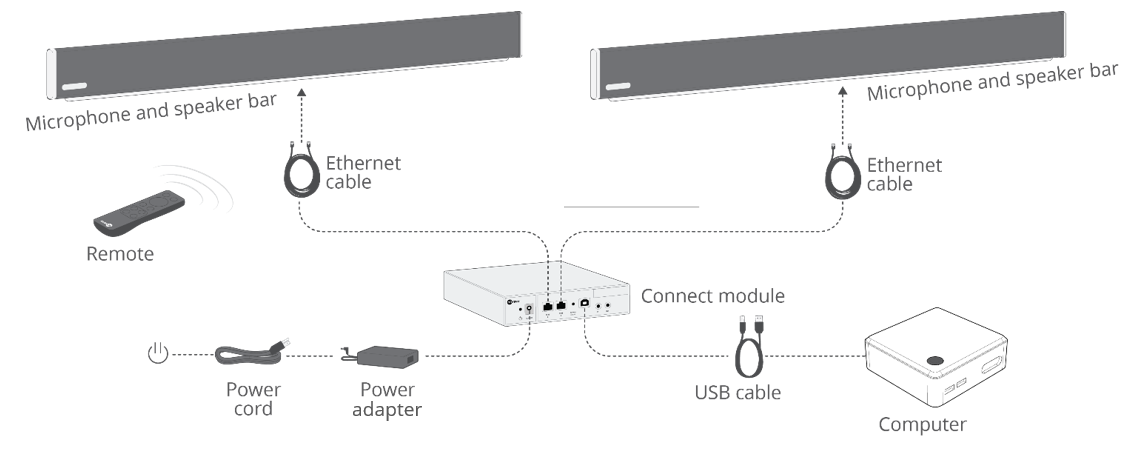
Follow the same basic set up for the single system with the following steps:
- Plug the second integrated microphone and speaker bar into the additional RJ-45 jack on the connect module
- Make sure firmware version 2.0 or higher is installed. To upgrade your firmware, use Nureva® Console client. If the correct firmware is not installed, the unit will not work properly and may produce pops, snaps or clicks in the audio stream.
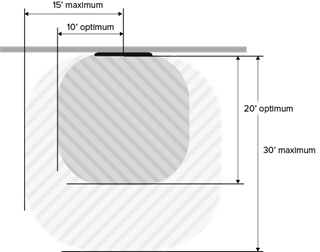
When installing the second integrated microphone and speaker bar in the conference room, use the same guidelines for single installation. The integrated microphone and speaker bars have a range of 20′ to 30′ (610 cm to 915 cm) directly out from the wall, and 10′ to 15′ (305 cm to 457 cm) to each side from the center of the HDL300 unit.
The microphone and speaker bars can be installed on opposing walls or adjacent walls, as long as they are spaced properly to give maximum coverage of the room. However, do not install both bars on the same shorter wall of a room. Although some overlap in range is ideal, the units should be spread out for coverage and should not both be installed close to the same corner of the room or put close together. The best configuration is when the bars are installed on the longest wall on the same side. See the examples below:
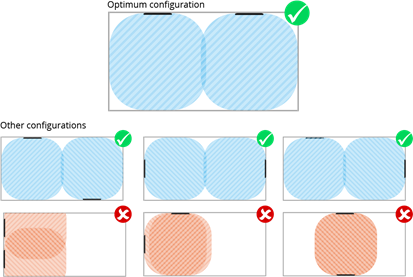
For non-standard room shapes, contact Nureva support.