Most wireless headset or earset microphones with an XLR out connection are supported for use with HDL300 and Dual HDL300 systems and Voice Amplification Mode. More than one microphone can be used in situations with multiple presenters.
Required before you start:
- Ensure your Nureva Console client application is up to date
- Version 1.3.171812 is the minimum required to enable voice amplification
- Learn how to update the Nureva Console client
- Version 1.3.171812 is the minimum required to enable voice amplification
- Confirm your HDL300 system or Dual HDL300 system has the latest firmware
- Firmware version 2.4.67 is the minimum required to enable voice amplification
- Learn how to update HDL300 firmware
- Enroll your HDL300 or Dual HDL300 system into Nureva Console cloud to enable remote management
- Ensure that a multichannel mixer with XLR input and output is available
- Each microphone will require a channel on the mixer
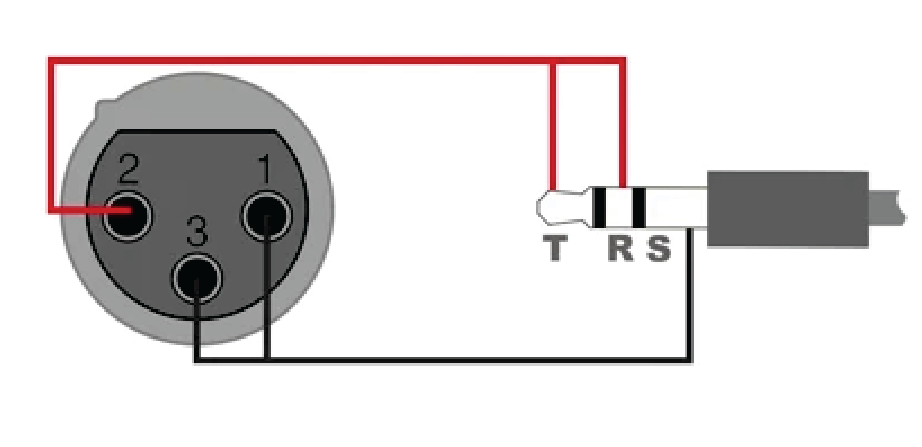
- A balanced XLR to unbalanced 3.5mm TRS adapter cable is required
 |
- Ensure XLR male to XLR female cables are available
- Each microphone will require a cable
- The cables, microphones and mixer are purchased separately
- See your audiovisual reseller to purchase the cable, microphones and mixer
NOTE: The connect module for the HDL300 and Dual HDL300 systems only supports mono and unbalanced audio inputs.
Follow these steps to set up voice amplification:
Step 1: Connect the system
Setting up the HDL300 system or Dual HDL300 system
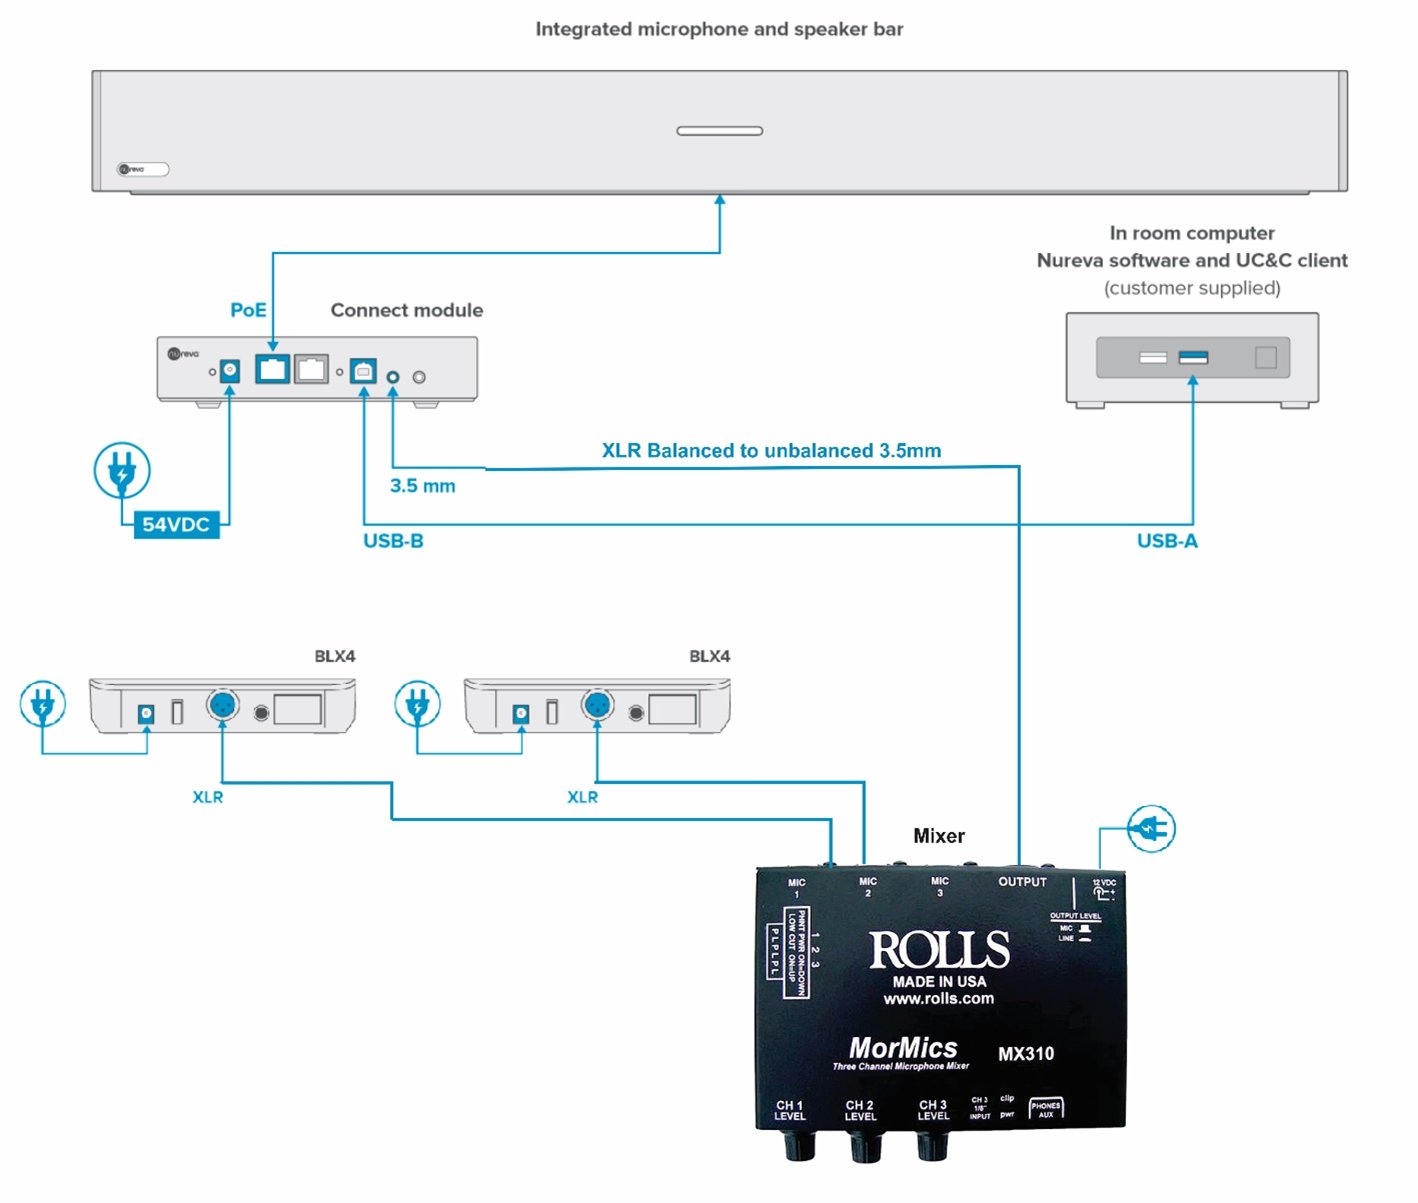
- Connect the PoE cables (provided) to the RJ45-1 ports on the connect module to the rear port on each microphone and speaker bar
- Connect a computer to the connect module using the USB-A to USB-B cable (provided)
- Connect the power cable and power supply to the connect module and plug into a power source
Connect the connect module, mixer and microphones
- Using the balanced XLR to unbalanced 3.5mm TRS adapter cable
- Connect the cable to the XLR output port on the back of the mixer
- Connect the cable to the Aux in port on the back of the connect module
- Using the XLR to XLR cables, connect each microphone to the mixer
- Connect each cable to an XLR input on the back of the mixer
- Connect each cable to the XLR output on the back of each microphone receiver
- Set microphone receivers to Line level output if this feature is available
- Turn off "phantom power" if the mixer has this feature
- Connect the mixer and microphone receivers to the power source using the power cables and power supplies
Connection diagram
Pair the transmitters to the receivers
Ensure each headset or earset is disconnected from the transmitter at this time
Step 2: Adjust volume output on computer
Turn up or down the speaker volume
The volume setting on the computer affects the amplification level. Start with the volume set at a level that would normally be used in the room.
-
Windows® 10 computer
- Locate and click on the speaker icon in the bottom right corner, on the taskbar
- Move the slider control to adjust the volume as needed
- This can be adjusted at any time
-
macOS® computer
- Locate and click on the Volume control in the menu bar
- Move the slider control to adjust the volume as needed
- This can be adjusted at any time
Step 3: Adjust settings in Nureva Console
The instructions below are completed using Nureva Console cloud. Voice Amplification Mode is not currently available in Nureva Console client.
- Navigate to the sign-in page for Nureva Console and log in to your account
- Choose the HDL300 or Dual HDL300 system that was connected in Step 1
Adjust Speaker settings
- Navigate to Device settings, and open Speakers
- Select Custom to adjust the Bass and Treble settings
- Set Treble to 50
- Set Bass to 50
- If there is no distortion during testing, the Bass setting can be increased to meet individual preferences
Disable Sleep mode
- Navigate to Device settings, and open Auxiliary ports
- Ensure that Sleep mode is set to OFF by sliding the toggle to the left
Enable Voice Amplification Mode
- Navigate to Device settings and open Voice Amplification Mode
- Enable Voice Amplification Mode by sliding the toggle to the right
- Click on Apply at the top of the Device settings dashboard

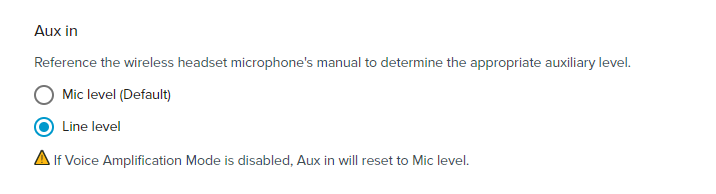
Adjusting the Aux in level
- Set the Aux in setting to Line level to match the receiver
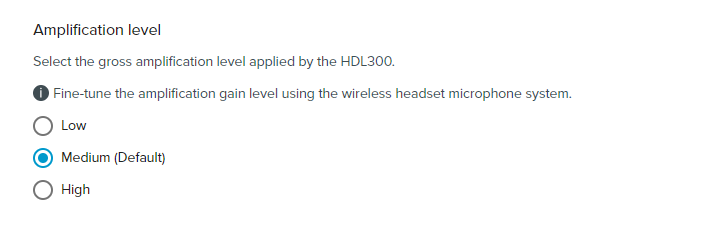
Adjusting the Amplification level
- Start with the Amplification level at Medium (Default)
- Select the Amplification level that provides the best quality voice amplification
Step 4: Test the amplification
Test the system
- Connect each headset or earset to their transmitters
- Stand approximately 1 to 2 meters in front of the HDL300 microphone and speaker bar
- Have another person stand at the back of the room or where students will be seated in the classroom
- Test each microphone separately
- If a UC&C client (e.g. Microsoft® Teams, Zoom) will be used, test the amplification setup with a remote person in an audio or video conference
Adjust amplification
- Set the level (volume or gain) for each microphone channel to low on the mixer
- Adjust the output level for each microphone
- Adjust the gain on the microphone transmitter or receiver
- Slowly increase the level for the microphone channel on the mixer
- Fine-tune the transmitter and mixer for each wireless microphone until the desired output levels are reached
- If there is feedback or squelch, lower the gain or dB setting for the microphone transmitter and ensure that Aux in is set to Line level
NOTE: The gain or dB settings when using multiple microphones with a mixer will be different than when using a single microphone that is directly connected to an HDL300 or Dual HDL300 system.
Important information
|
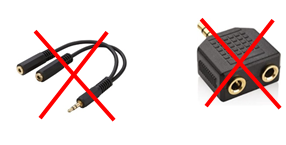
Do not use a "y" splitter to add more than one microphone to the connect module.
|
 |
Explore additional information about Voice Amplification Mode.
Review Voice Amplification Mode FAQs.
NOTE: The technical information provided in this article, including specifications and recommendations, is provided for customer convenience. The accuracy of this information is not guaranteed and is subject to change without notice. Please check the user manuals and related documentation from each product manufacturer to ensure that your setup meets the proper recommendations.